
• Skip to primary navigation
  • Skip to main content
  • Skip to primary sidebar
  • Skip to footer

Watch What U Eat logo

  • About us
    • Privacy Policy
  • Recipes
    • Main Course
    • Breakfast
    • Snacks or Appetizer
    • Dessert and Sweets
    • Non Alcoholic Drinks
    • Indian Recipes
  • Guide to Healthy Eating
  • Shop
  • Videos
  • Contact us
  • Subscribe
  • Nav Social Menu

    • Facebook
    • Instagram
    • Pinterest
menu icon
go to homepage
subscribe
search icon
Homepage link
  • Summer Drinks
  • Recipe Index
  • About us
  • Contact us
    • Facebook
    • Instagram
    • Pinterest
  • ×
    Watch What U Eat

    6 Comments

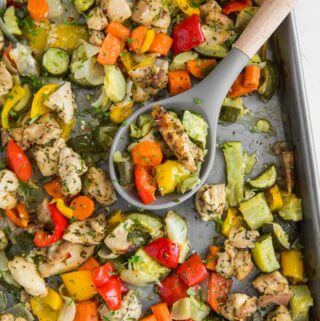
    One-pan baked chicken and vegetables in a baking tray ready to serve

    This healthy baked chicken and vegetables with rainbow colors will make you fall in love with this recipe. It is a one-pan chicken dish cooked in the oven in under 30 mins. Filling, satisfying and loaded with all the goodness from fresh veggies.
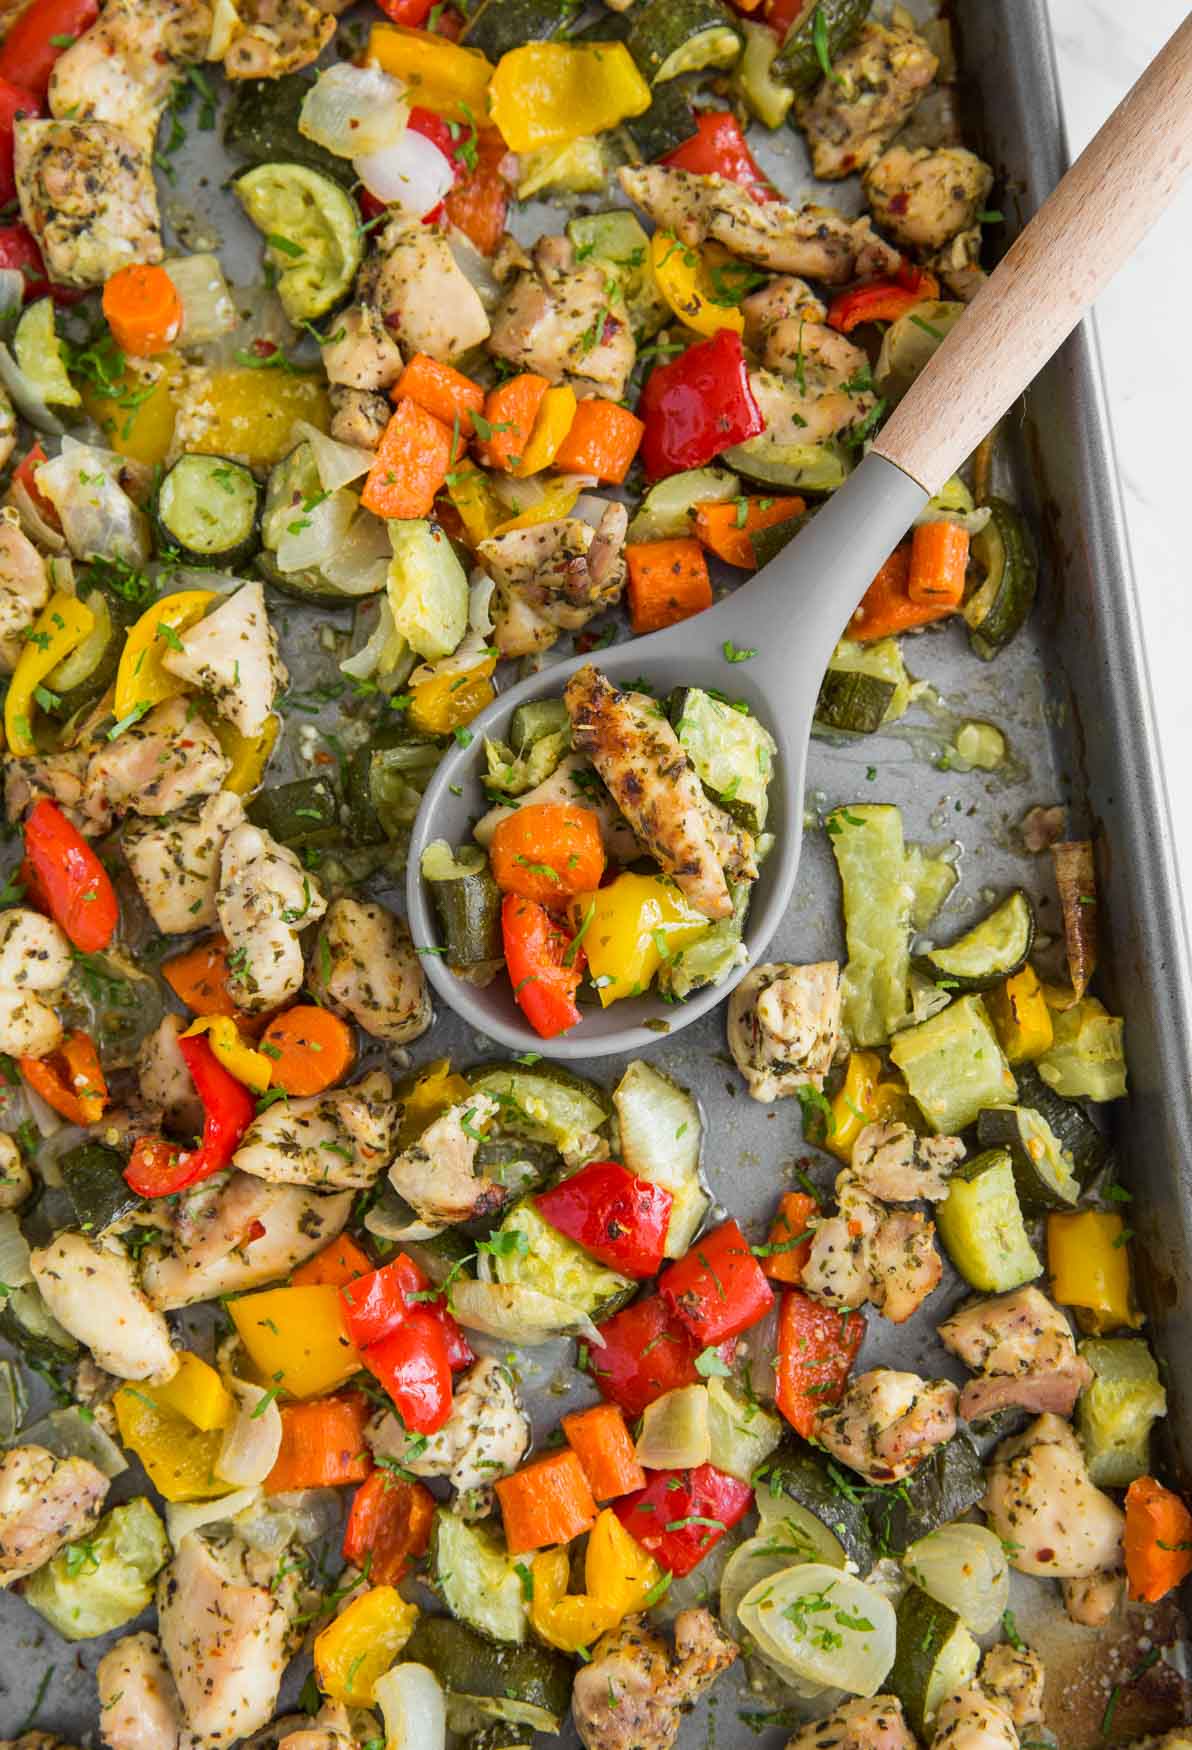
    One-pan baked chicken and vegetables in a baking tray ready to serve

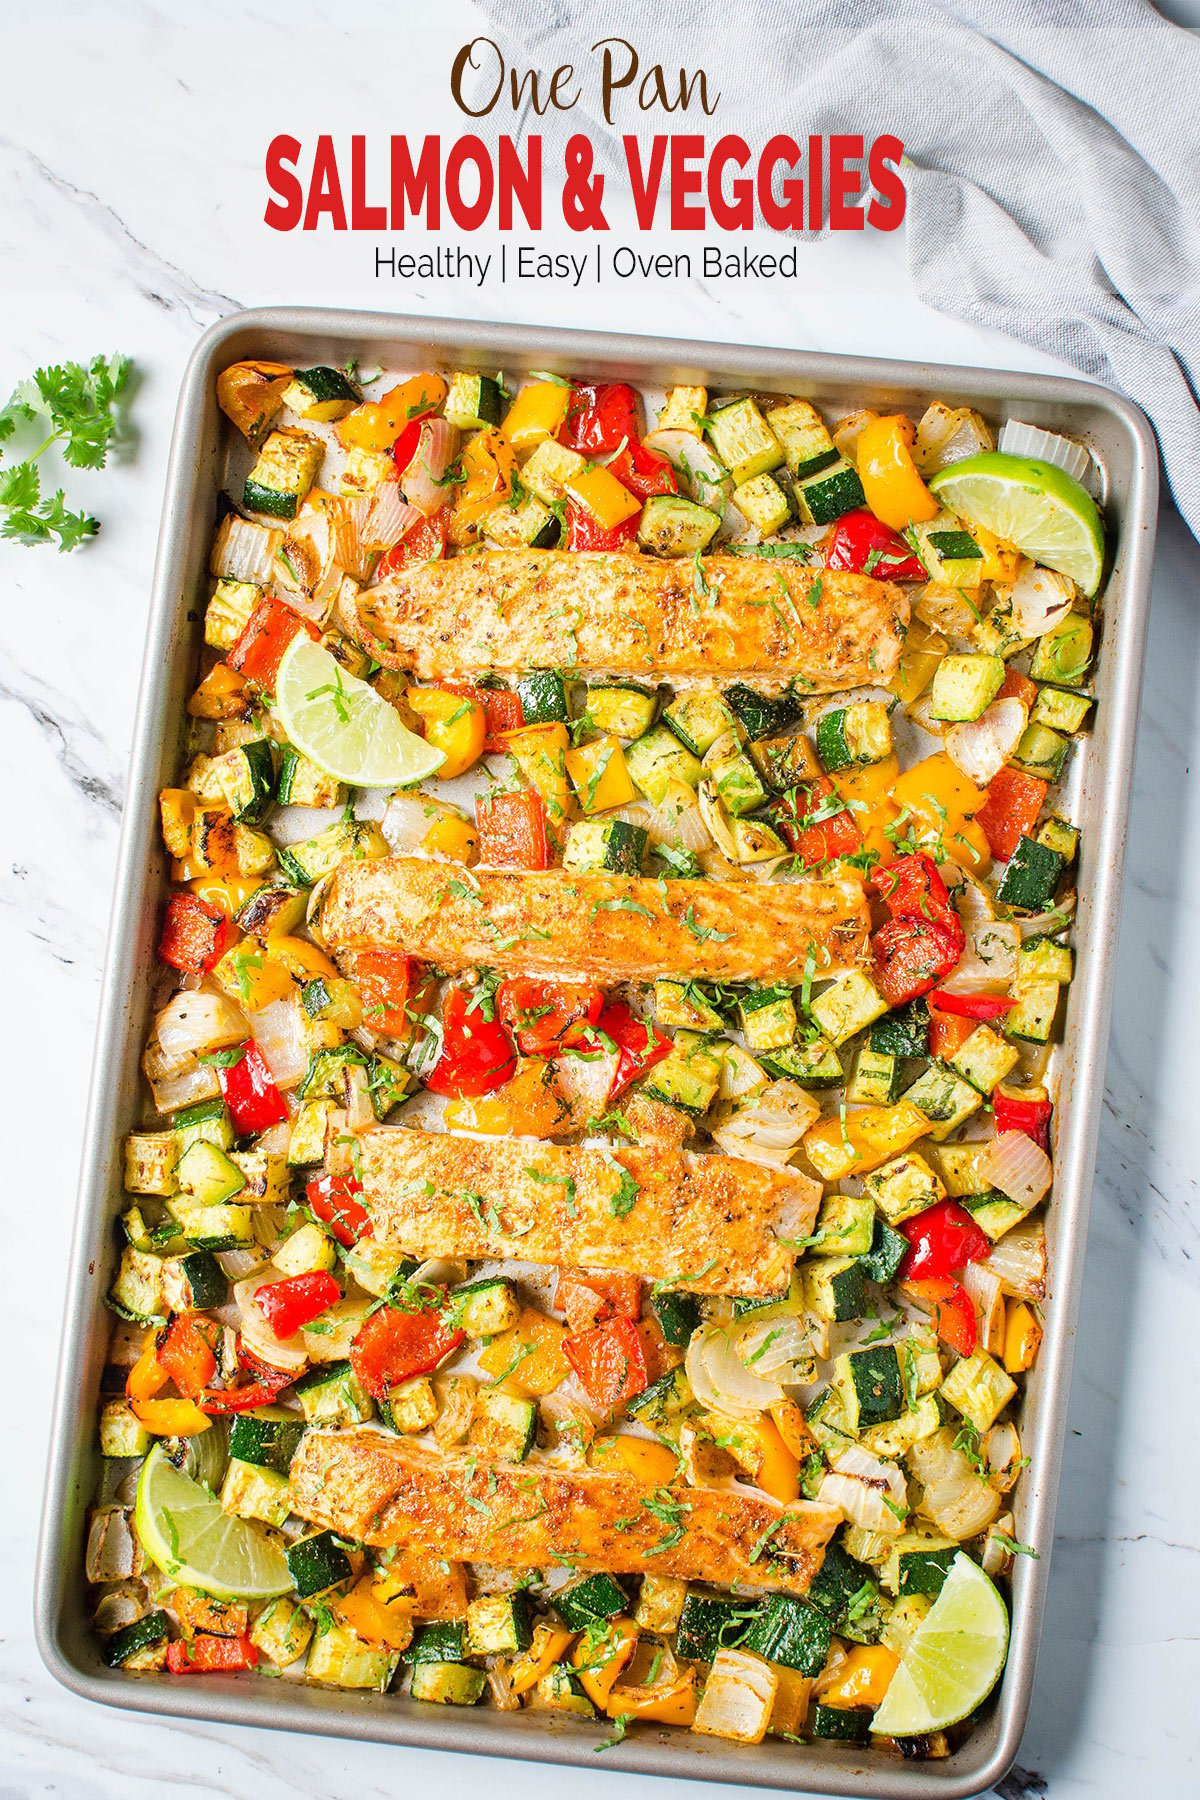
    This oven-baked chicken and veggies recipe is a variation of one pan salmon and vegetables that I published a few months back. So by any chance, if you want to make a seafood version of this awesome dish then you can simply click on the link above. Otherwise, continue reading...

    Here, I repeat myself again as to how much I am in love with one-pan recipes. This healthy baked chicken and vegetables with multi-colors is sure to be your favorite. It is a one-pan chicken dish cooked in the oven in under 30 mins. Less mess, less cleanup blah blah!!!

    Seriously, I am not going to say any more about how much I love one-pot dishes. Let's get to the recipe now!
    [feast_advanced_jump_to]
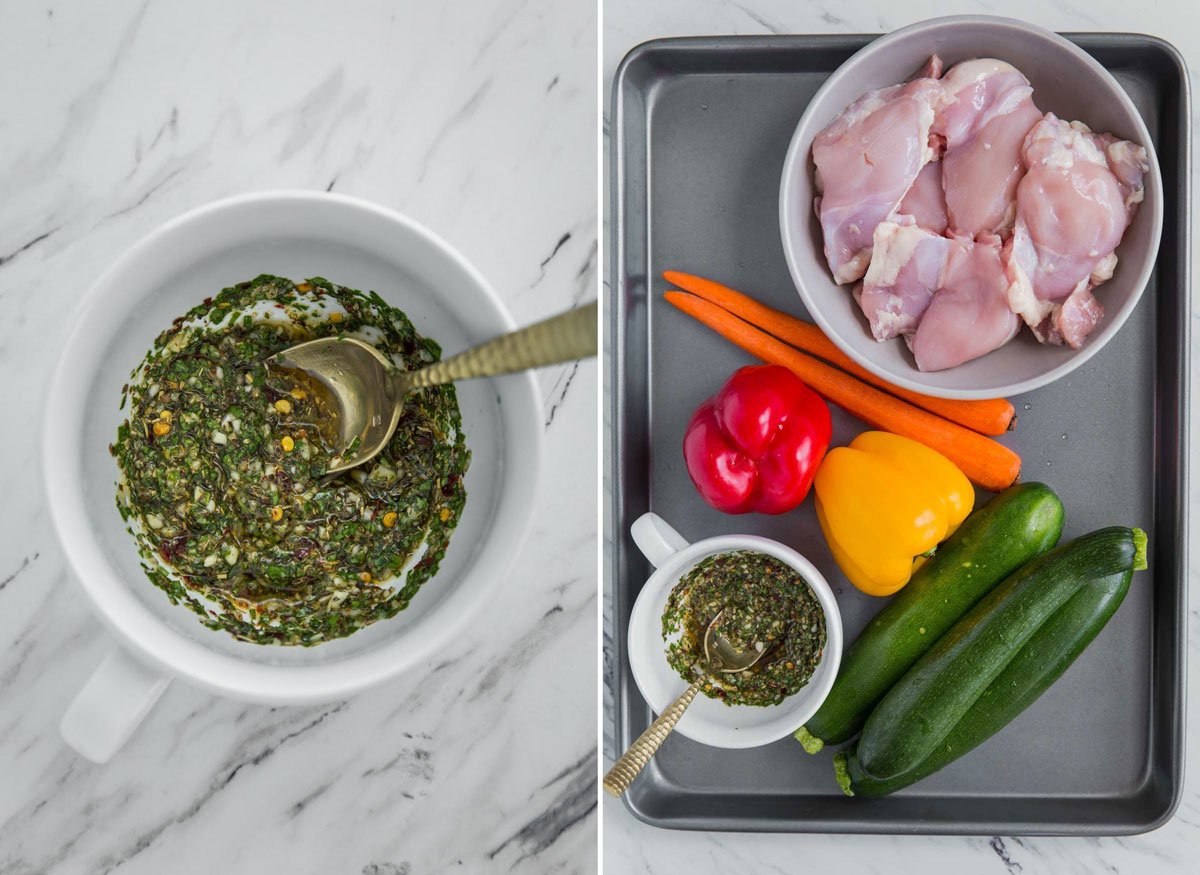
    Garlic herb mixture and fresh vegetables

    Ingredients

    • chicken thighs - use boneless and skinless, cut into bite-size pieces
    • fresh vegetables - use a variety of vegetables like carrot, bell peppers, and zucchini, etc. dice them all into 1" long pieces
    • onion - peel and dice into 1" long pieces
    • fresh parsley - clean and chop it finely
    • garlic cloves  - mince it
    • spice blend - use Italian seasoning, black pepper, red chili flakes, and salt
    • olive oil - I use extra virgin olive oil.
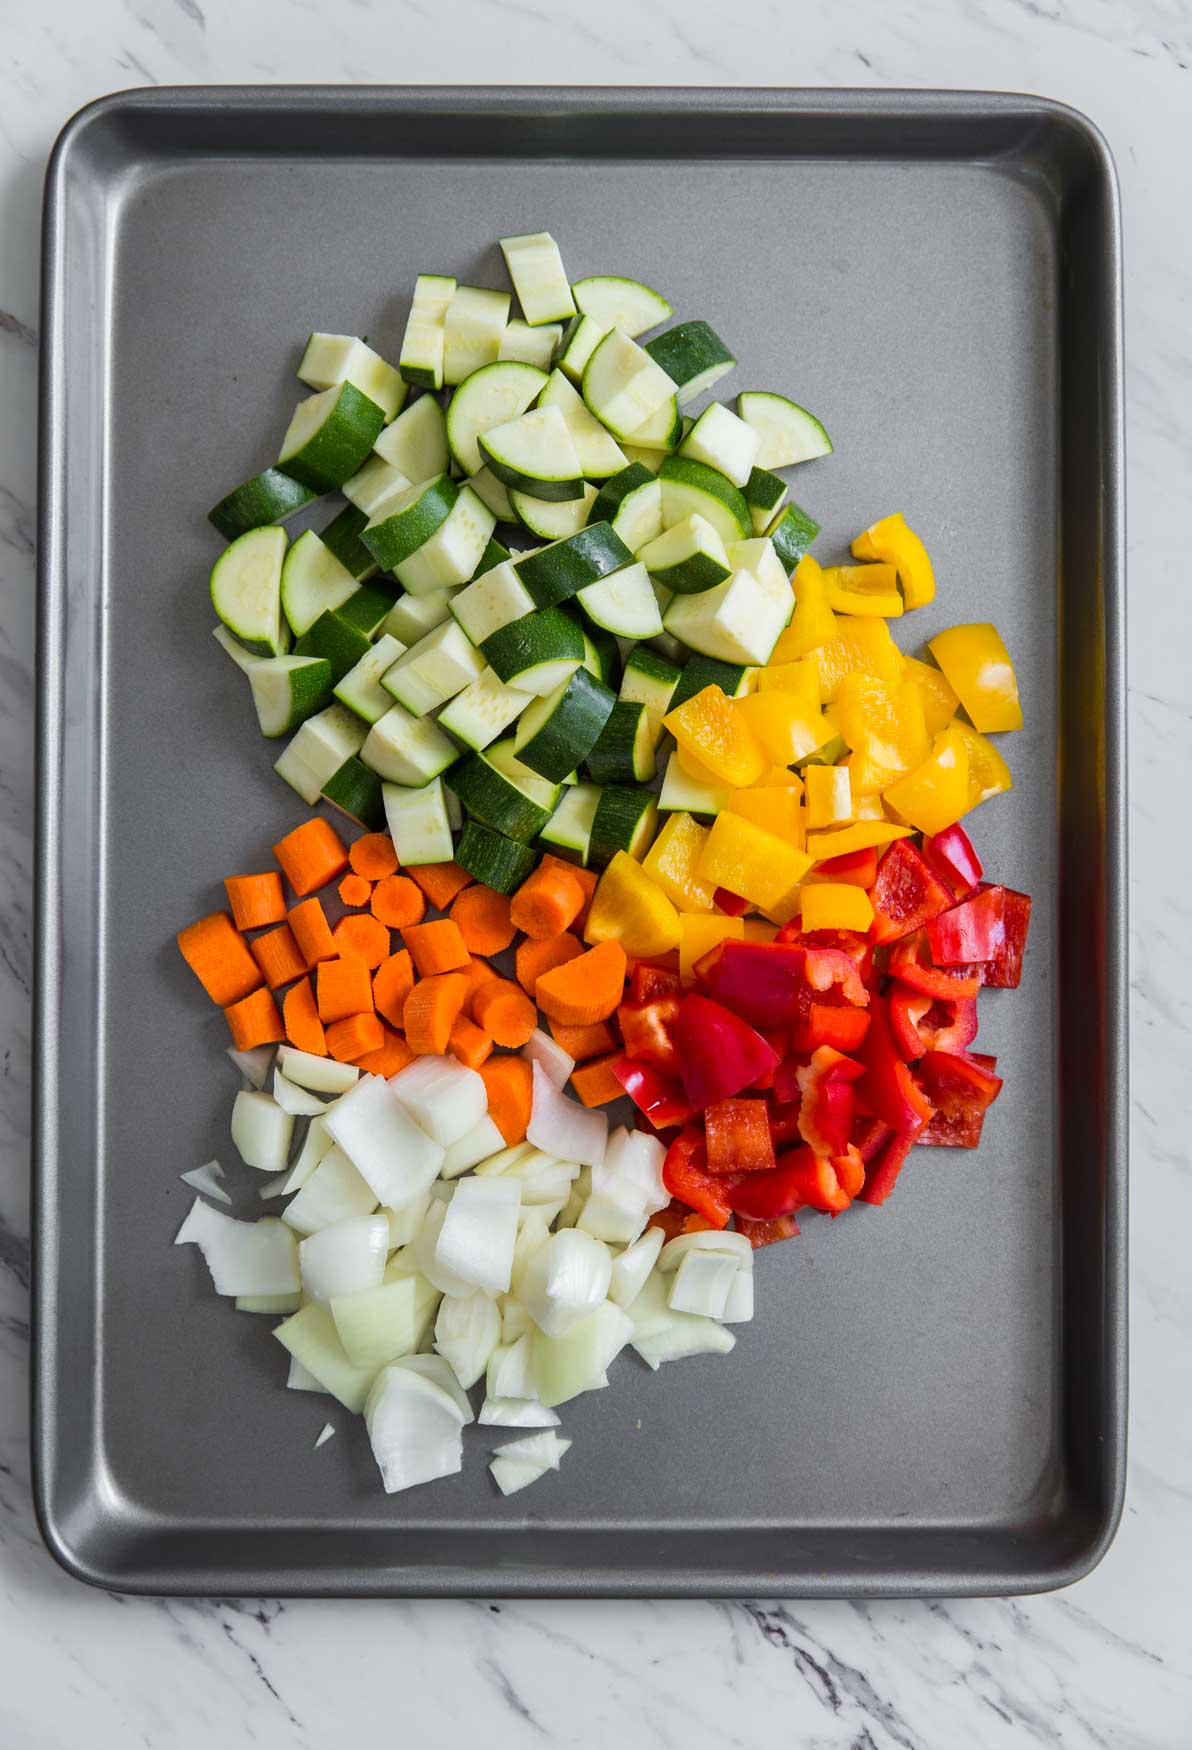
    Vegetables cut into bite-size pieces in a baking pan

    How to make oven baked chicken and veggies?

    In a small bowl, mix garlic, parsley, olive oil, and dry spice blend including salt.

    On a large baking sheet add onion and diced vegetables like carrot, bell peppers, and zucchini.  Also, add chicken pieces. Then mix the chicken and vegetables with prepared garlic, oil and herb mixture to coat them evenly. Spread them on to the sheet in a single layer.

    Bake veggies and chicken in the preheated oven until well done. Once the cooking is done, garnish with more fresh parsley and serve warm. Find instructions in detail below.
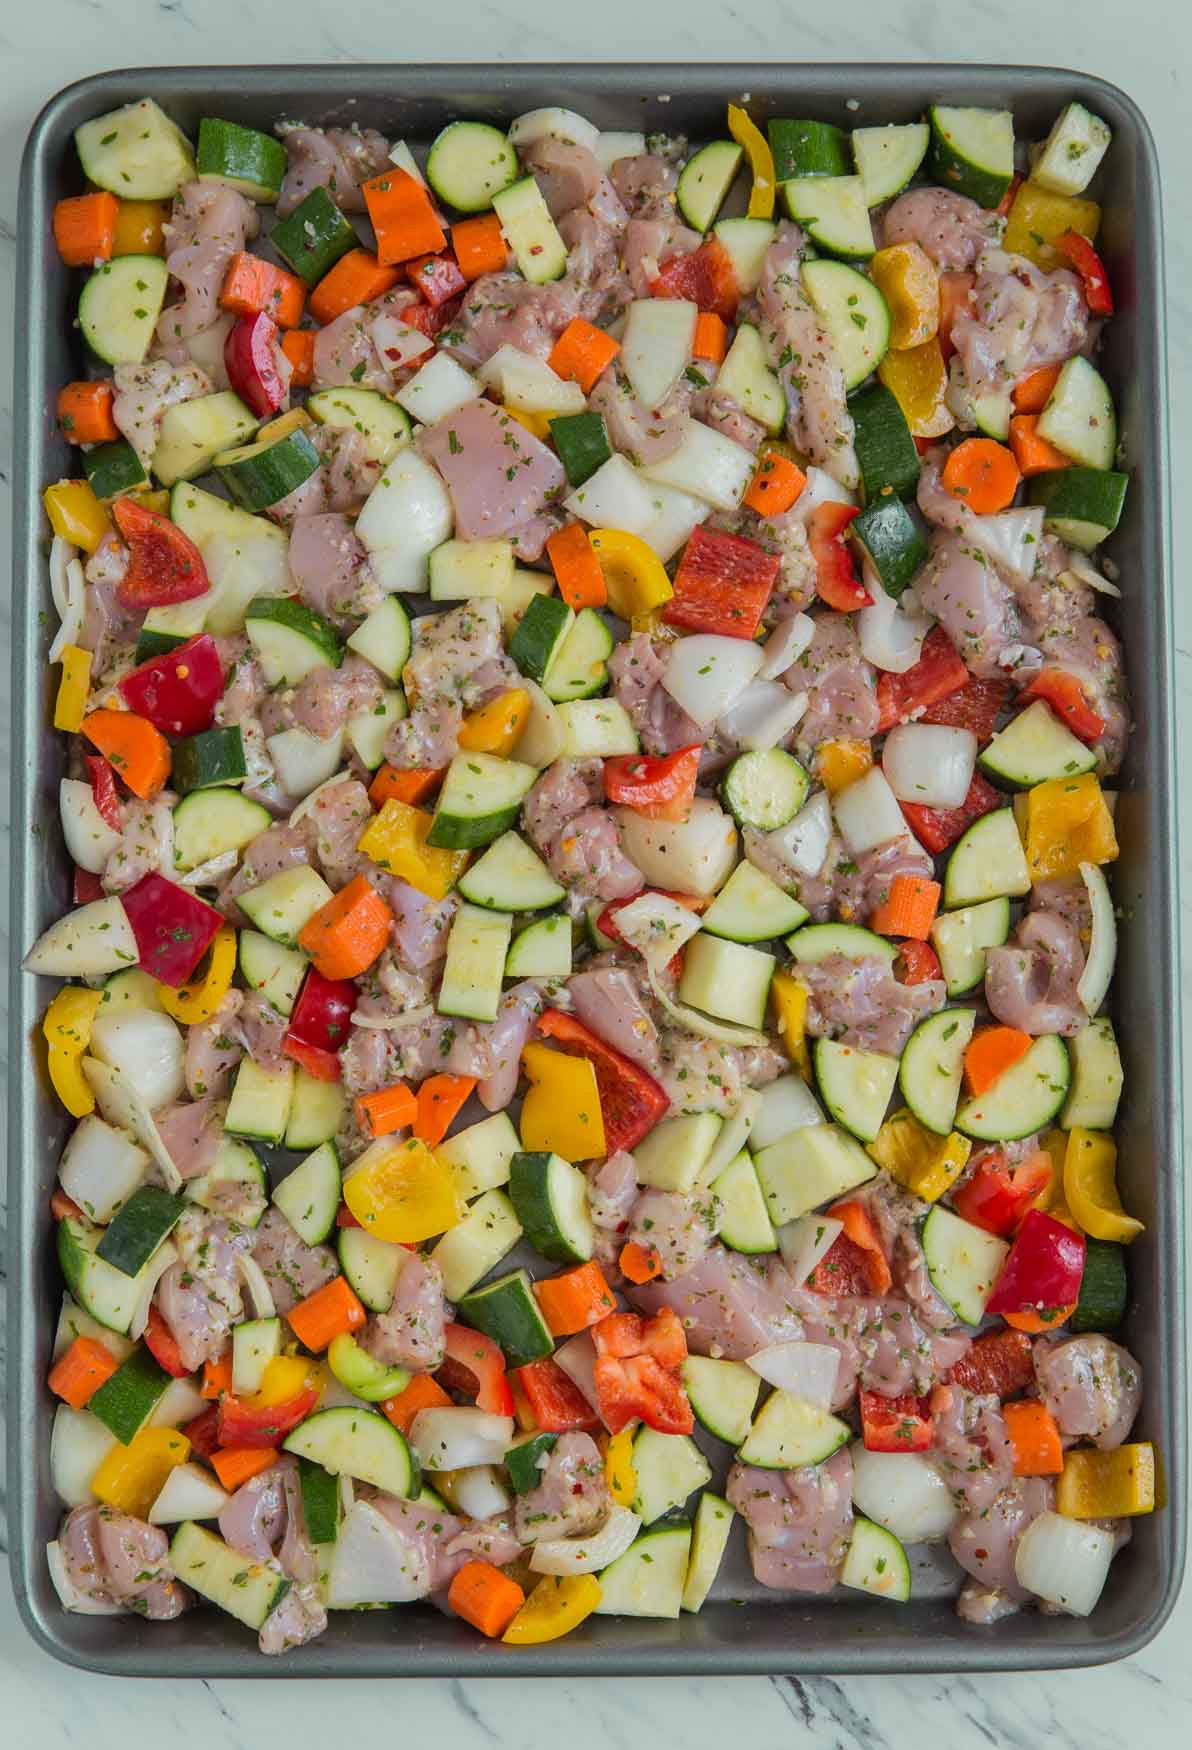
    Marinated chicken and vegetables in a baking tray ready to go in the oven

    Helpful tips!

    • Buying chicken - buy organic, hormone-free, pasture-raised chicken whenever possible. Here I used boneless and skinless chicken thighs. However, you can also use breast pieces if you prefer. Boneless chicken takes less time to cook compared to bone-in.
    • Use a sharp knife for cutting the chicken. It will take less time and effort to cut the chicken into your desired size.
    • Cut all the vegetables to roughly the same in size. These veggies will then cook evenly.
    • Use a large baking sheet (I use 12 X 17" size) for this recipe. It will make your life easier to spread out the chicken and vegetables evenly in a single layer.
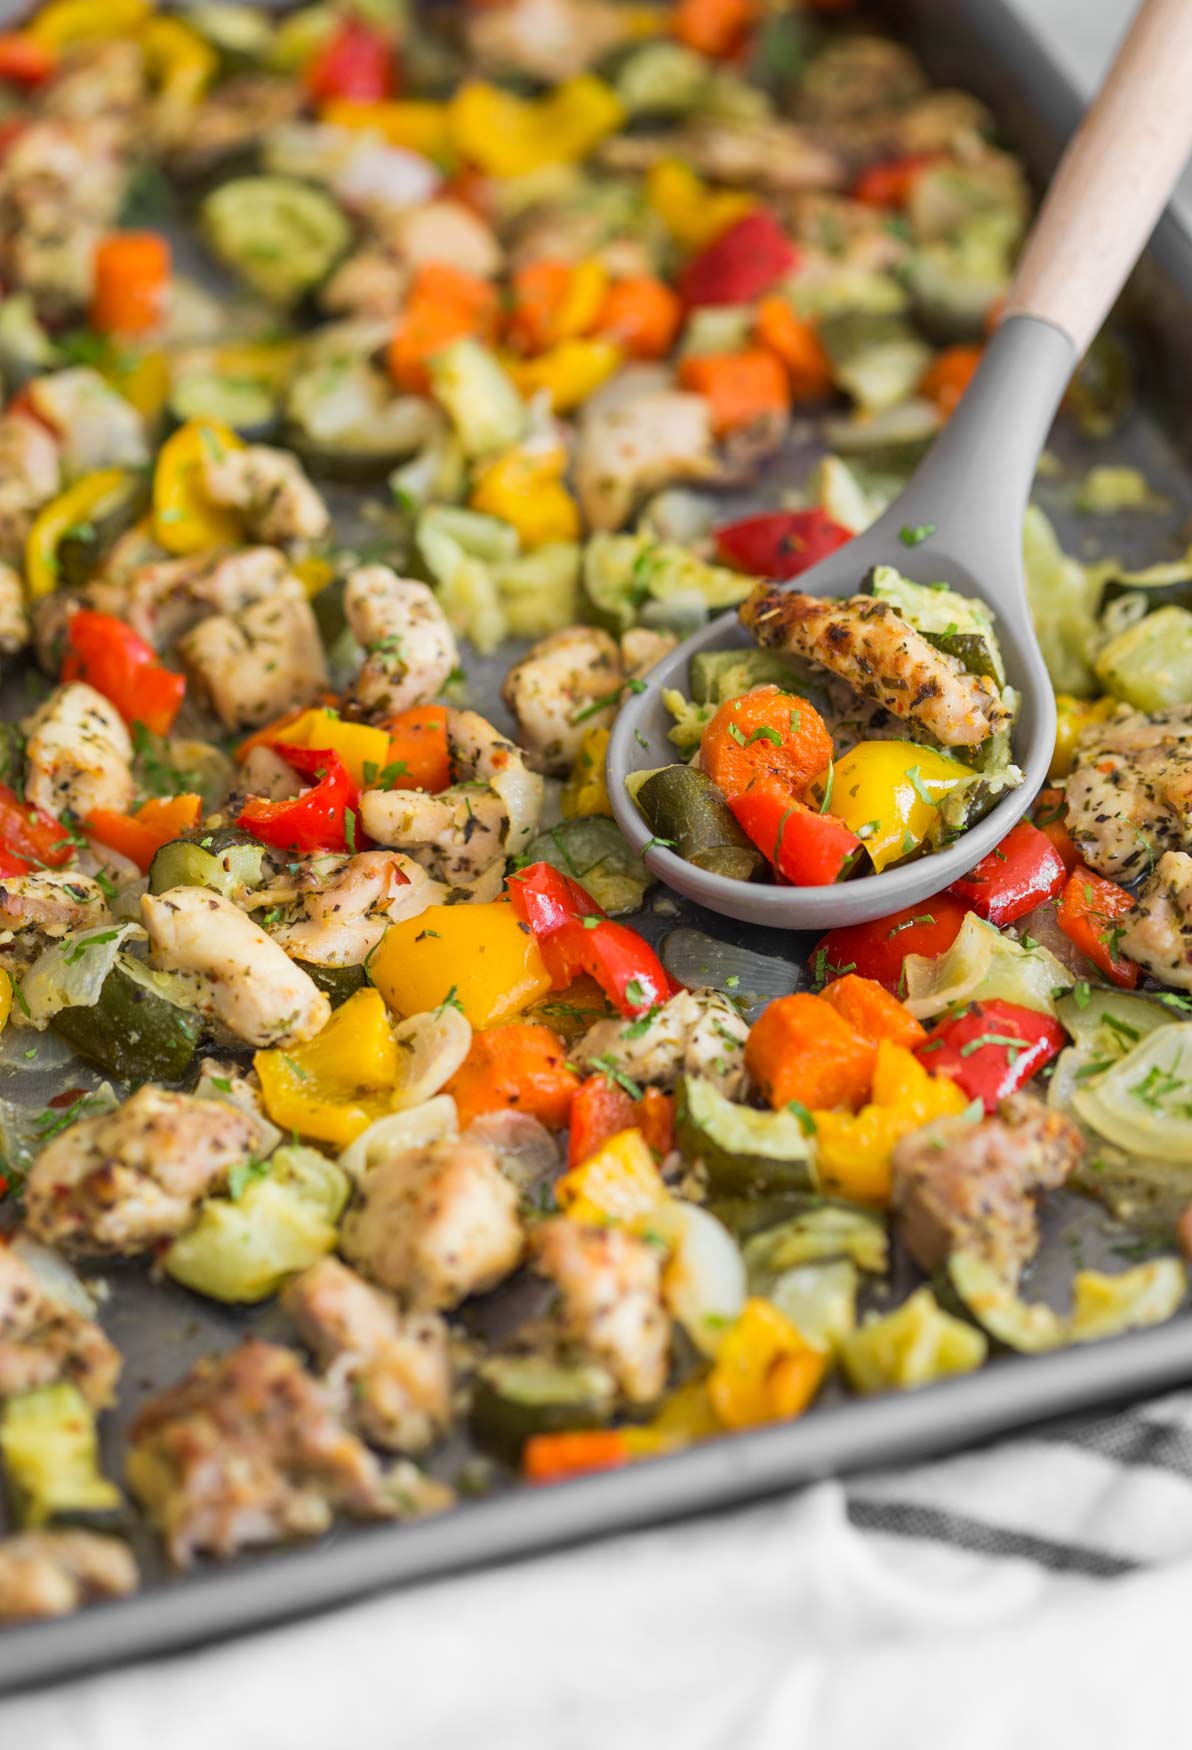
    One-pan baked chicken and vegetables in a baking tray ready to serve

    You will also love these more chicken recipes
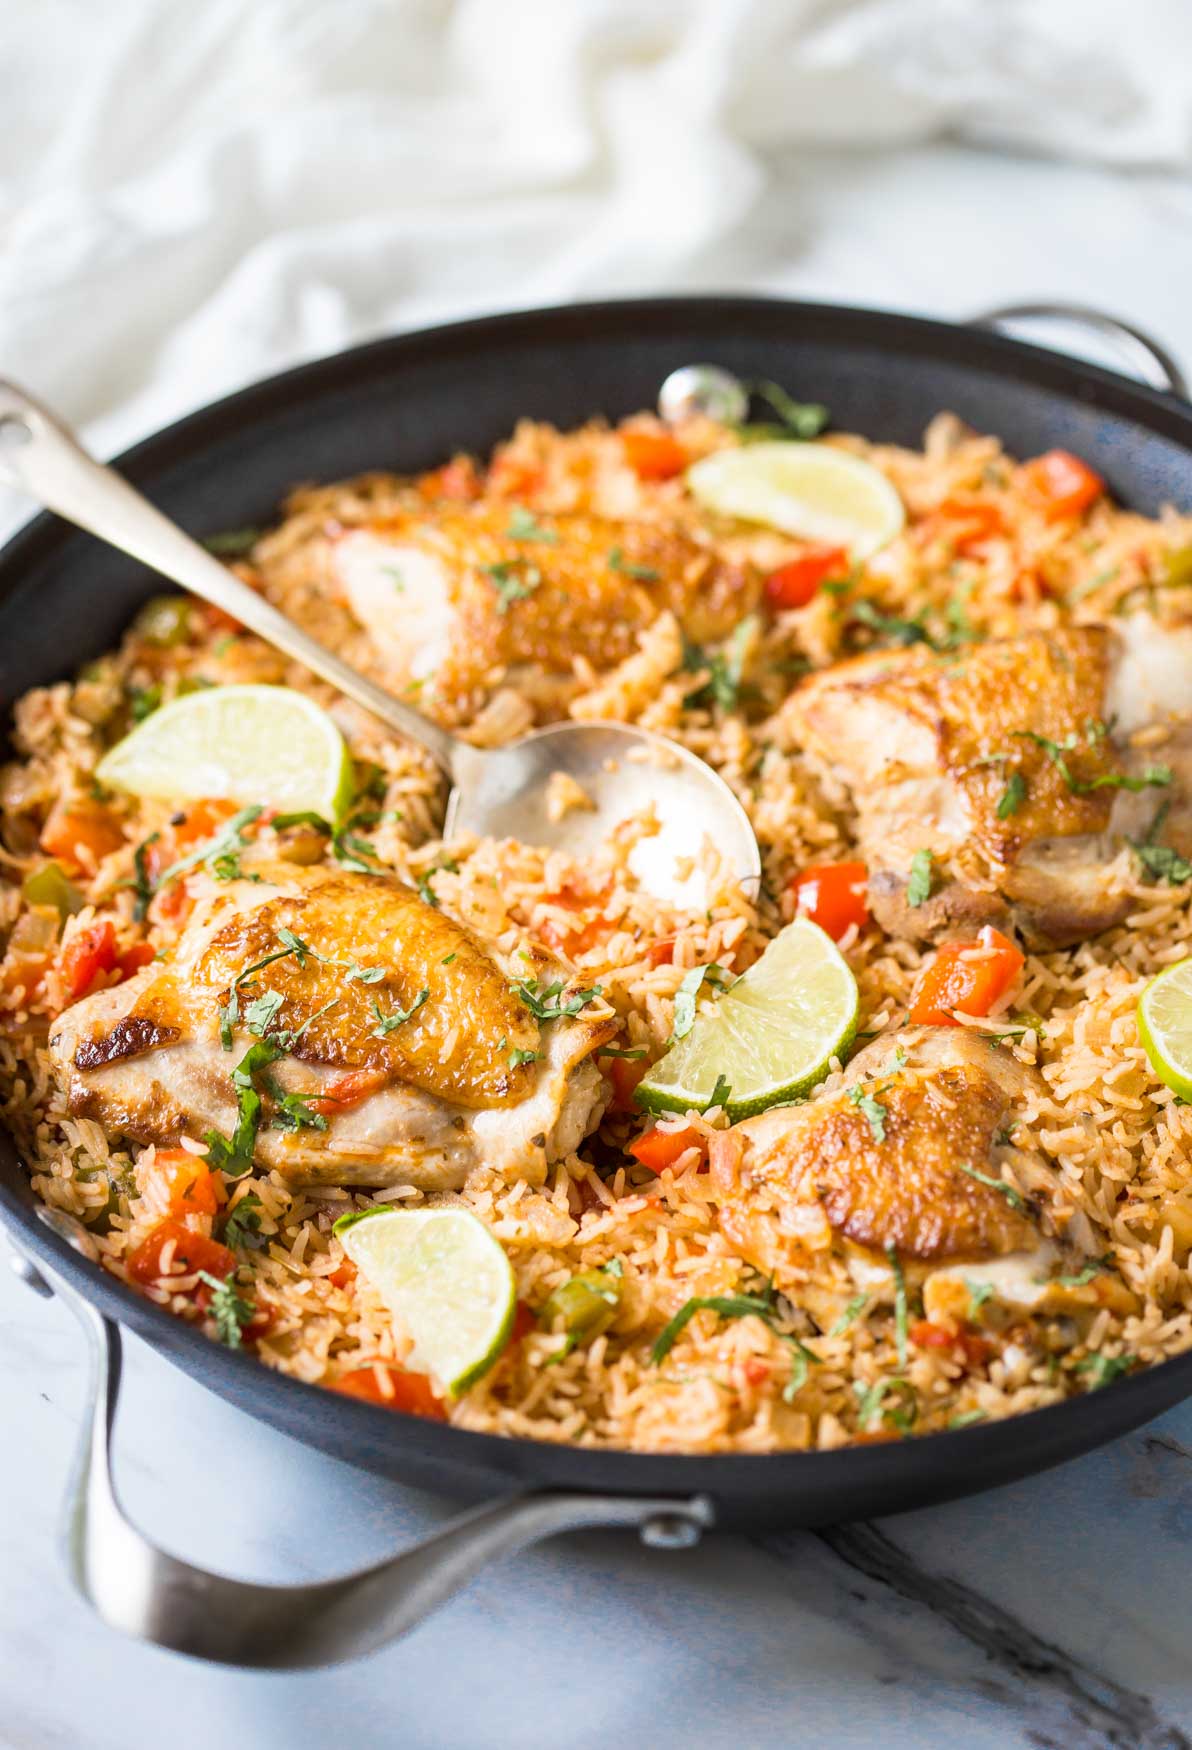
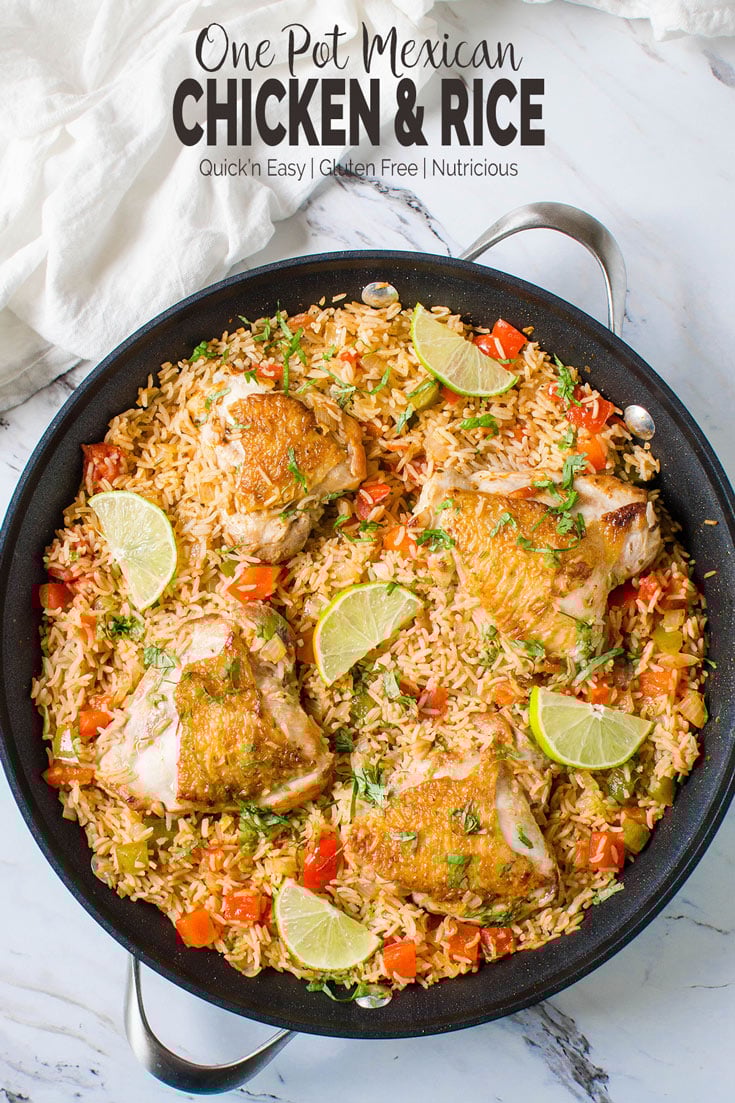
    • One Pan Mexican Chicken Rice
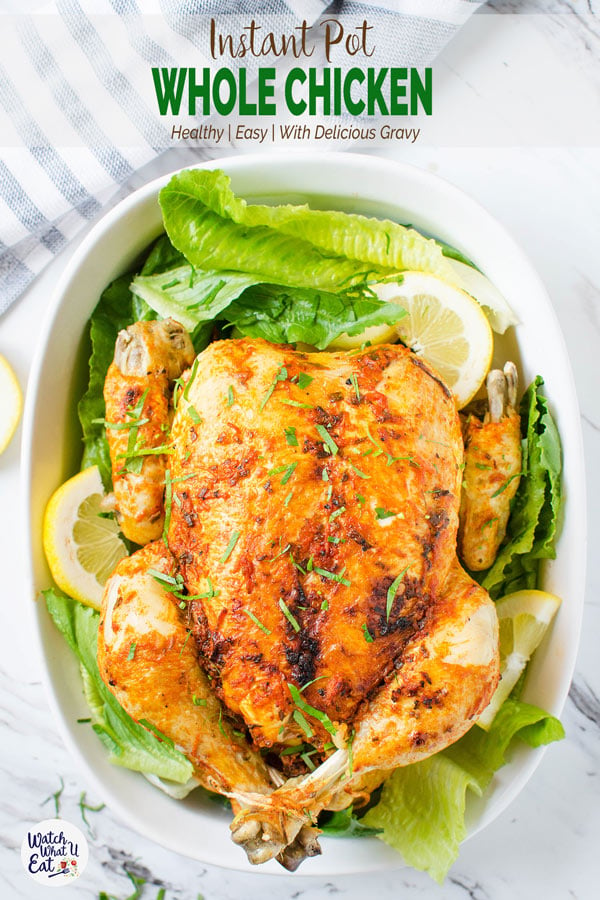
    • Instant Pot Whole Chicken
    • Oven Roasted Whole Chicken
    • Air Fryer BBQ Chicken Wings
    • One-Pot Chicken Biryani
    • Easy Instant Pot Chicken Drumsticks
    One-pan baked chicken and vegetables in a baking tray ready to serve

    Love this recipe? Please leave a 5-star ⭐⭐⭐⭐⭐ rating in the recipe card below & a review in the comments if you REALLY like this recipe. Thank You!

    📖 Recipe
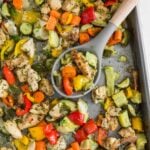
    One-pan baked chicken and vegetables in a baking tray ready to serve
    Print Pin
    5 from 3 votes

    One Pan Baked Chicken And Vegetables

    A variety of vegetables and chicken rubbed with spices, garlic, and herbs and then cooked in the oven for the roasted taste. An awsome dinner with full of flavors and healthy ingredients that you can make on weeknights.
    Course: Lunch / Dinner
    Cuisine: American Inspired,Italian Inspired
    Prep Time 15 minutes minutes
    Cook Time 30 minutes minutes
    Total Time 45 minutes minutes
    Servings :5
    Calories :304kcal
    Author:Swati Kadam Gulati

    Would you like to save this recipe?

    Email yourself a link to this post and come back to it later!

    Equipment

    • Large Baking Sheet
    • Sharp Knife (10% Code: WATCHWHATUEAT)

    Ingredients

    • 6 small chicken thighs boneless and skinless cut into bite-size pieces
    • 3 medium carrot peeled
    • 1 red and yellow pepper each
    • 3 medium zucchini
    • 1 large onion
    • 2-3 tablespoon chopped fresh parsley
    • 2 large garlic cloves finely chopped
    • 1 teaspoon Italian seasonings mix
    • ½ teaspoon red chili flakes
    • 1 ½ tablespoon olive oil
    • 1 tablespoon lime juice
    • Salt and pepper

    Instructions

    • Preheat the oven to 400F.
    • In a small mixing bowl combine parsley, garlic, Italian seasoning mix, chili flakes, oil, lime juice, salt, and pepper. Mix well and keep it aside.
    • Cut carrots, peppers, zucchini, and onion into roughly 1” pieces. Spread them on a baking sheet pan. Also, add chicken pieces to the pan.
    • Then add the garlic and herbs mixture. Using hand mix thoroughly to coat the chicken and vegetables.
    • Spread the chicken and veggie mixture evenly on the baking pan and cook them in the preheated oven for 20 min. Then using a long spatula, stir the mixture and cook for another 10-15 mins.
    • Finally, garnish with some fresh parsley and serve warm.

    Notes

    1. Disclaimer: Vegetables in this recipe won't be crunchy--they will be tender. Vegetables will be perfectly ready in the first 20-25 min of cooking. However, in order to evaporate the water from the chicken completely, and get the roasted color and texture, it takes 30-35 min in total. That's the reason your veggies would get slightly overcooked. However, it doesn't affect the deliciousness of this dish.
    2. You can also use chicken breasts instead of chicken thighs. It may take less time to cook compared to thighs.
    3. You can skip the red chili flakes if you don't prefer it.
    4. We always purchase organic chicken. And about 6 small pieces of chicken thighs roughly weighs 1 ½ lb. You can keep a note of this when deciding how many chicken thighs you would use in this recipe. 
    Nutrition

    Calories: 304kcal
    Tried this recipe?Tag us on Instagram @watchwhatueat or tag #watchwhatueat! OR leave us a comment & rating below. Your feedback is very important to us.

    3 Comments

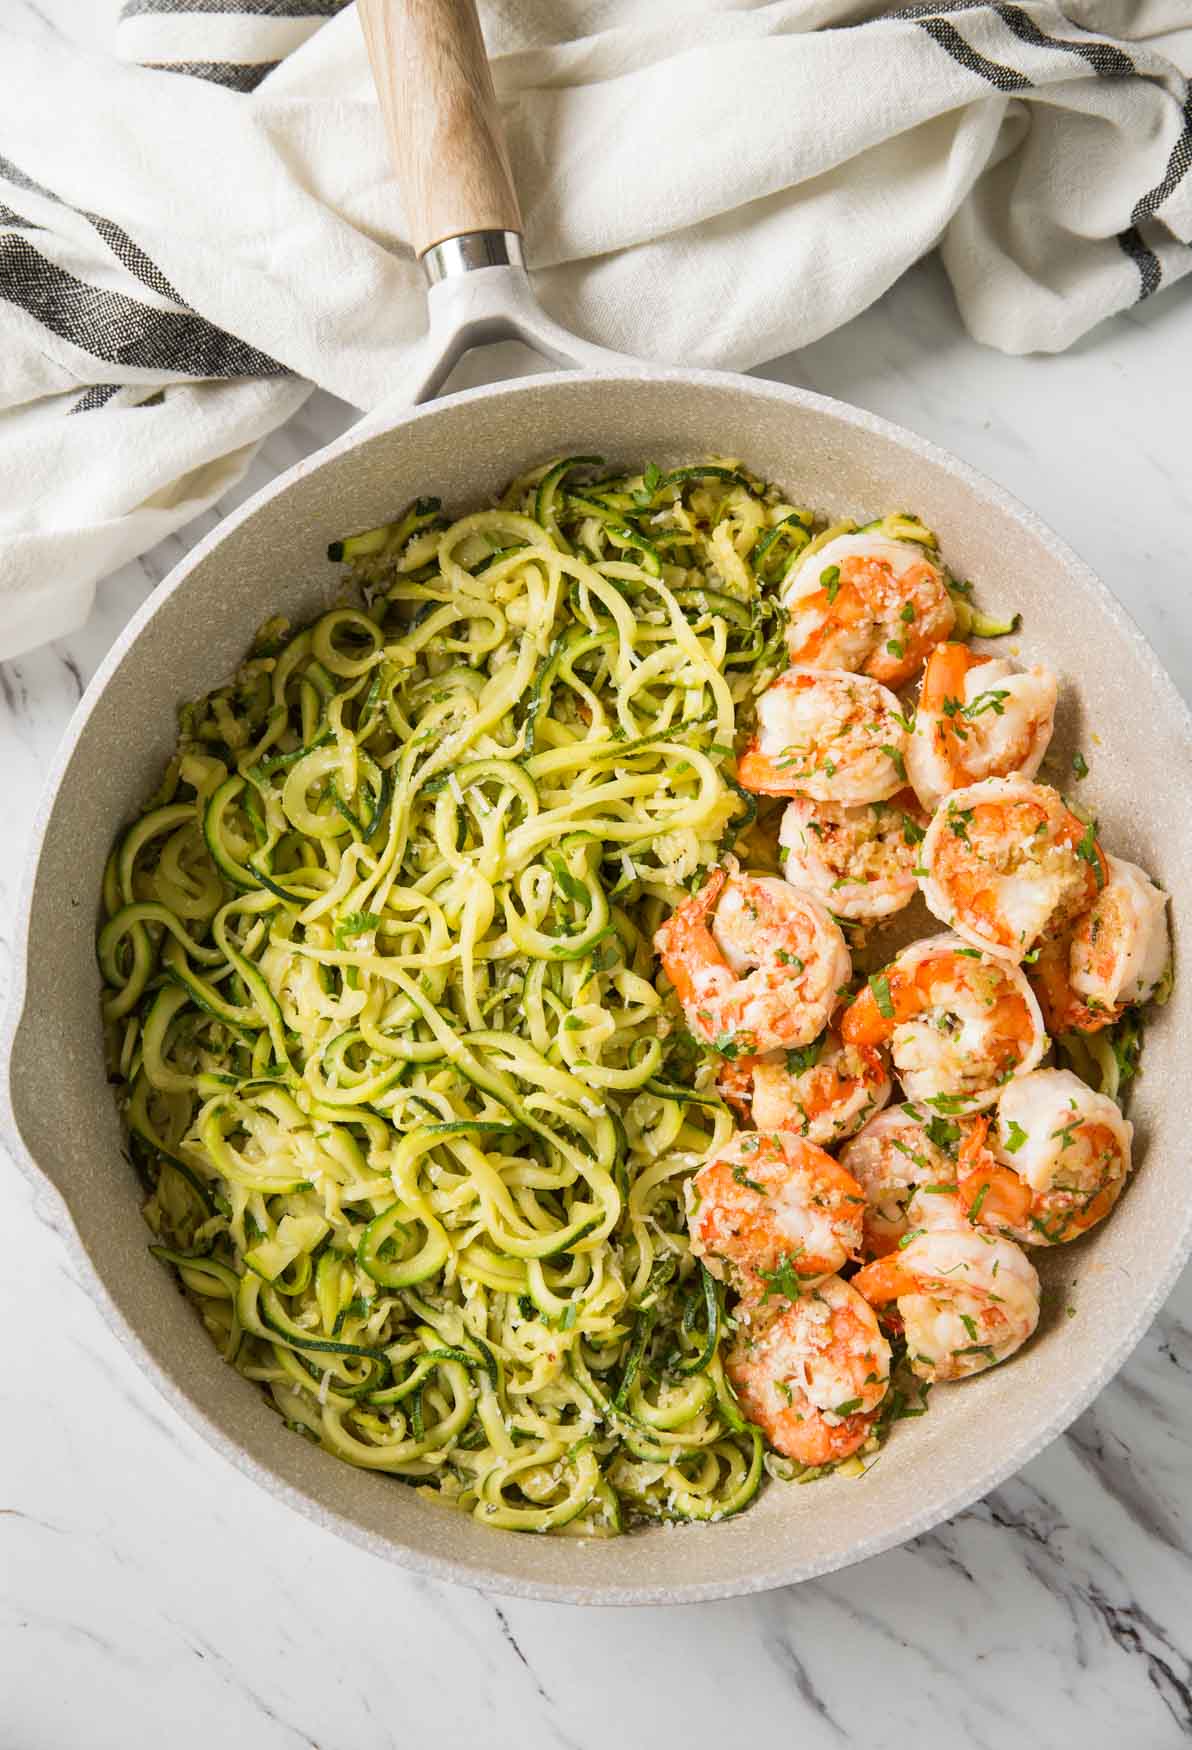
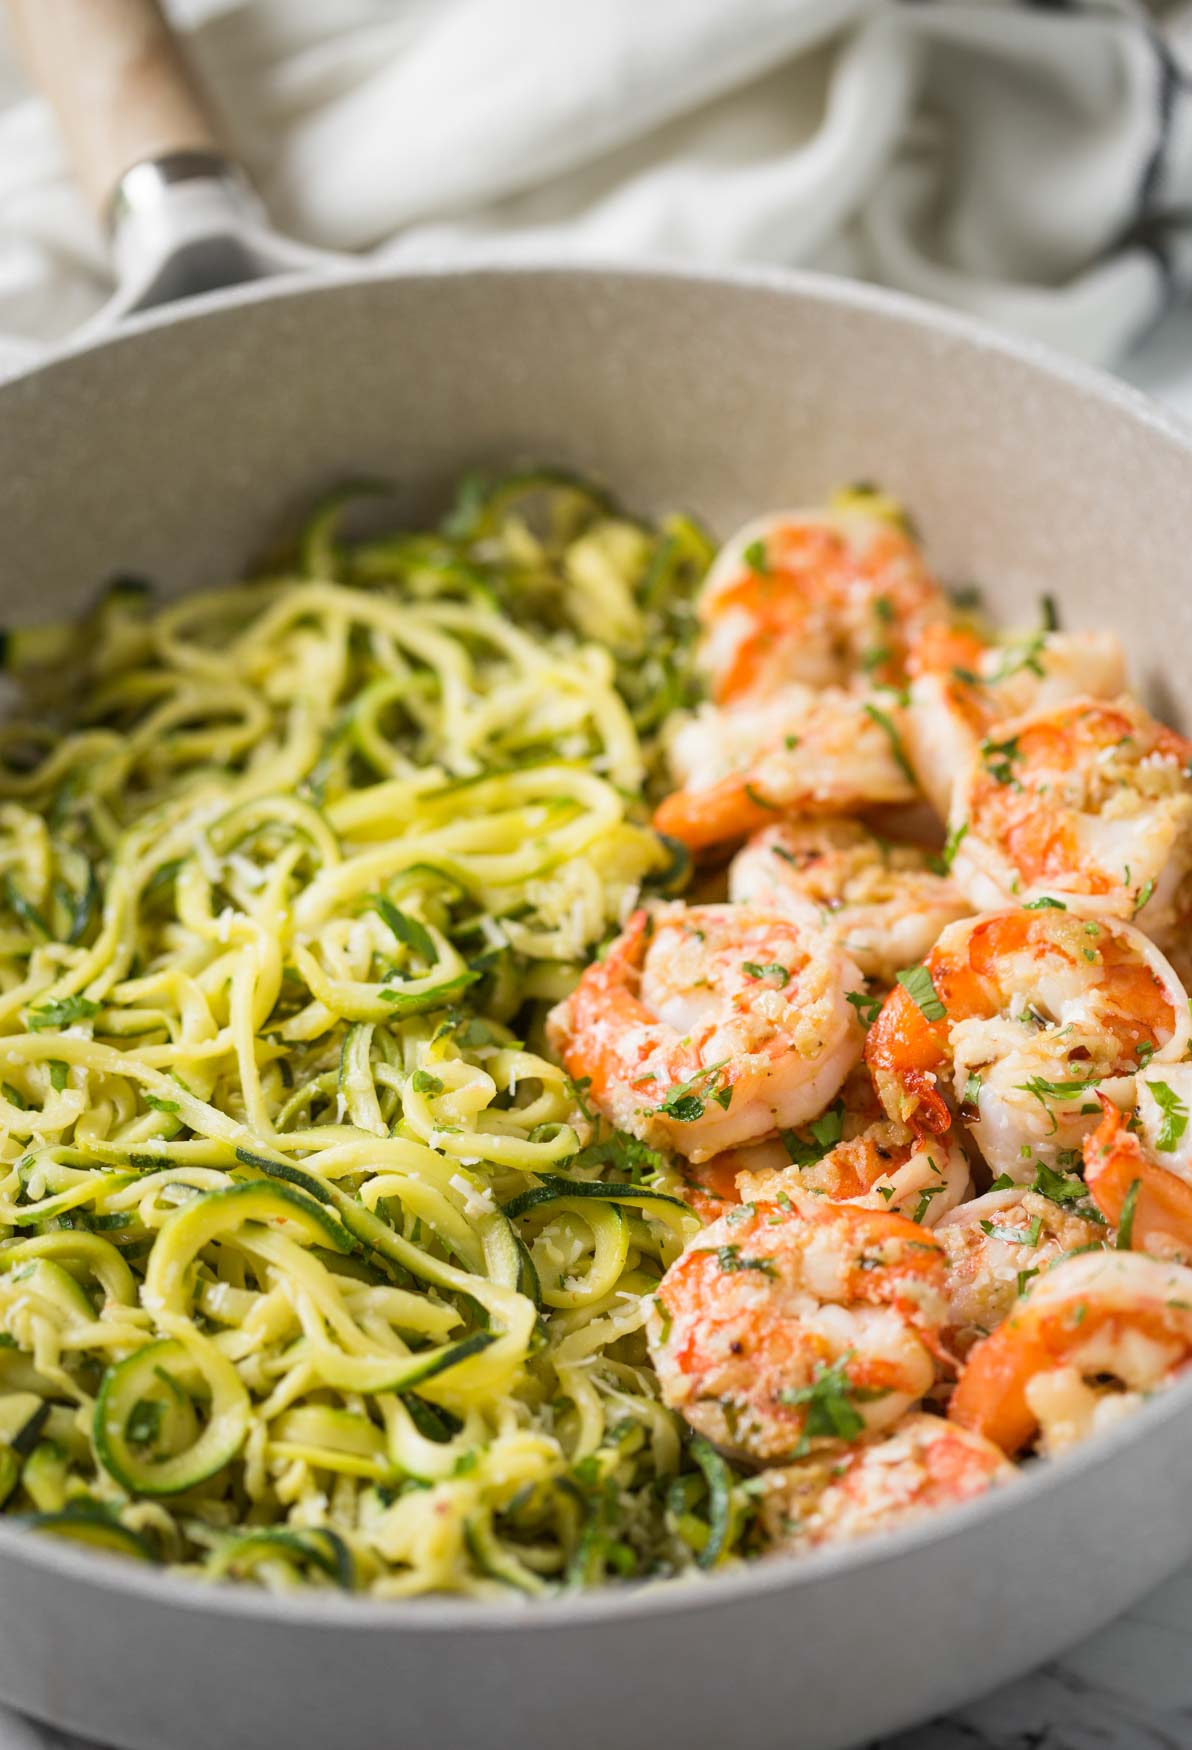
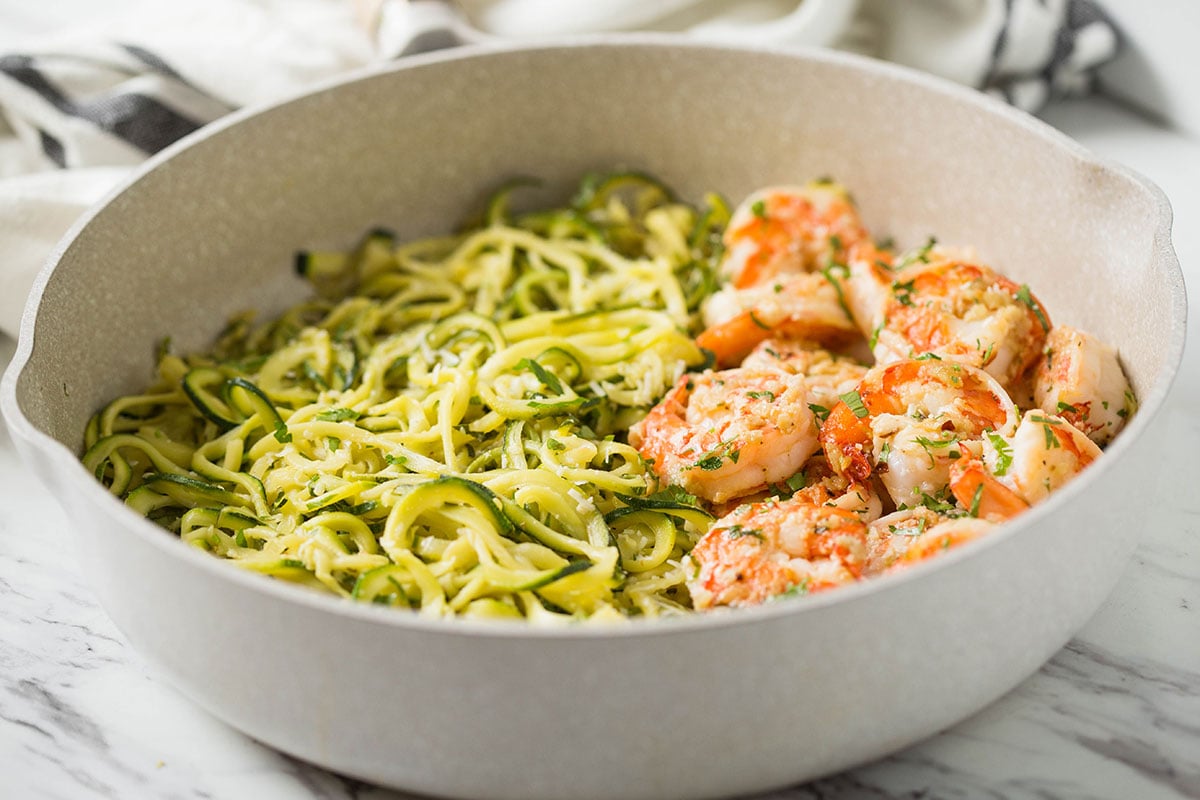
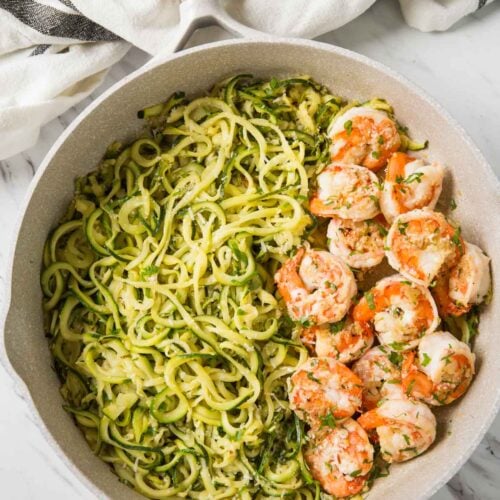
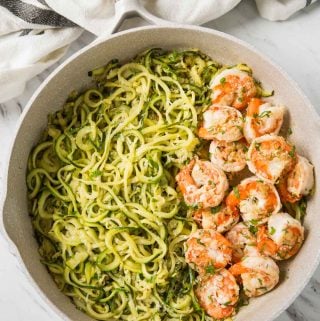
    Shrimps and zucchini noodles cooked in fresh garlic and lemon juice and topped with finely chopped fresh herbs

    Make this one-pan shrimp and zucchini noodles flavored with lemon and garlic for a healthy, quick and easy weeknight dinner or lunch. You can also serve this as-is or pair it with simple whole-grain pasta for a wholesome meal.

    Shrimps and zucchini noodles cooked in fresh garlic and lemon juice and topped with finely chopped fresh herbs.

    Whenever I see super fresh zucchinis or green squash in our grocery store I always feel tempted to bring them home. Currently, they are in season and I love to enjoy them roasted, for example. 

    Hence, to fully take advantage of seasonal zucchinis I am going out of the box to make a variety of green squash recipes such as zucchini rice, Air Fryer zucchini fritters, and this lemon garlic zoodles, etc. 

    I would love to know your favorite zucchini recipe. Please share with us if you have any unique recipe ideas using fresh zucchini.

    [feast_advanced_jump_to]
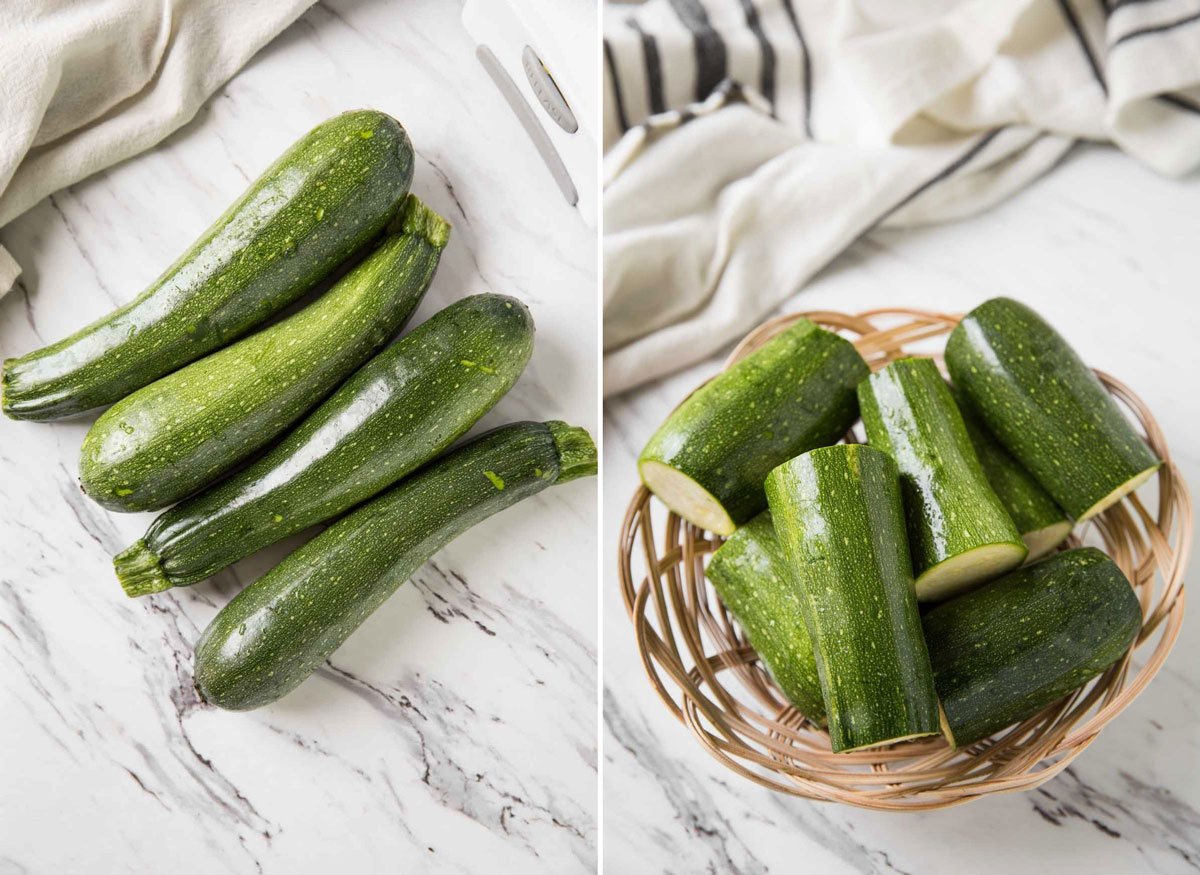
    Fresh zucchini cut in half to prepare zucchini noodles.

    Ingredients

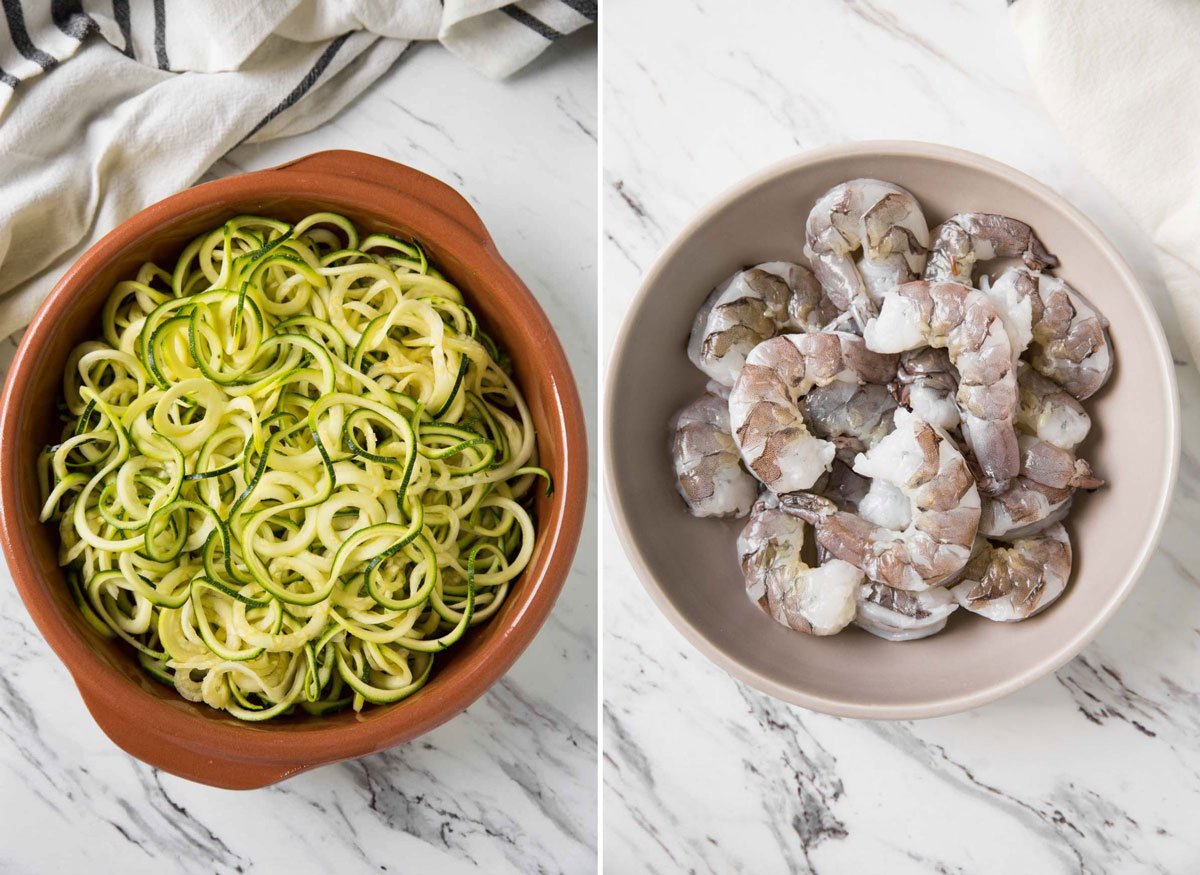
    • fresh or frozen shrimp - remove shells, devein and clean shrimps or prawns before using
    • zucchini - use a spiralizer to turn them into curly noodles
    • garlic - minced or finely chopped
    • red chili flakes - add according to your taste. Or skip it altogether
    • lemon juice - use fresh lemon juice whenever possible
    • olive oil - use olive oil suitable for sauteing or grilling
    • salt and pepper - add according to your taste 
    • fresh parsley - finely chopped 
    Zucchini noodles and raw shrimp in a bowl for making garlic shrimp and zucchini pasta.

    How to make Lemon Garlic Shrimp And Zucchini Noodles 

    Cook garlic and some chili pepper flakes with some olive oil in a large skillet for a few seconds. Then add deveined and clean shrimps to the garlic. Sprinkle some lemon juice, salt, and pepper and cook them on both sides until well done. Finally, garnish with finely chopped fresh parsley.

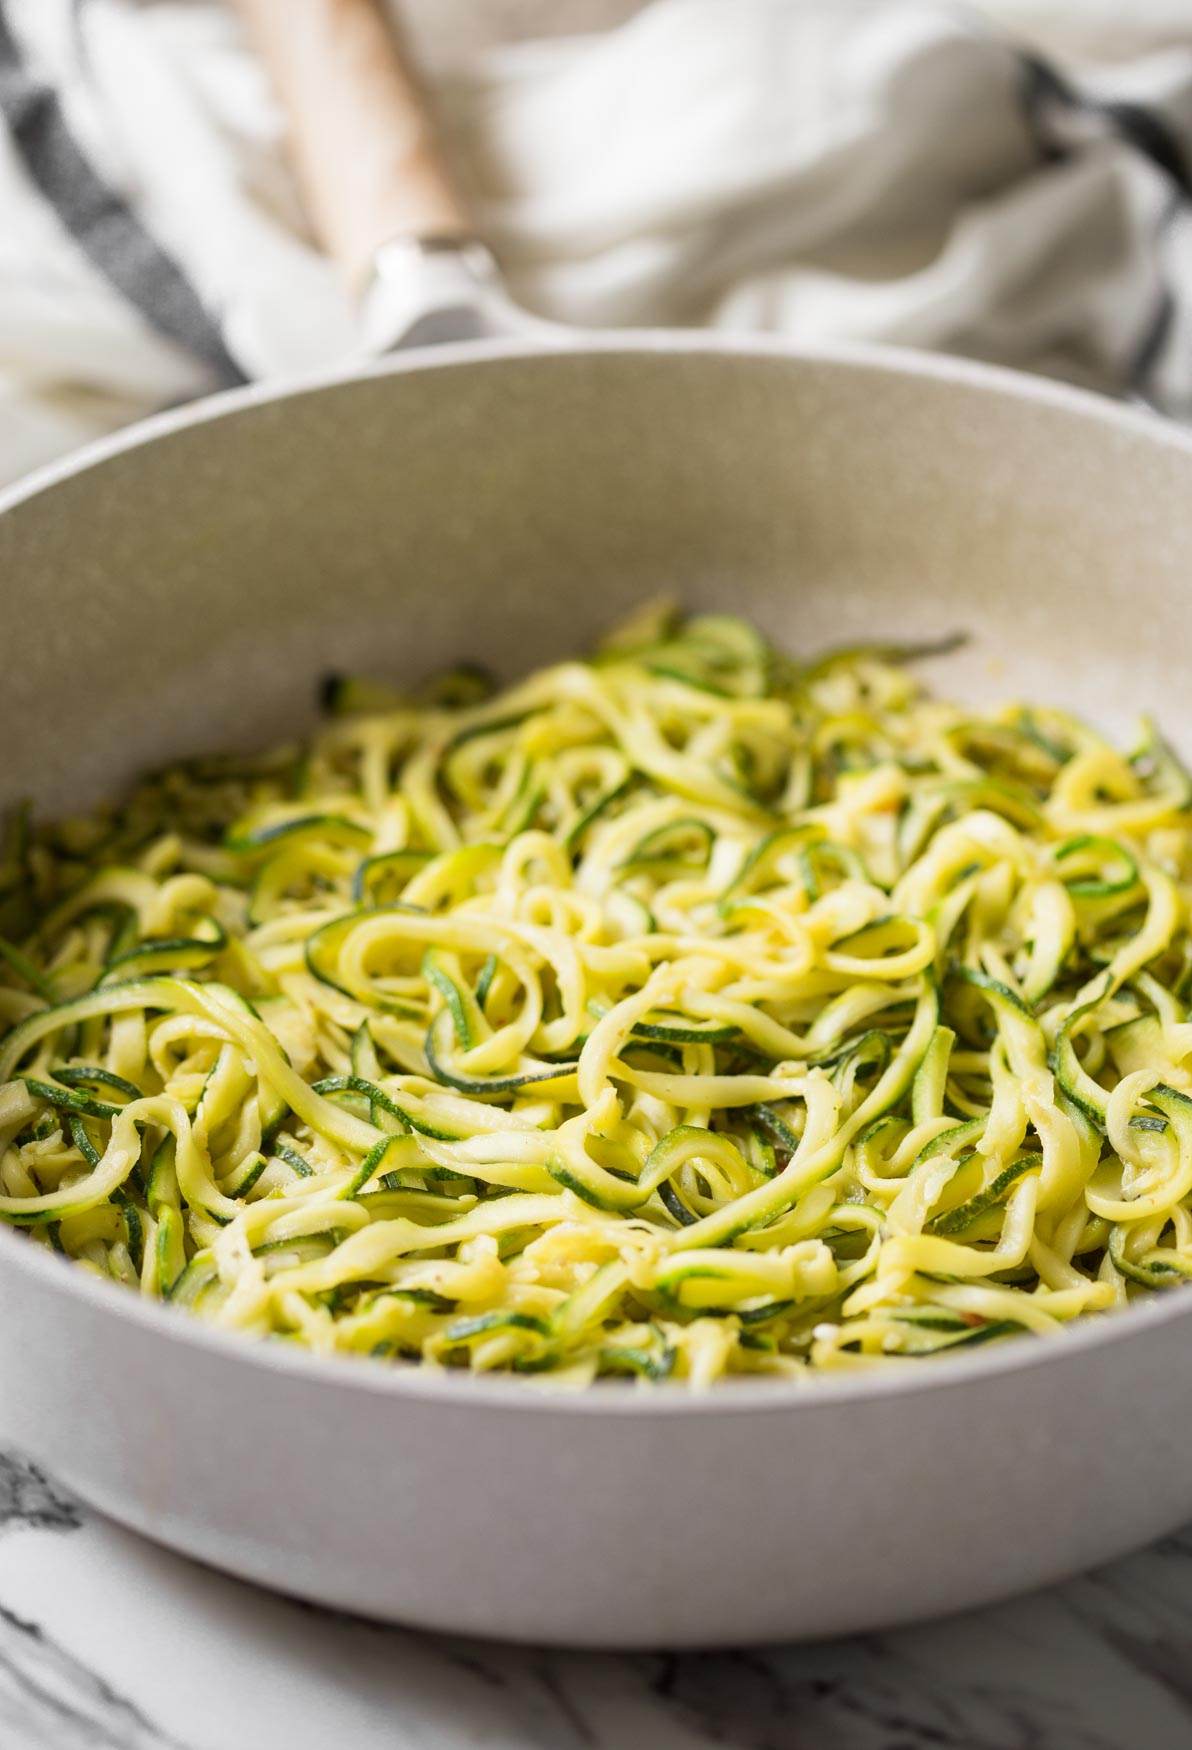
    Once the shrimps are cooked take them out using tongs. Cook zucchini curls in the same pan with leftover oil and garlic on high heat for a few minutes or as per your likings. Season with salt and pepper. You can add the shrimps back and mix with zucchini pasta or serve them separately.

    Shrimp stir-fried in a skillet with chili, garlic, and olive oil.

    Serving suggestions

    For keto or low carb diet, this dish itself is perfect. And for a wholesome meal, you can serve it on the side of plain linguine or any other pasta. You can also serve it on the side of this butternut squash risotto or easy pumpkin risotto.

    Fresh zucchini noodles stir-fried in a skillet with chili, garlic, and olive oil.

    Helpful tips!

    • Use fresh or frozen large shrimps or prawns for this recipe. If you are using frozen shrimps, thaw them well in advance at room temperature. 
    • Always try to buy seafood from sources or farms that practice sustainable farming. Seafood from such sources may be a little pricey than regular ones but we contribute toward saving the environment. Moreover, they are safe to eat.
    • I observed some packaged shrimps still have dark black veins on one side even though they say deveined. I always end up cleaning them. Look on both sides of the shrimps to see if they are clean. You can use one end of a fork to remove these dark threads or veins easily. Or simply use a handy tool like shrimp deveiner for this job. 
    • Use even-sized thick zucchinis for making zucchini pasta. Trim both the ends and cut into half. Then use a spiralizer tool to make zucchini noodles. If you don't cut the zucchini in half, it will result in super long noodles that might be difficult to handle.
    • There is no need to peel the zucchini. Just clean it properly to remove all the dirt and soil from the surface. 
    Shrimps and zucchini noodles cooked in fresh garlic and lemon juice and topped with finely chopped fresh herbs.

    More shrimp and zucchini recipes to try

    • Shrimp With Tomato Sauce
    • Vietnamese Shrimp Rolls
    • Shrimp Coconut Curry 
    • Healthy Zucchini Rice
    • Air Fryer Zucchini Corn Fritters
    Shrimps and zucchini noodles cooked in fresh garlic and lemon juice and topped with finely chopped fresh herbs.

    Love this recipe? Please leave a 5-star ⭐⭐⭐⭐⭐ rating in the recipe card below & a review in the comments if you REALLY like this recipe. Thank You!

    📖 Recipe

    Shrimps and zucchini noodles cooked in fresh garlic and lemon juice and topped with finely chopped fresh herbs
    Print Pin
    5 from 2 votes

    One Pan Garlic Shrimp And Zucchini Noodles

    Cook shrimps and zucchini noodles in fresh garlic and lemon juice and top with finely chopped fresh herbs for a healthy, quick and easy lunch or dinner. 
    Course: Lunch / Dinner
    Cuisine: Italian Inspired
    Prep Time 10 minutes minutes
    Cook Time 12 minutes minutes
    Servings :4
    Calories :120kcal
    Author:Swati Kadam Gulati

    Would you like to save this recipe?

    Email yourself a link to this post and come back to it later!

    Equipment

    • Shrimp Deveiner

    Ingredients

    • 20 large shrimps peeled and deveined
    • 4 medium zucchini
    • 1 tablespoon olive oil
    • 3-4 garlic cloves finely minced
    • ¼ teaspoon red chili flakes
    • 1 tablespoon lemon juice
    • 2 tablespoon finely chopped fresh parsley
    • salt and pepper

    Instructions

    • Heat oil in a large skillet on medium heat.
    • Add garlic, some chili flakes and cook for 40-60 sec.
    • Then add shrimp, lemon juice and season with salt and pepper. Cook them for 3 min on both sides (total 6 min). Once done take them out.
    • Now in the same skillet, in leftover oil and garlic, add zucchini noodles. Cook them on high heat for 3-4 min.
    • Add salt and pepper; mix well. Add back the cooked shrimp or serve separately.

    Notes

    1. Do not overcook the shrimp. Cooking seafood for long results in a hard and chewy texture.
    2. You can cook the zucchini noodles according to your preference. I prefer mine soft and fully cooked.
    3. Also, add salt only toward the end of cooking the zucchini. Else, it will make the zucchini noodles soggy. 

    Nutrition

    Calories: 120kcal
    Tried this recipe?Tag us on Instagram @watchwhatueat or tag #watchwhatueat! OR leave us a comment & rating below. Your feedback is very important to us.

    4 Comments

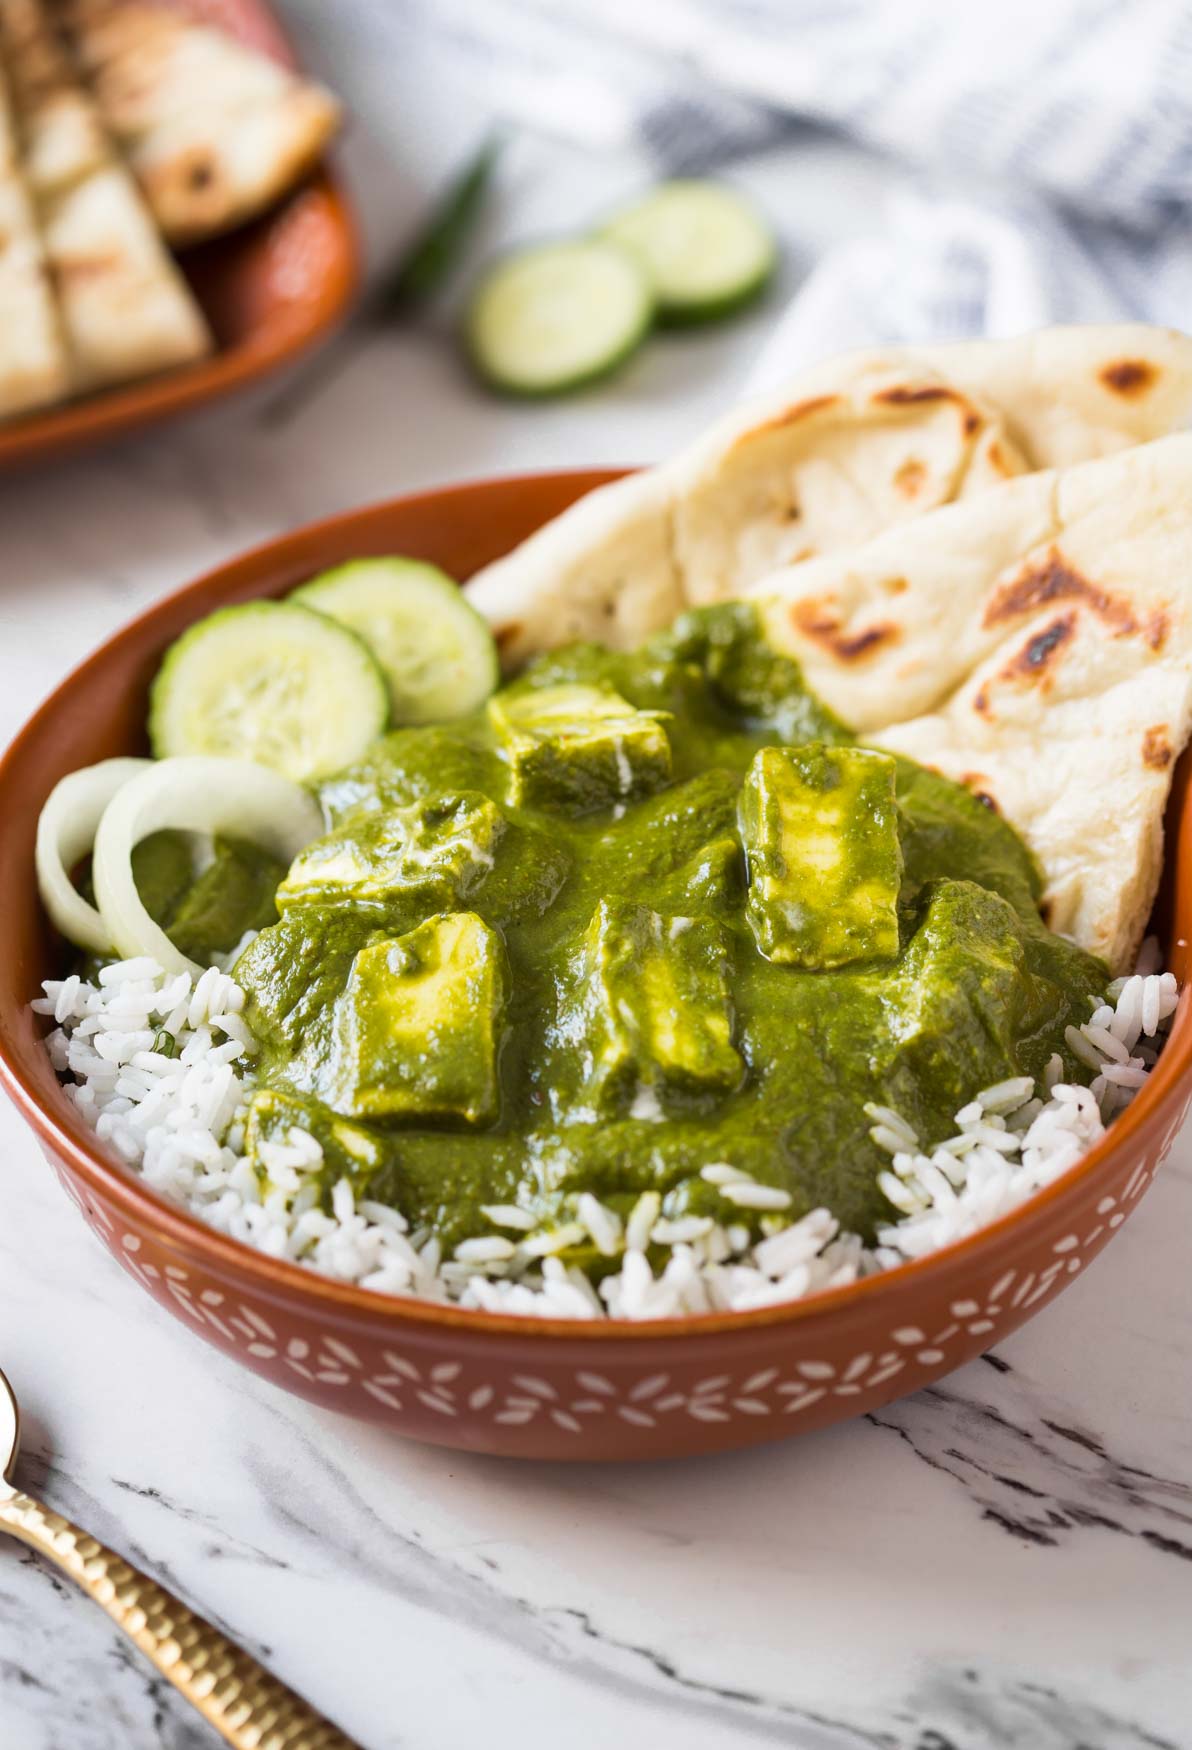
    Soft paneer dunked in creamy green spinach curry to prepare authentic Indian palak paneer curry. Healthy, quick and easy recipe for saag paneer curry that you can serve with naan bread or cooked rice. | #watchwhatueat #palakpaneer #spinachrecipe #spinach #vegetarian

    This creamy yet healthy palak paneer curry is super easy to prepare at home. Loaded with all authentic Indian flavors and it goes well with naan or plain basmati rice.

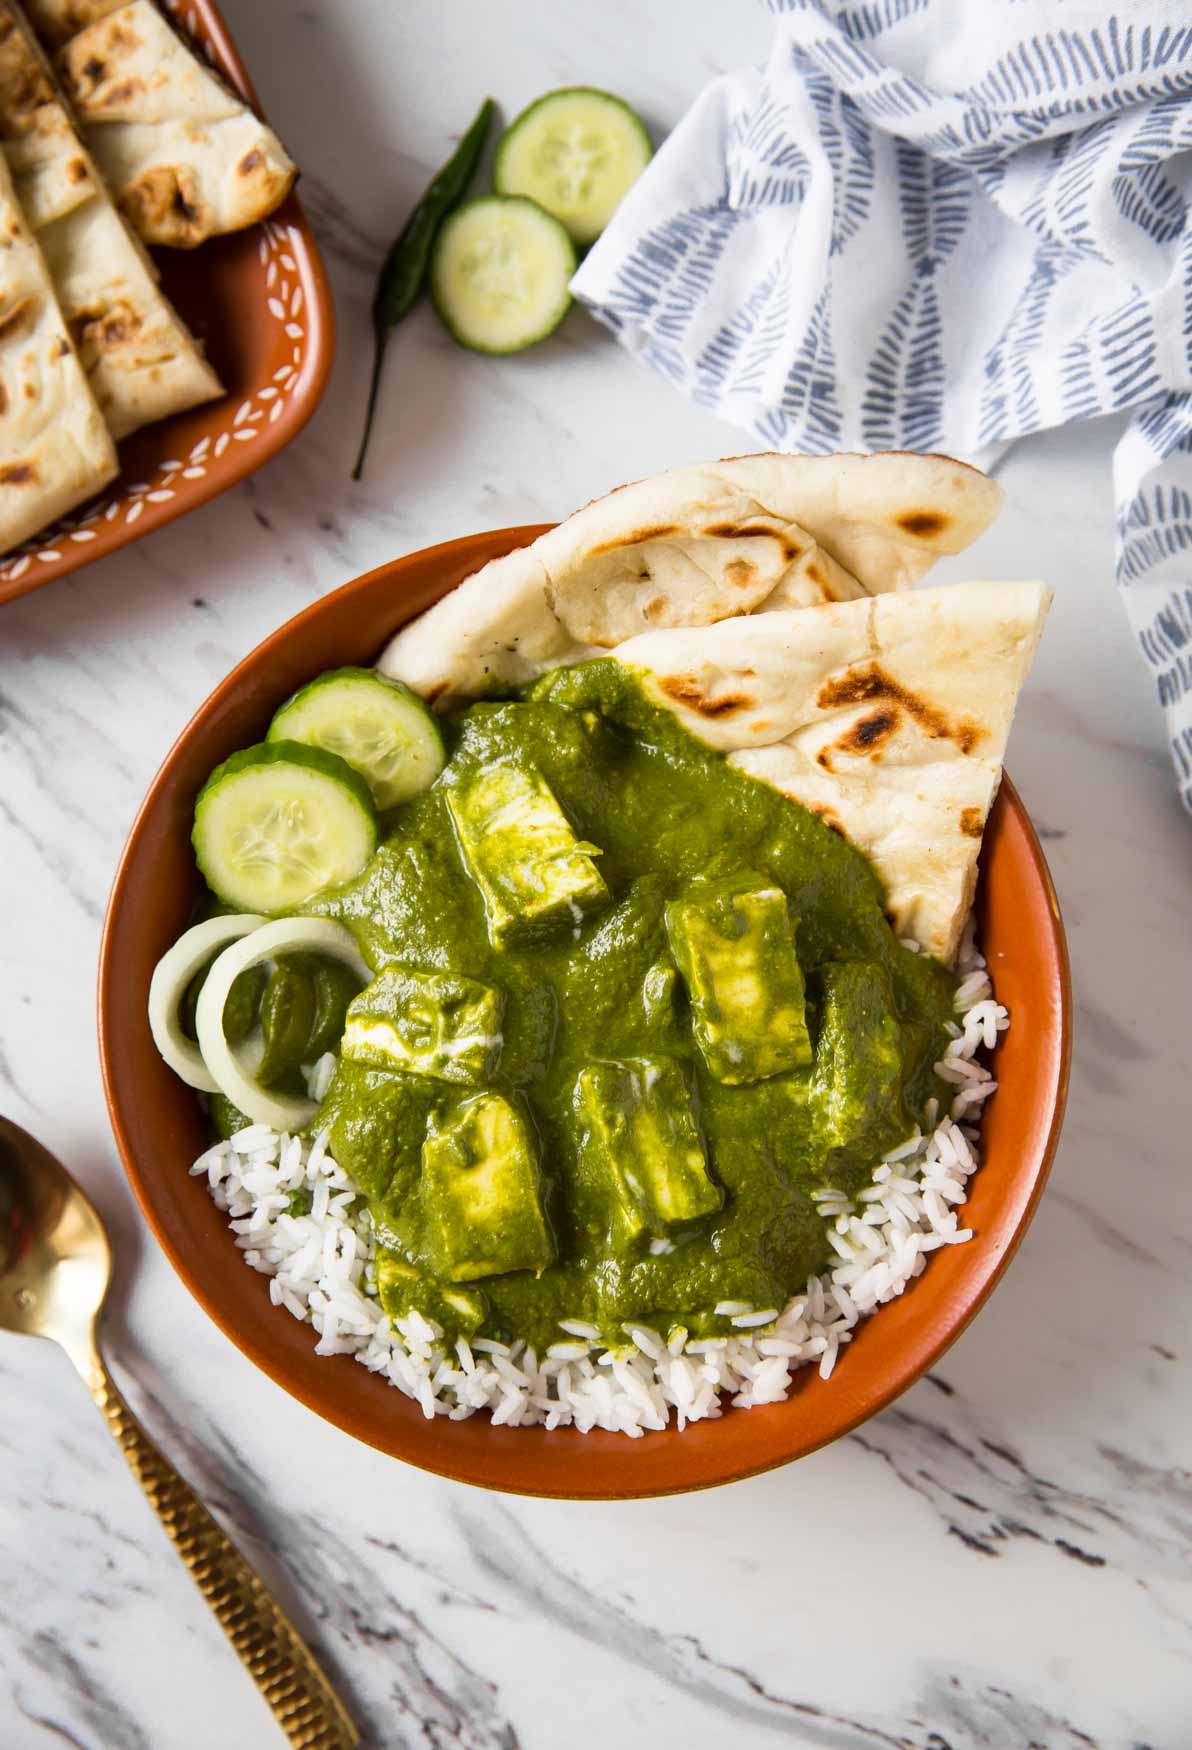
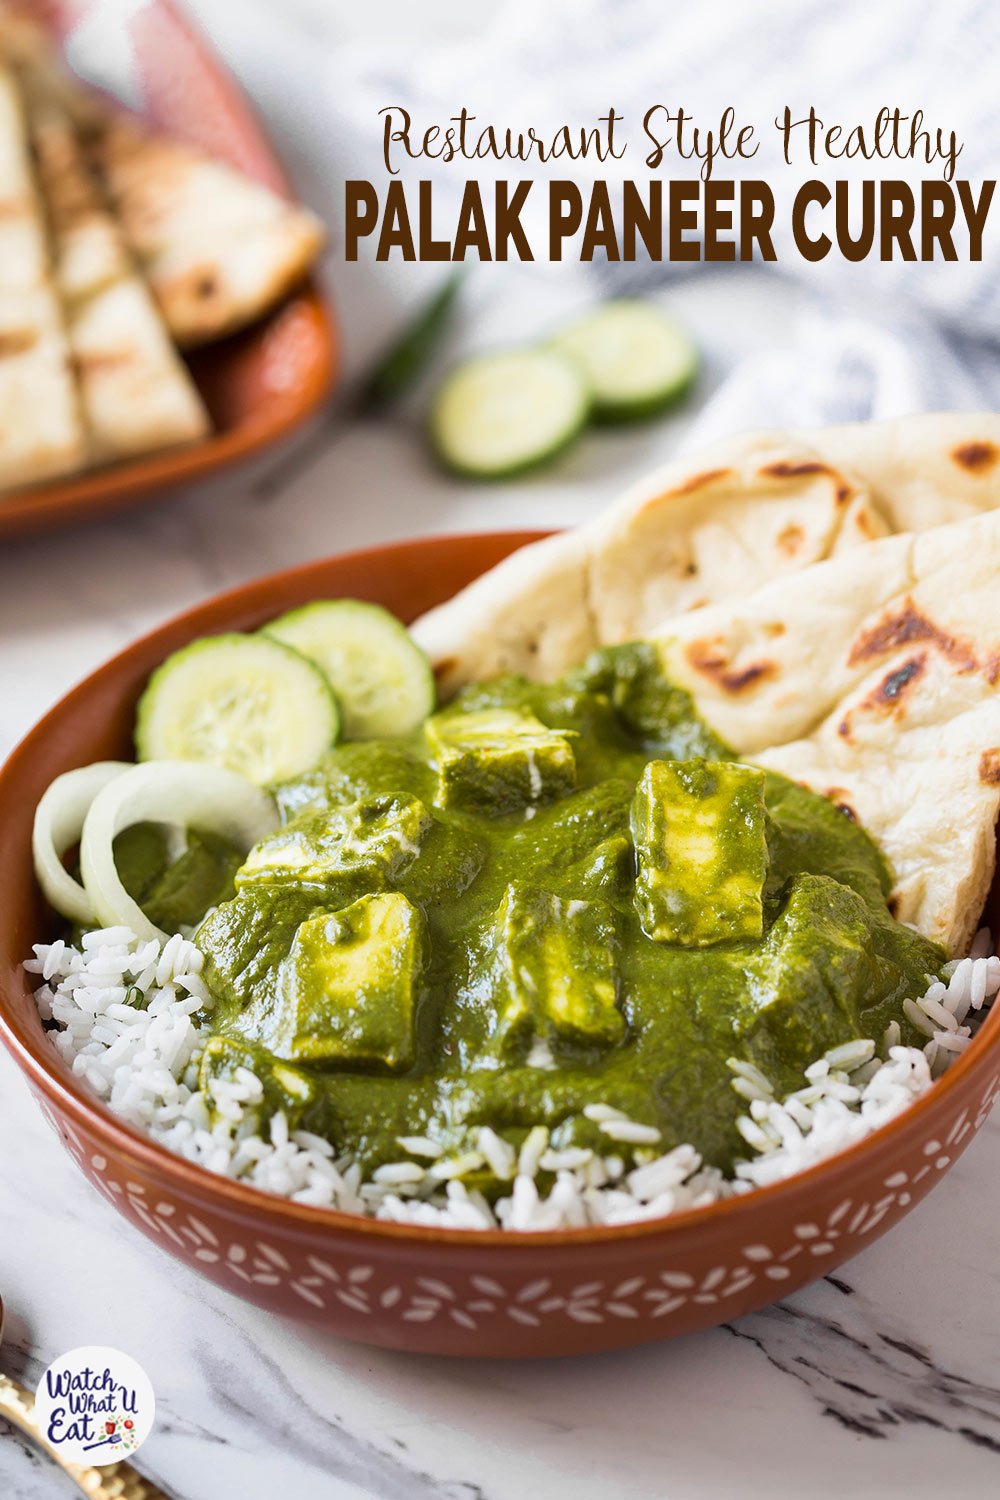
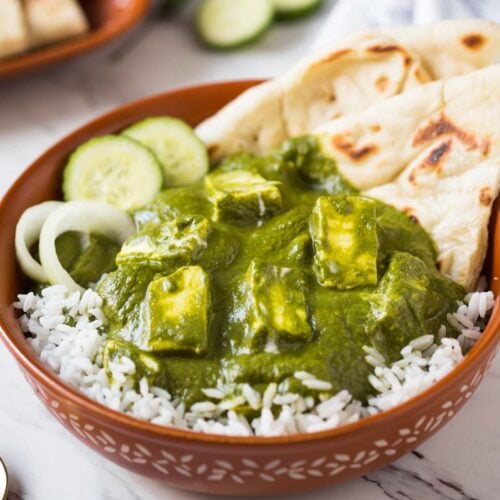
    Palak paneer curry over a bed of rice with naan bread in a serving dish.

    Last year I had published a recipe for one pot palak paneer rice. The inspiration for that recipe came from this creamy palak paneer curry. It took me a while to publish this recipe. But finally, I got a chance to bring it to you all.

    Palak: spinach and paneer: Indian cottage cheese. So we can also call it Indian spinach curry.

    If you are in love with authentic Indian flavors then you will definitely like this healthy palak paneer curry. Popularly it is also known as saag paneer in India. And you can make it at home very easily.

    Moreover, it is a perfect option to consume green leafy spinach.

    [feast_advanced_jump_to]
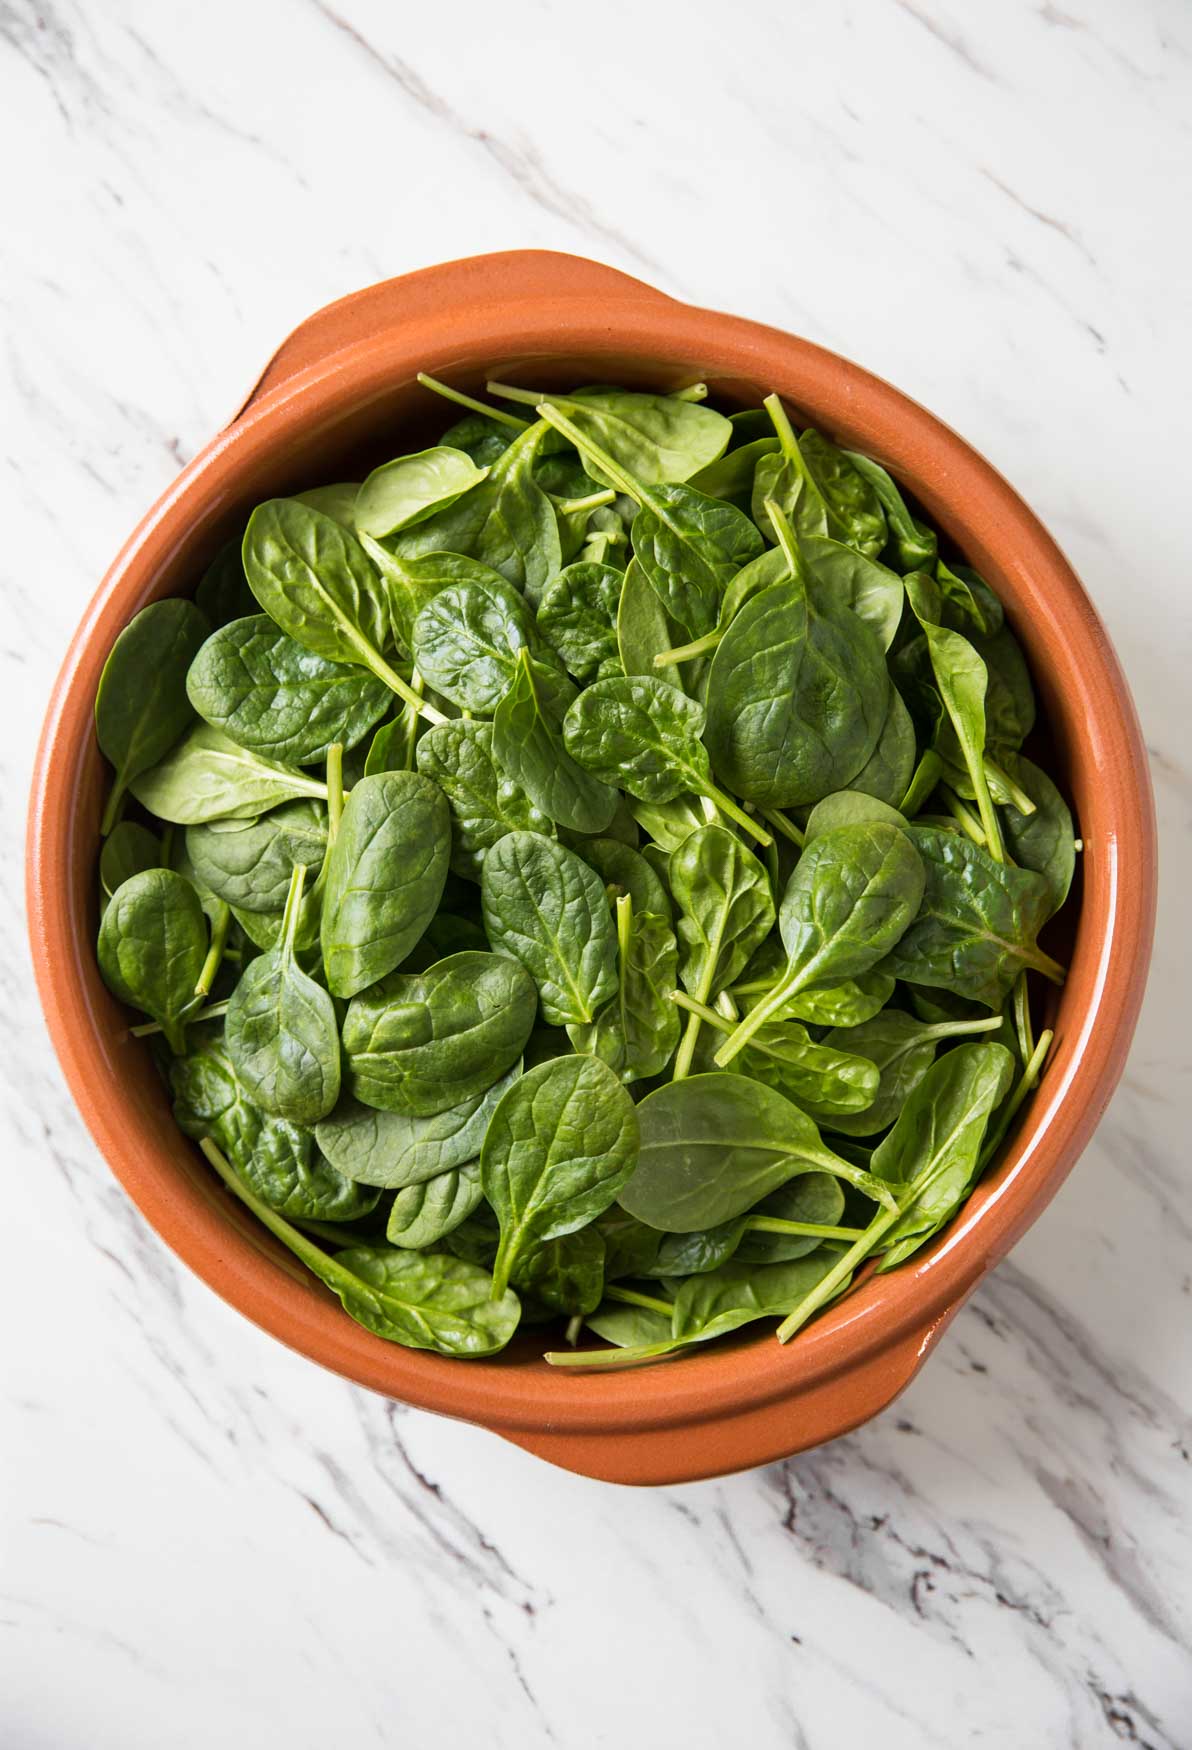
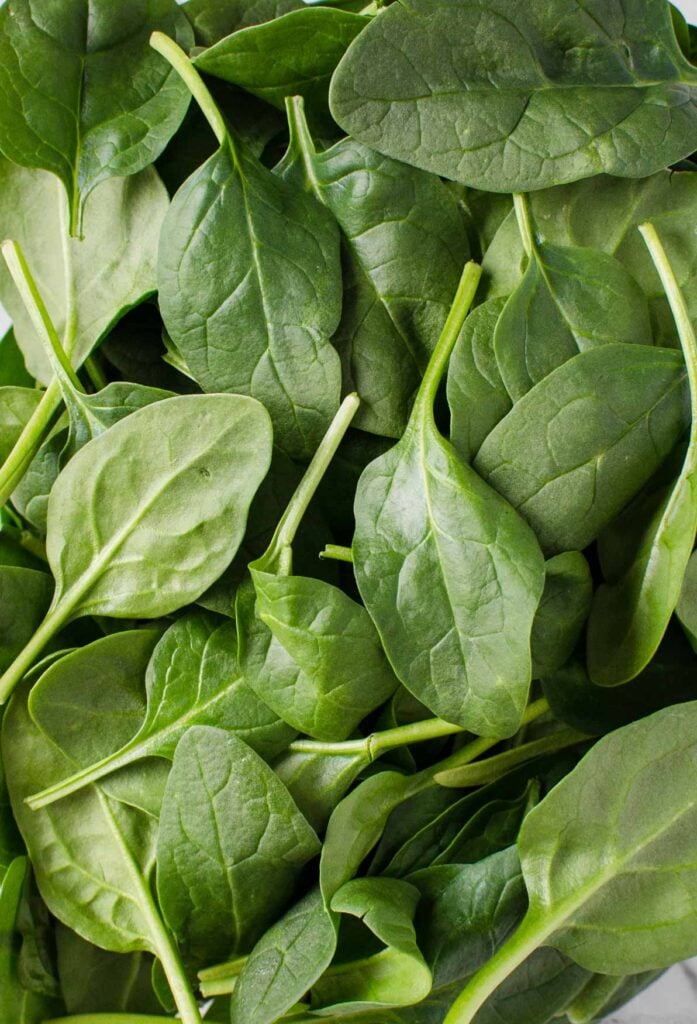
    Fresh spinach in a terracotta dish for making palak paneer curry
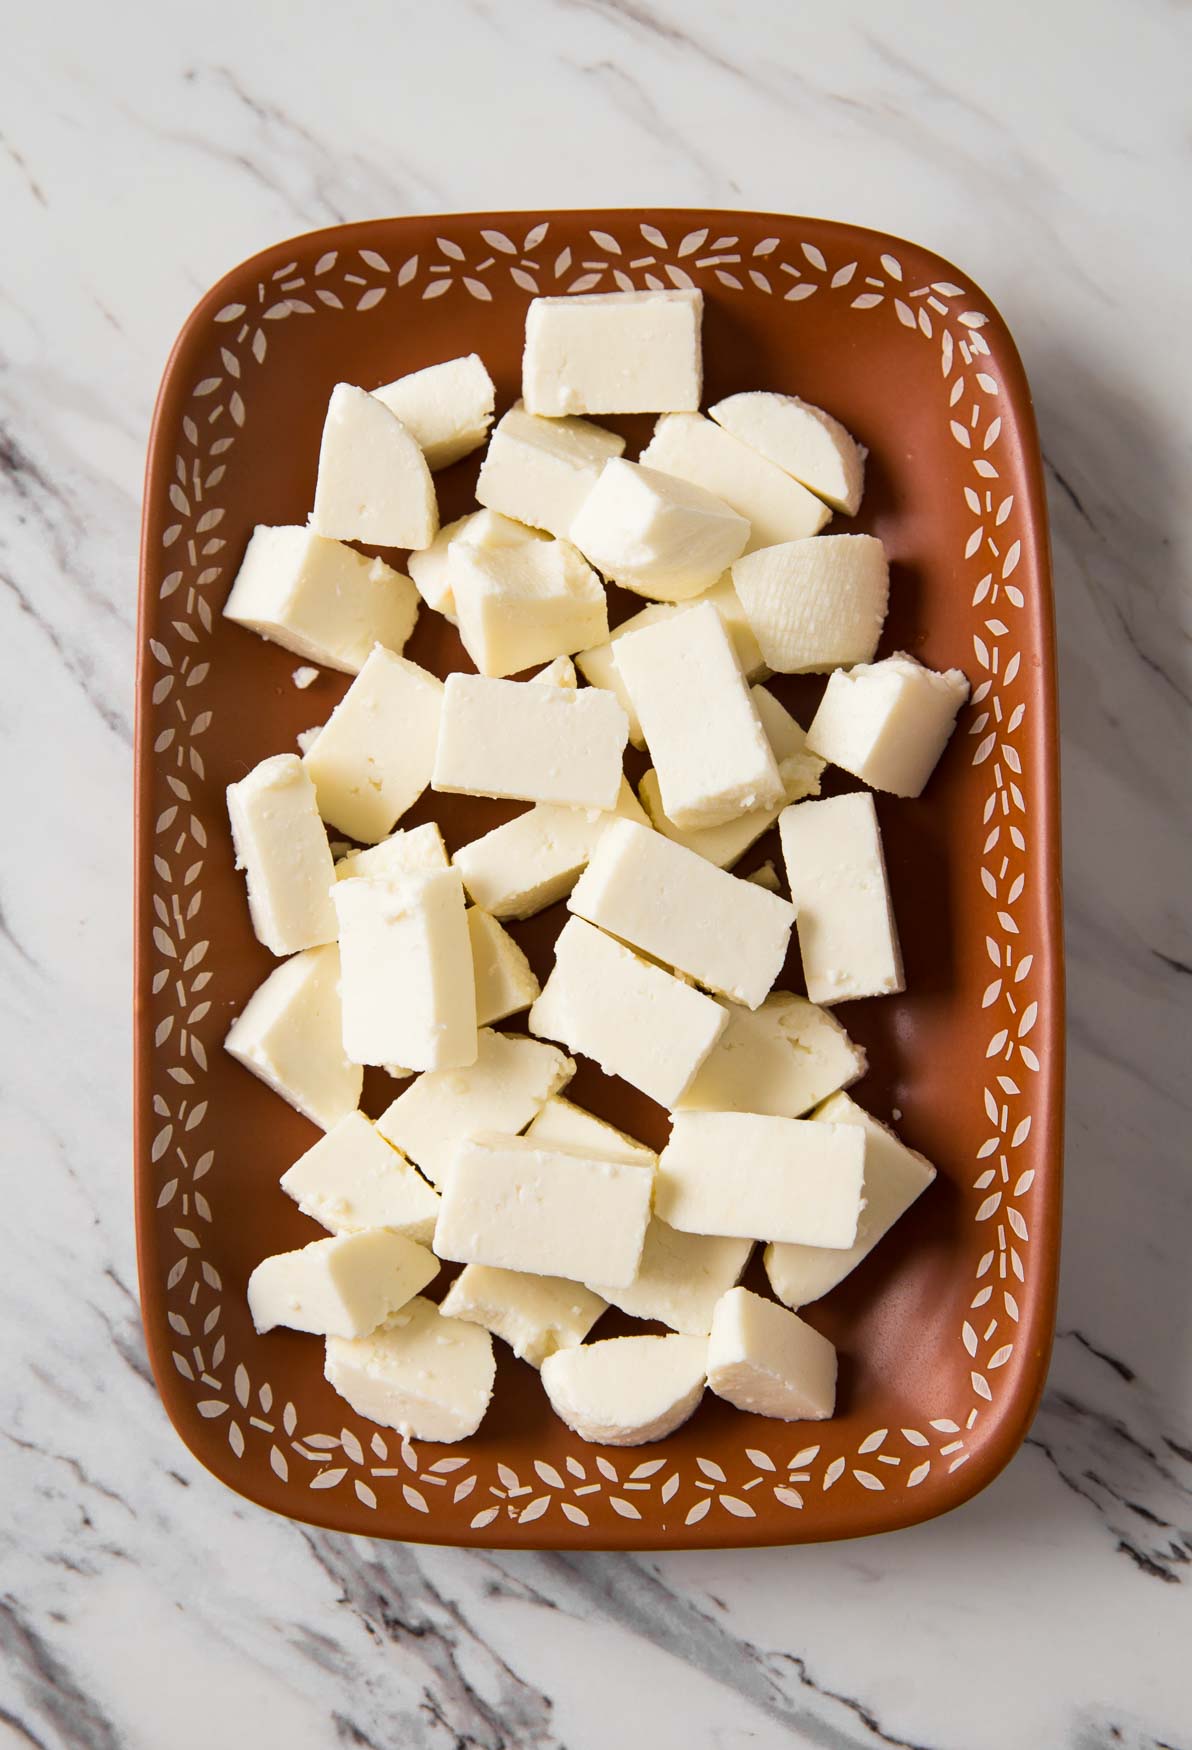
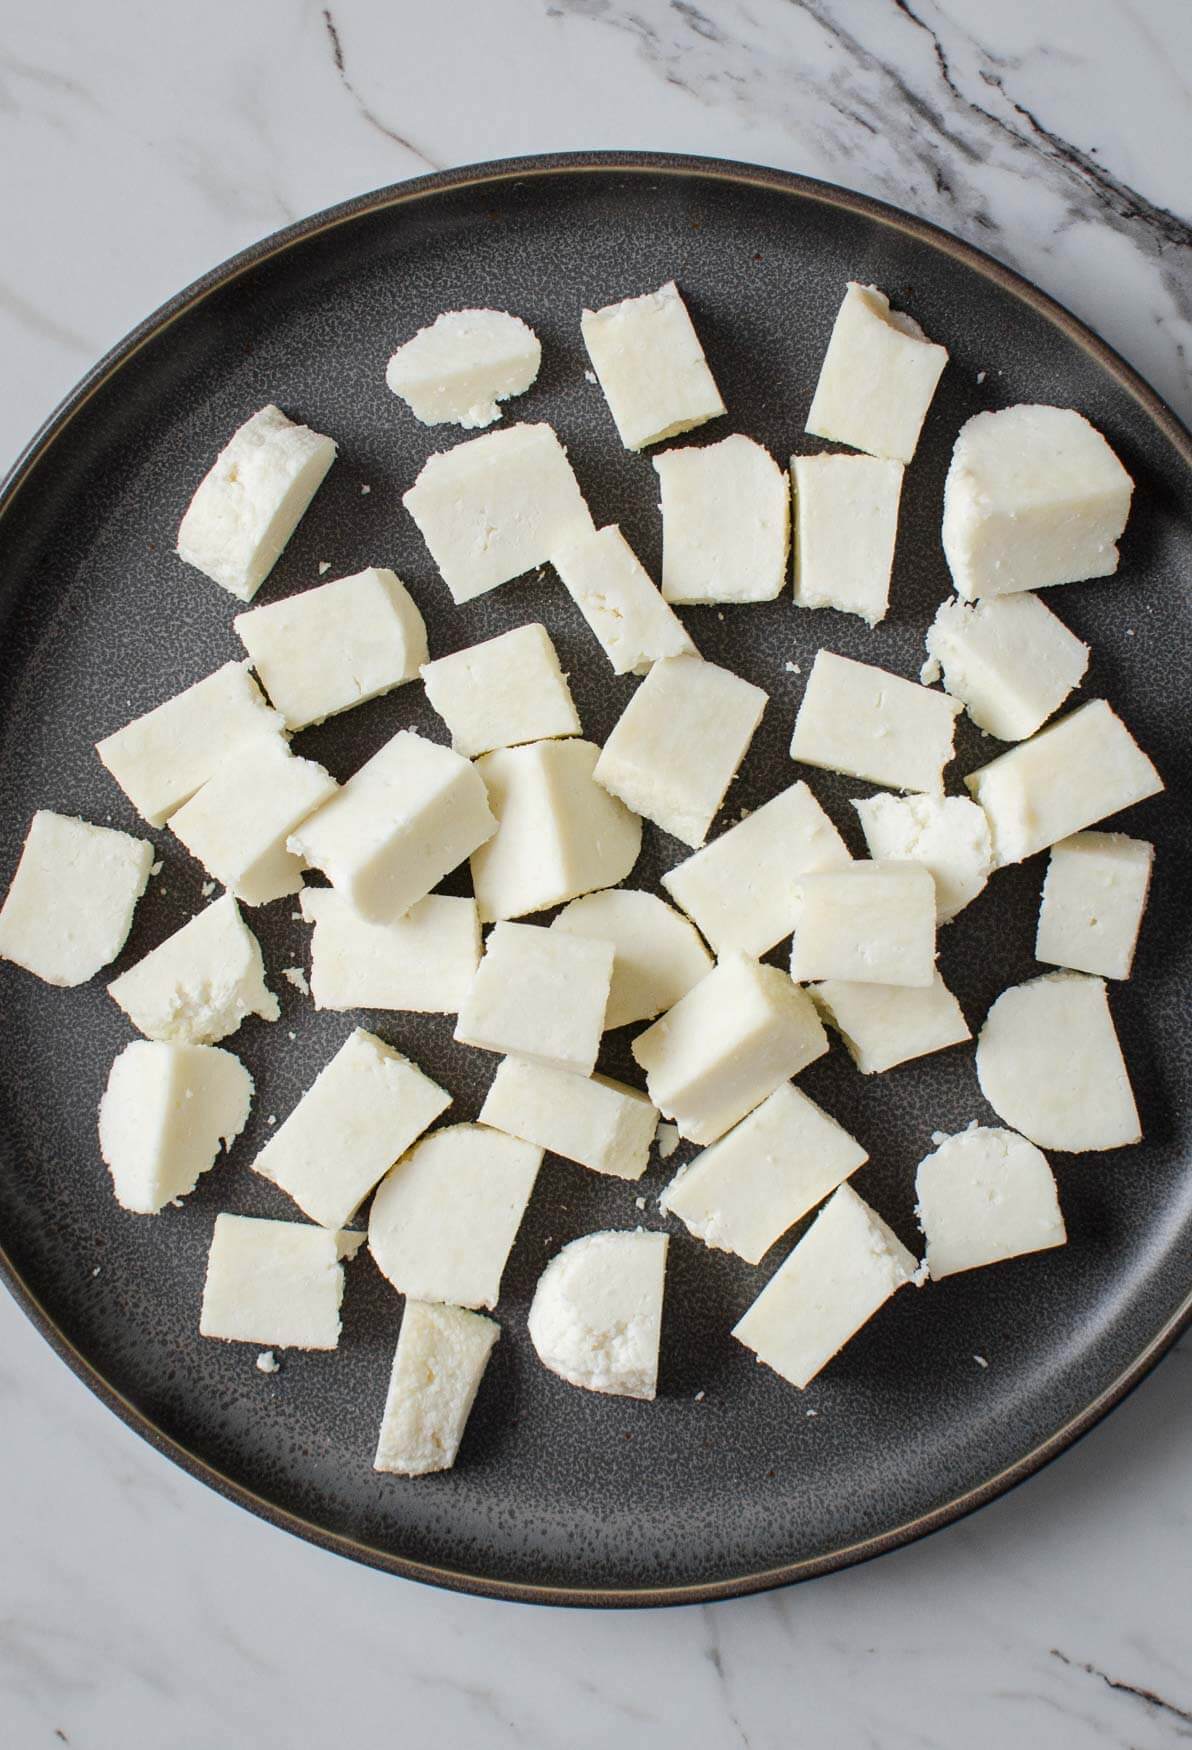
    Fresh paneer cubes in a terracotta dish for making palak paneer curry.

    How to make palak paneer curry

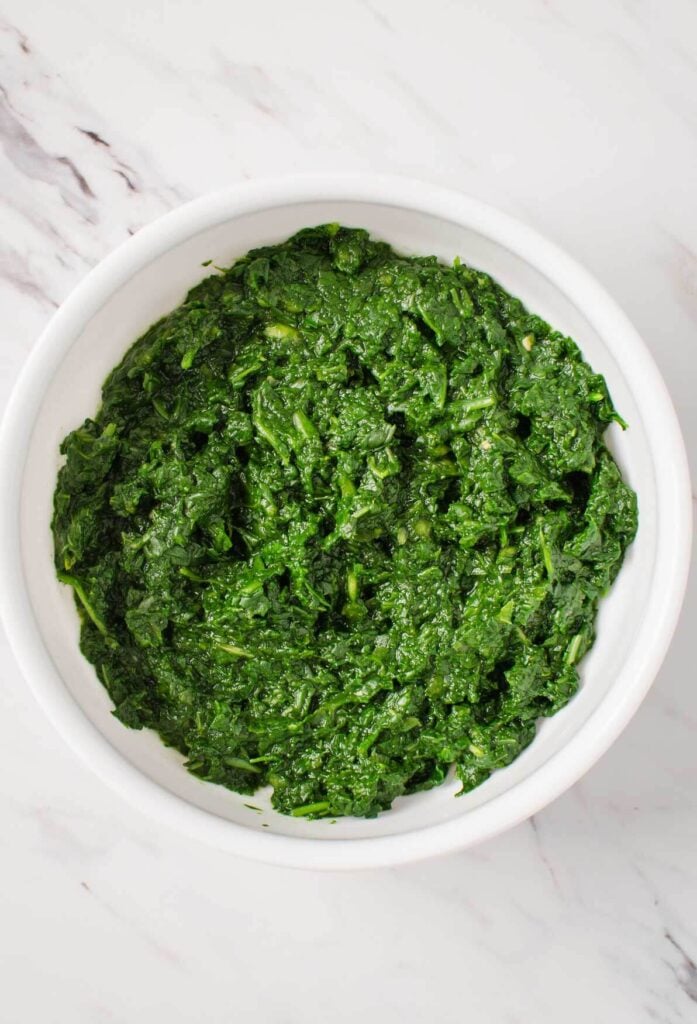
    • In a nonstick pan cook spinach until it wilts down. Take it out into a blender jar.
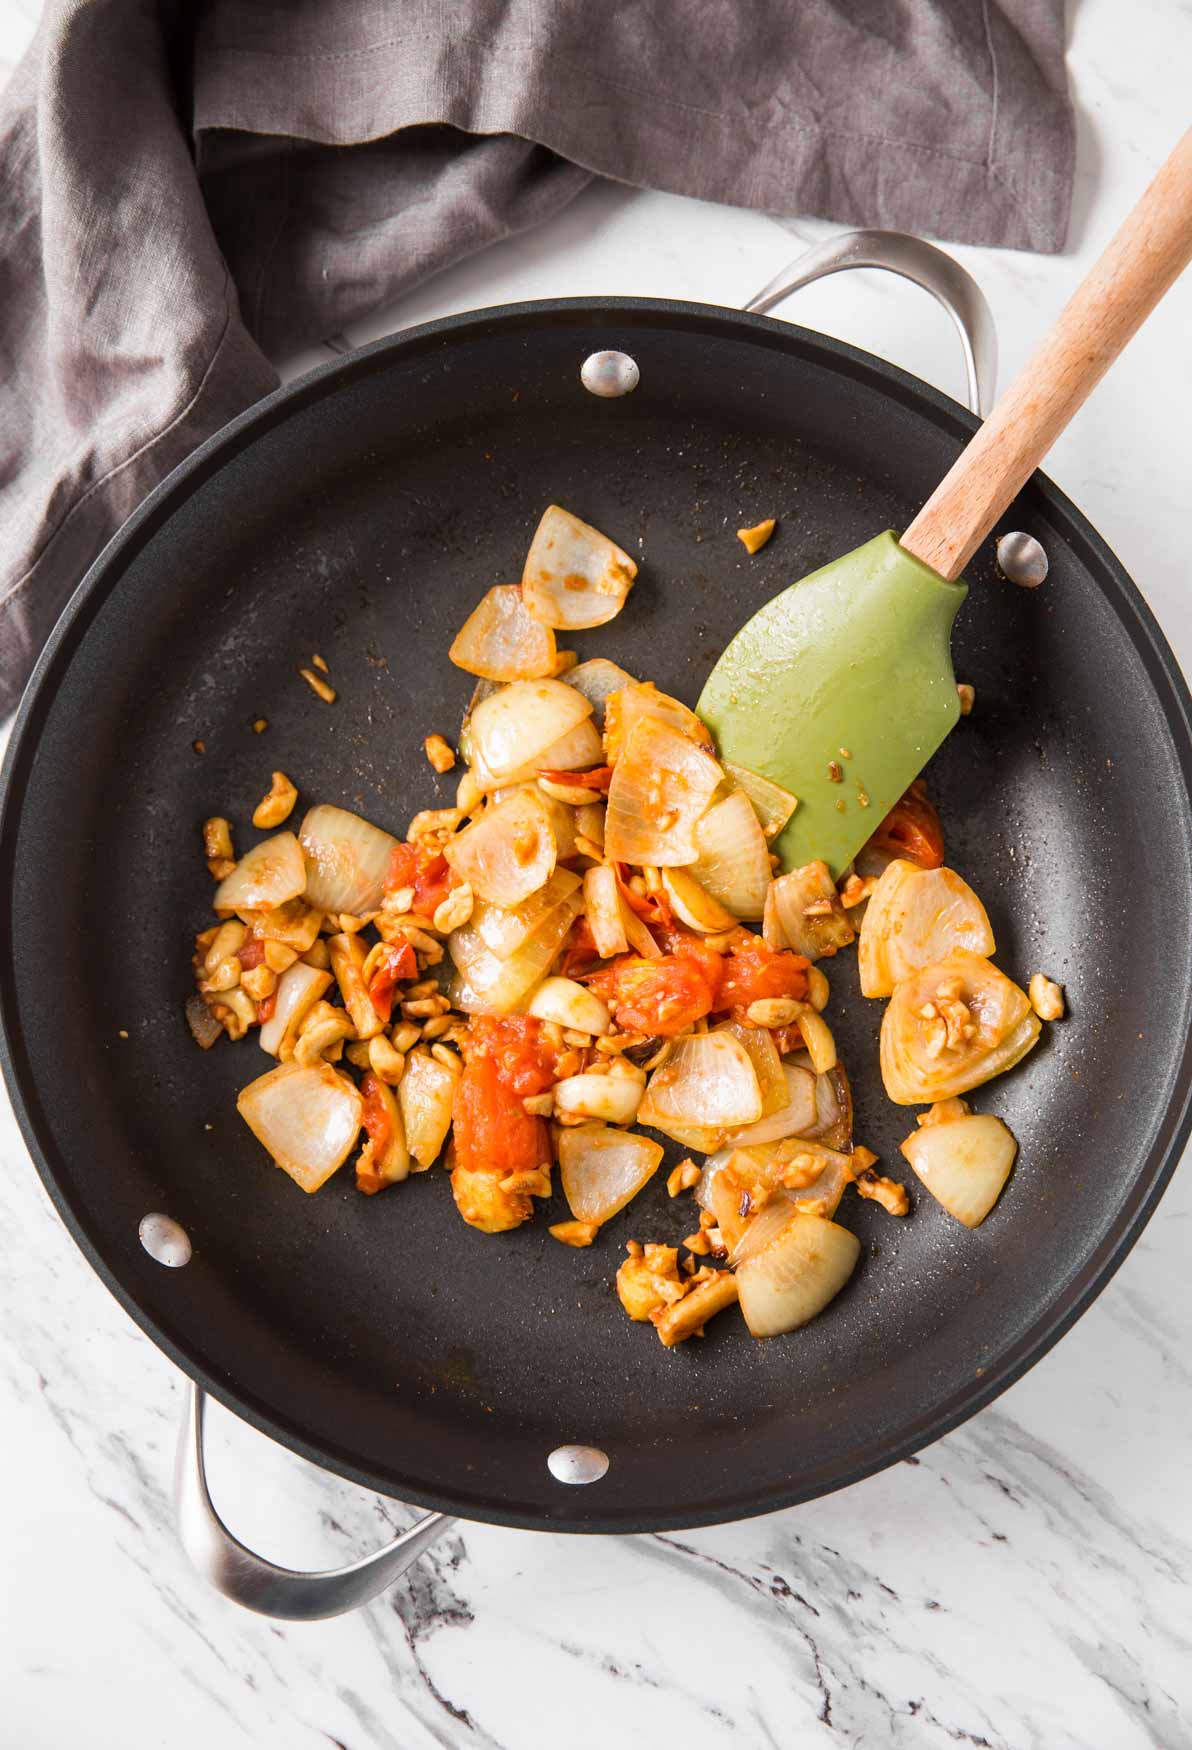
    • In the same pan add some oil and cook garlic, ginger, onion, tomato, and cashew nuts. Add them to the wilted spinach. Add some water and puree the spinach and onion-tomato mixture until creamy.
    • Then in a frying pan fry some chili powder and turmeric powder in some oil. Add spinach puree and mix well.
    • Season with cumin powder, coriander powder, garam masala, and salt. Cook the curry for a few minutes.
    • Finally, add fresh paneer cubes and serve warm.
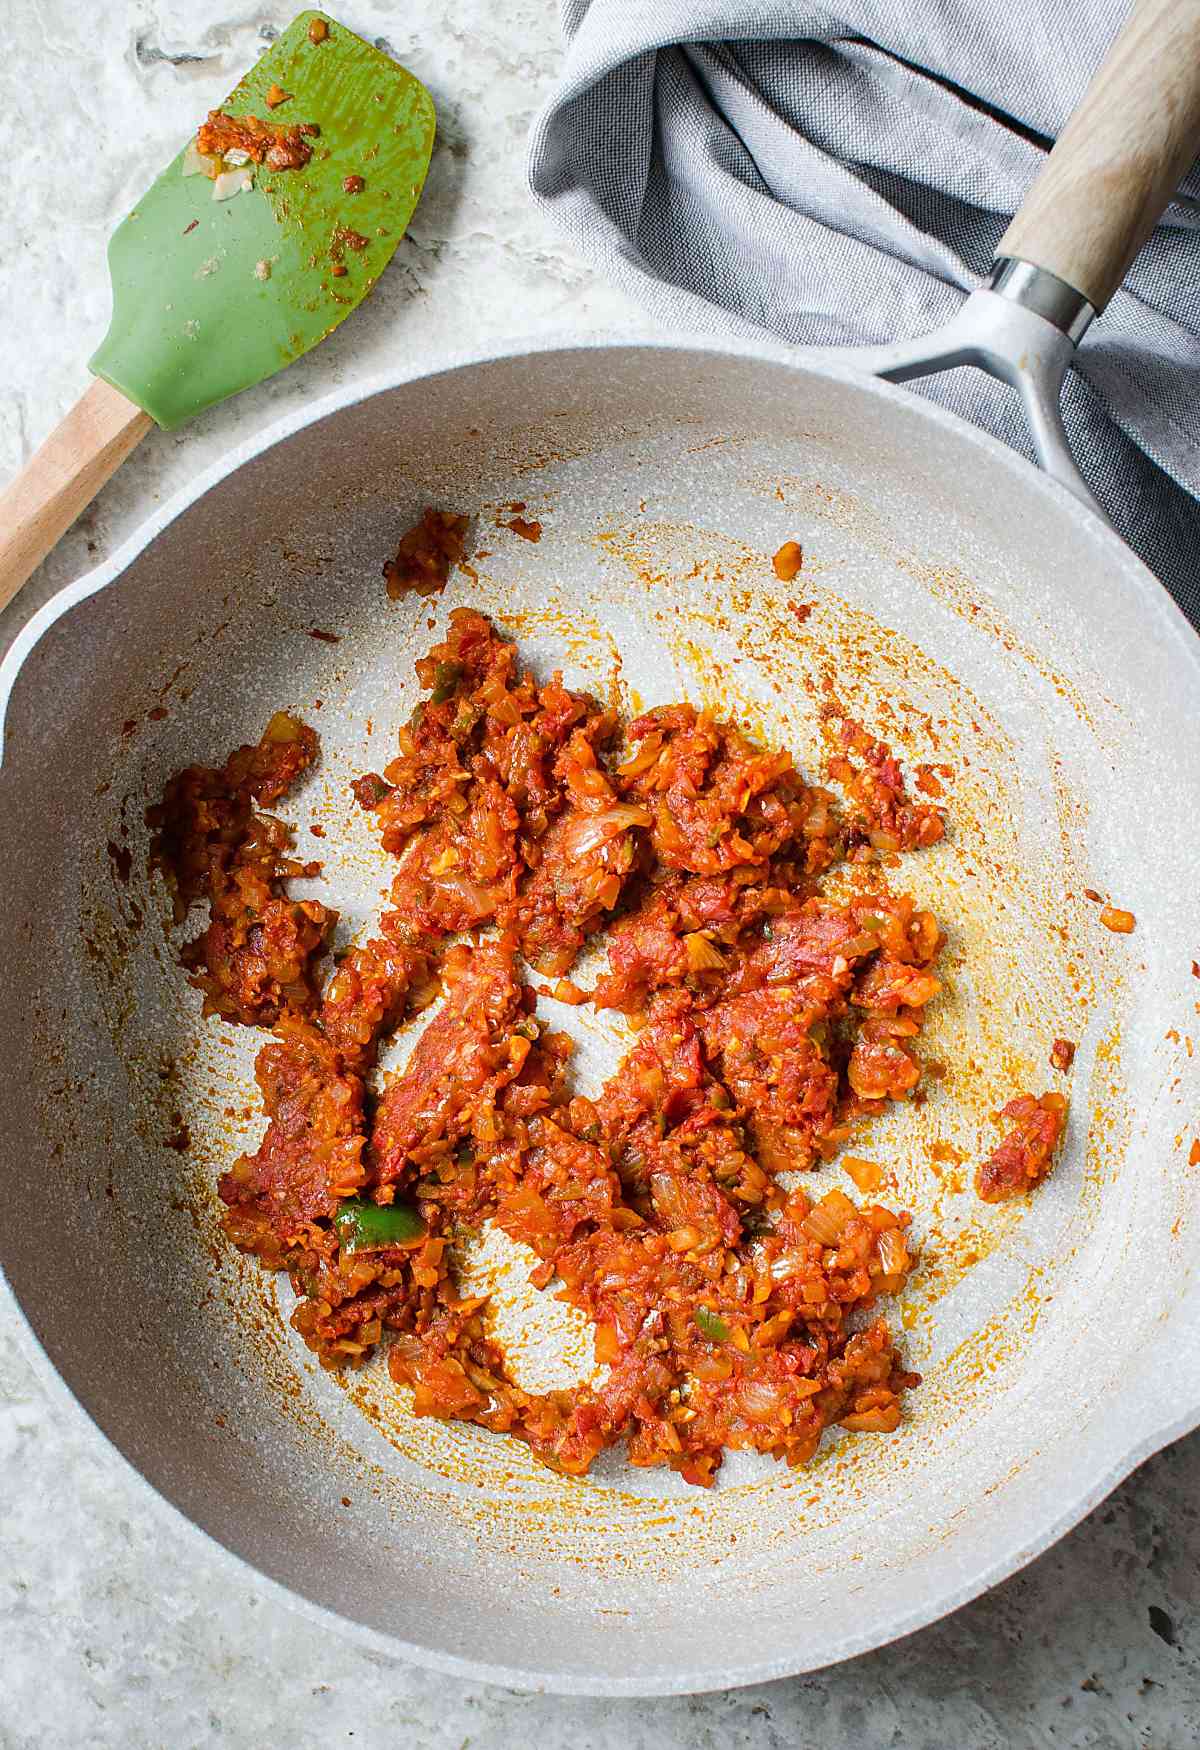
    Cooking onion and tomato mixture in a nonstick skillet for making the base for green spinach curry.

    Serving suggestions

    This creamy palak paneer curry goes very well with plain or garlic naan bread, simple roti (flatbread), plain rice or vegetable rice pulao, etc. For the party menu, you can also include it with vegetable biryani or chicken biryani and drinks like mango lassi on the side.

    Helpful Tips!

    • Spinach - Use fresh baby spinach leaves for making this dish. And avoid using stems. However, frozen spinach does not work well for this saag paneer curry.
    • Paneer - I usually make paneer at home using reduced-fat milk. Homemade fresh paneer always tastes great. However, you can buy paneer at nearby Indian grocery stores easily.
    • Cashew nuts - To give a creamy texture to the dish use crushed raw cashew nuts. This way, you can avoid using dairy cream and make the palak paneer a bit healthier.
    • To make this Indian spinach curry more aromatic and flavorful use homemade ground cumin powder and coriander powder. Trust me it makes a lot more difference in the flavors and the taste. 
    • Do not overcook the curry. It will lose its bright green color from the spinach and darken the color of the dish.
    Palak paneer curry over a bed of rice with naan bread in a serving dish.

    More Indian curries you will love to try

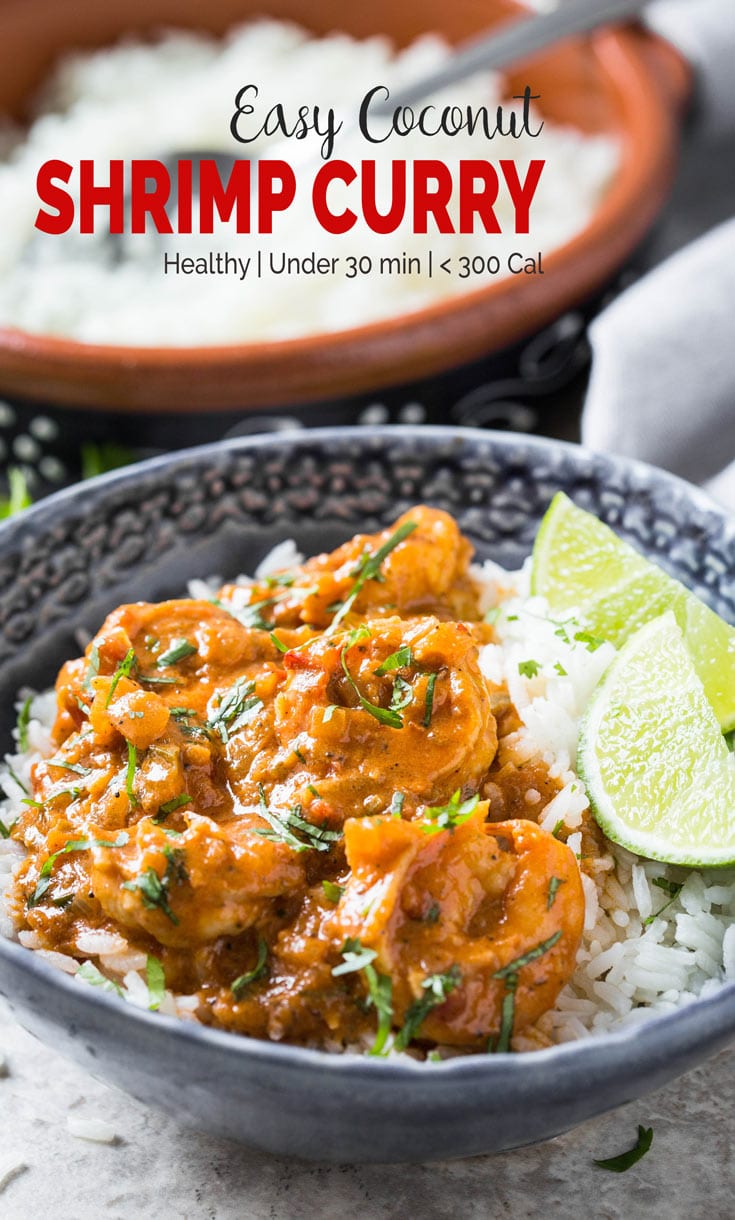
    • Coconut Shrimp Curry
    • Red Lentil Curry
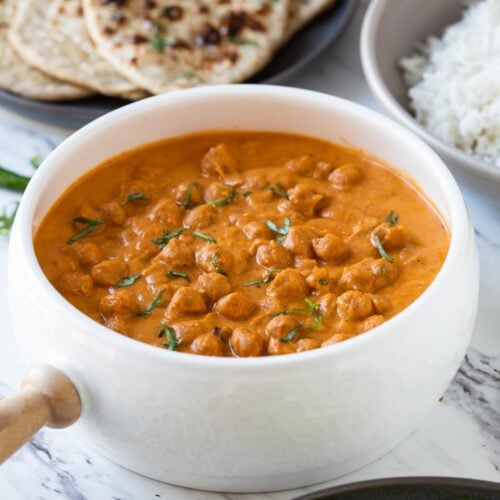
    • Coconut Chickpea Curry
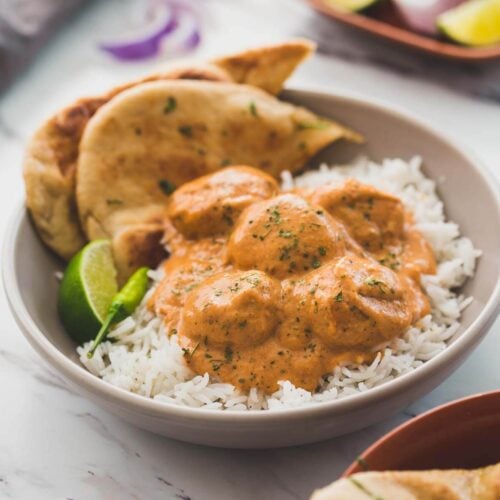
    • Chickpea Tikka Masala
    This restaurant-style creamy yet healthy palak paneer curry is super easy to prepare at home. Loaded with all authentic Indian flavors and it goes well with naan bread or plain basmati rice. | #watchwhatueat #palakpaneer #spinachrecipe #spinach #vegetarian

    Love this recipe? Please leave a 5-star ⭐⭐⭐⭐⭐ rating in the recipe card below & a review in the comments if you REALLY like this recipe. Thank You!

    📖 Recipe

    Soft paneer dunked in creamy green spinach curry to prepare authentic Indian palak paneer curry. Healthy, quick and easy recipe for saag paneer curry that you can serve with naan bread or cooked rice. | #watchwhatueat #palakpaneer #spinachrecipe #spinach #vegetarian
    Print Pin
    5 from 1 vote

    Restaurant Style Healthy Palak Paneer Curry

    Soft paneer dunked into creamy green spinach curry to prepare this authentic Indian palak paneer curry. Healthy, quick and easy saag paneer curry that you can serve with naan bread or cooked rice.
    Course: Lunch / Dinner,Main Dish
    Cuisine: Indian
    Prep Time 10 minutes minutes
    Cook Time 15 minutes minutes
    Servings :4
    Calories :209kcal
    Author:Swati Kadam Gulati

    Would you like to save this recipe?

    Email yourself a link to this post and come back to it later!

    Ingredients

    • 11 oz baby spinach
    • 4-5 oz paneer cut into around ¾" cube(Indian cottage cheese
    • ¼ cup loosely packed fresh cilantro
    • 2 teaspoon cooking oil divided
    • 3-4 whole garlic cloves
    • ½" ginger peeled
    • 1 medium onion cut into thick pieces
    • 1 medium red tomato cut into large pieces
    • ¼ cup raw cashews crushed
    • ½ tsp  turmeric powder
    • ½ teaspoon chili powder
    • 1 teaspoon coriander powder
    • 1 teaspoon cumin powder
    • ½ teaspoon garam masala
    • 1 ¼ cup water
    • salt to taste

    Instructions

    • Heat a large nonstick pan on medium heat. Add two tablespoon of water and then immediately add spinach leaves. Cover the pan with a lid and steam the spinach for 2-3 min.
    • Then remove the wilted spinach into a blender jar. Keep it aside.
    • Now in the same skillet heat 1 teaspoon cooking oil. Add garlic cloves, ginger pieces, and chopped onion. Cook for 2-3 min or until light golden brown.
    • Add tomato pieces, crushed cashew nuts and cook for 3-4 min or until the tomato softens. Once done take out this mixture and add it to the wilted spinach in the blender jar. Also, add fresh cilantro leaves, water and blend everything to make a puree.
    • Clean the same skillet (see the note) and heat the remaining 1 teaspoon oil on low-medium heat.
    • Add turmeric powder and chili powder and fry it for 10-15 seconds. Immediately add spinach puree and mix well.
    • Now add coriander powder, cumin powder, garam masala and salt to taste. Mix well, cover and cook the mixture for five minutes on low heat.
    • Add paneer cubes and turn the heat off. Cover and let it sit for 5 more min. Serve warm.

    Notes

    1. Paneer - To lower down the fat content use reduced fat paneer if you can find it in stores. I usually make paneer at home using low-fat milk. You can also saute the paneer to get a light brown crust on them before adding into the spinach curry.
    2. Add jalapeno or green chilies to the wilted spinach before blending if you want a hot or spicy palak paneer curry.
    3. Whenever possible use homemade roasted cumin powder and coriander powder. It really gives fresh flavors and aroma to the dish.
    4. For making this recipe I use the same skillet in every step mentioned in the instructions. After taking out cooked onion and tomato add 2-3 tablespoon of water to the skillet. Let the heat stay on. Hold a kitchen paper towel with a long tong and wipe the skillet. It cleans out the pan very easily and makes it ready for the next step.

    Nutrition

    Calories: 209kcal
    Tried this recipe?Tag us on Instagram @watchwhatueat or tag #watchwhatueat! OR leave us a comment & rating below. Your feedback is very important to us.

    1 Comment

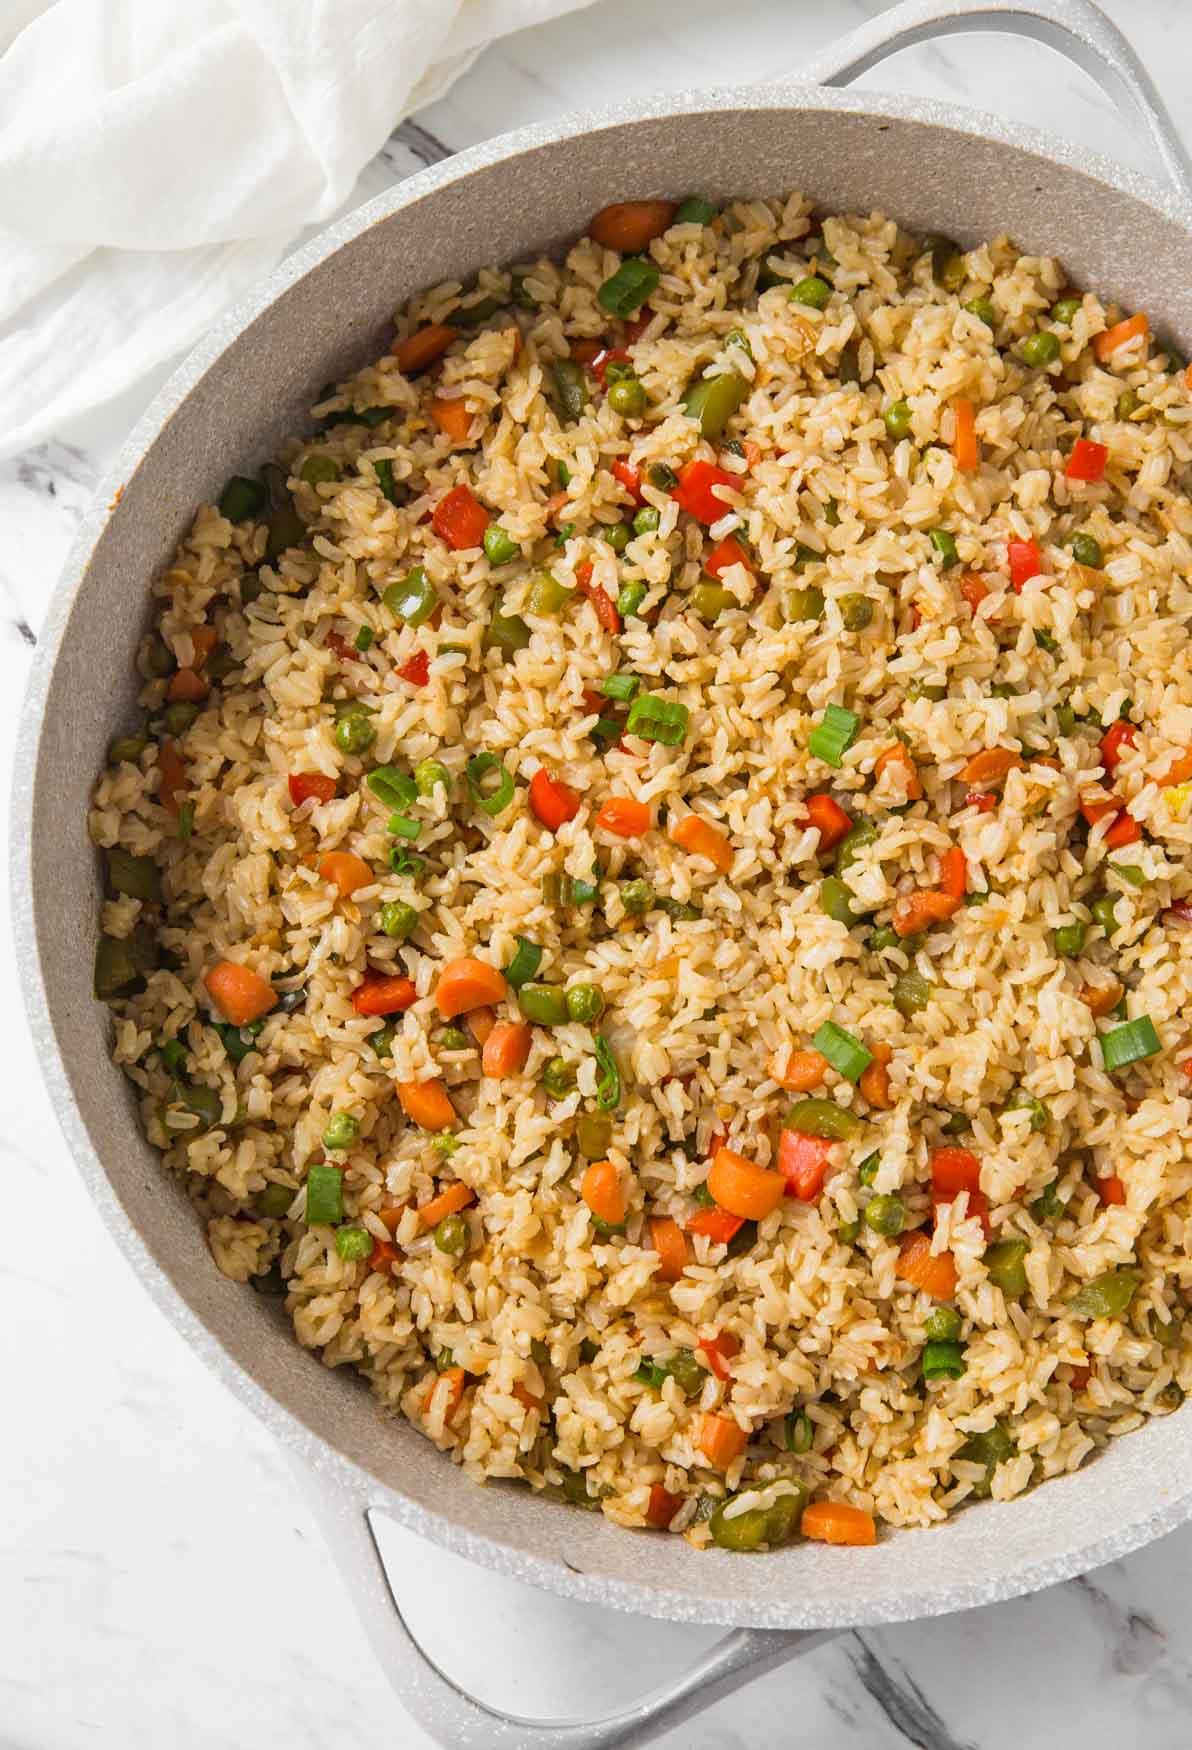
    Learn how to make healthy fried brown rice with fresh vegetables. A simple, delicious and wholesome vegetable fried rice recipe that is better than takeout

    Learn how to make healthy fried brown rice using this simple and easy recipe. A wholesome meal with fresh ingredients and way better than takeout. And, a perfect way to incorporate whole grains into your diet.

    Vegetable fried rice in a large skillet.

    If you feel some resistance to eating fiber-rich brown rice then try these recipes like Mexican brown rice, cilantro lime brown rice or this easy vegetable fried rice. These will inspire you to cook with brown rice more often.

    Brown rice does taste delicious if you cook it the proper way. And this Asian style fried rice with brown rice is far better and healthier than takeouts. Believe me, you will want to make it again and again.

    [feast_advanced_jump_to]
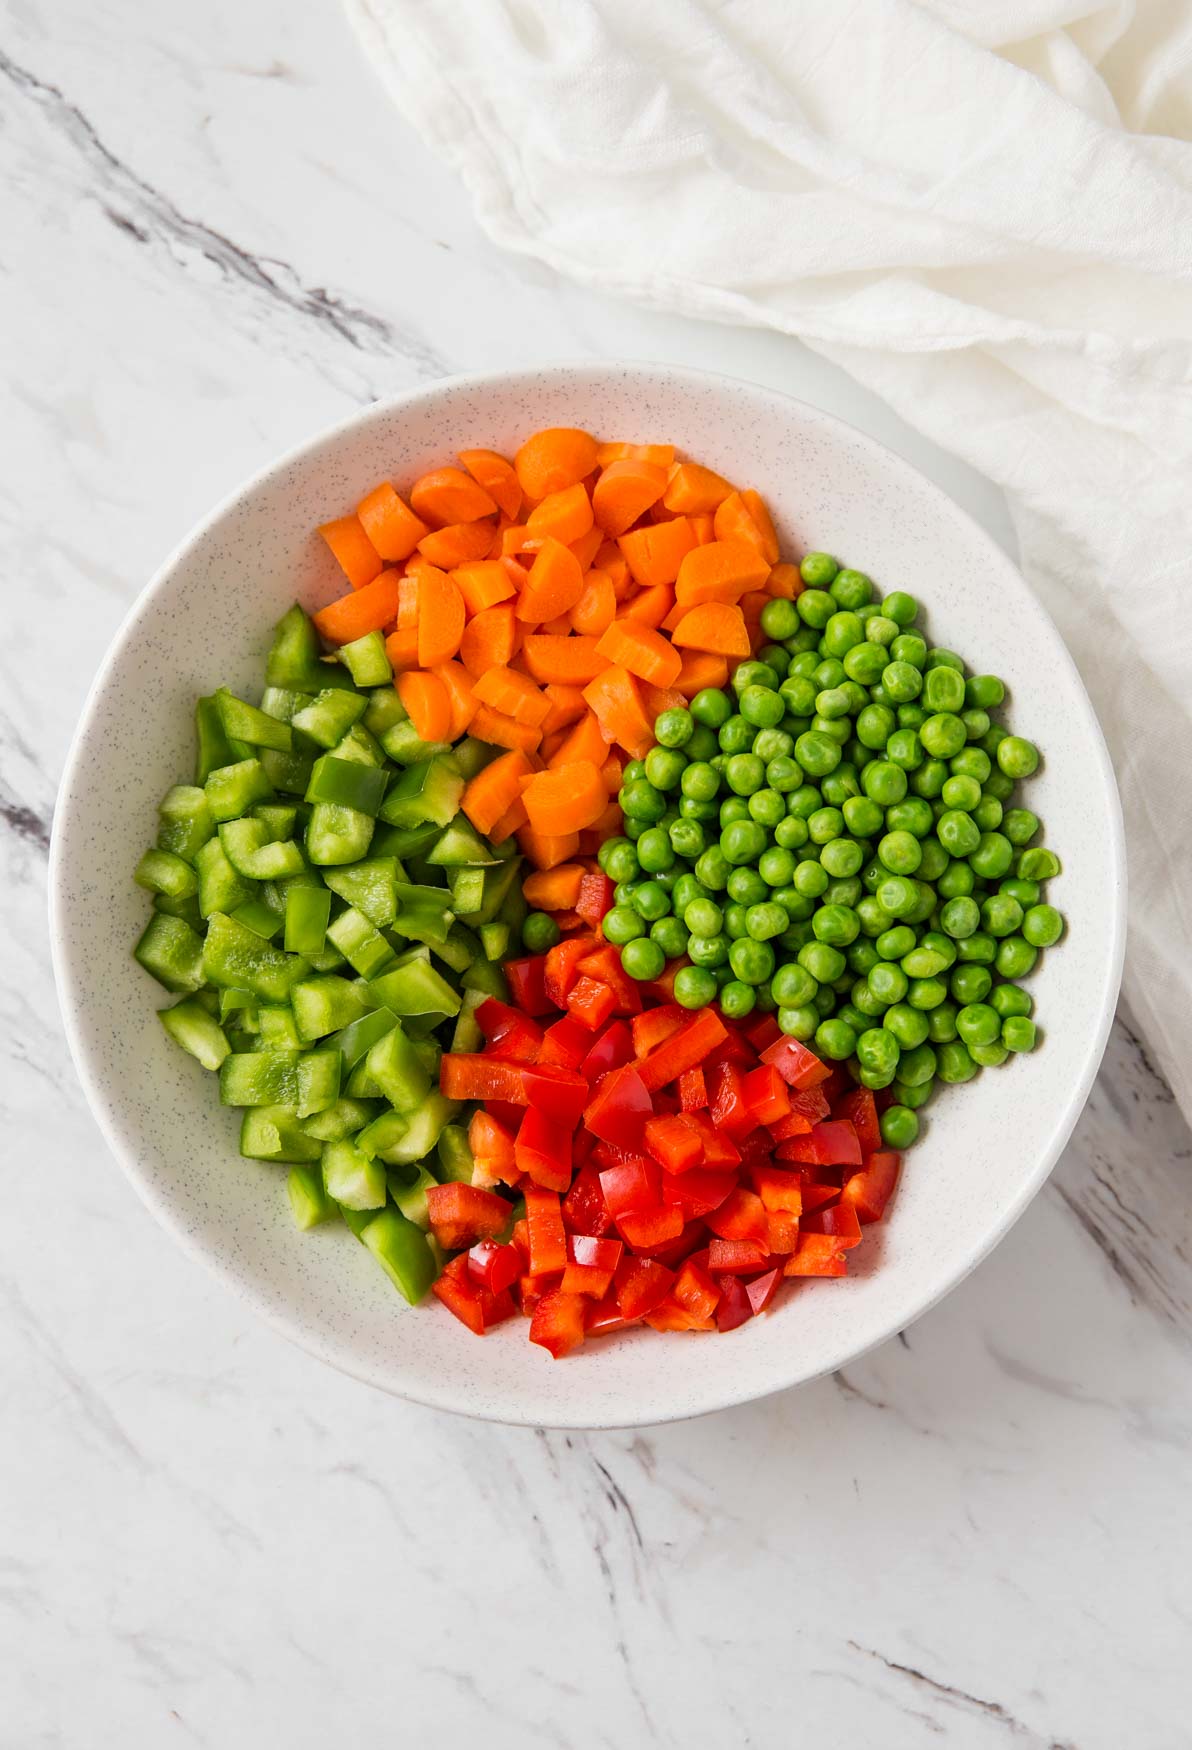
    Diced fresh vegetables in a mixing bowl for making vegetable fried rice.

    How to make healthy fried brown rice

    • In sesame oil fry some garlic, ginger, and scallions. 
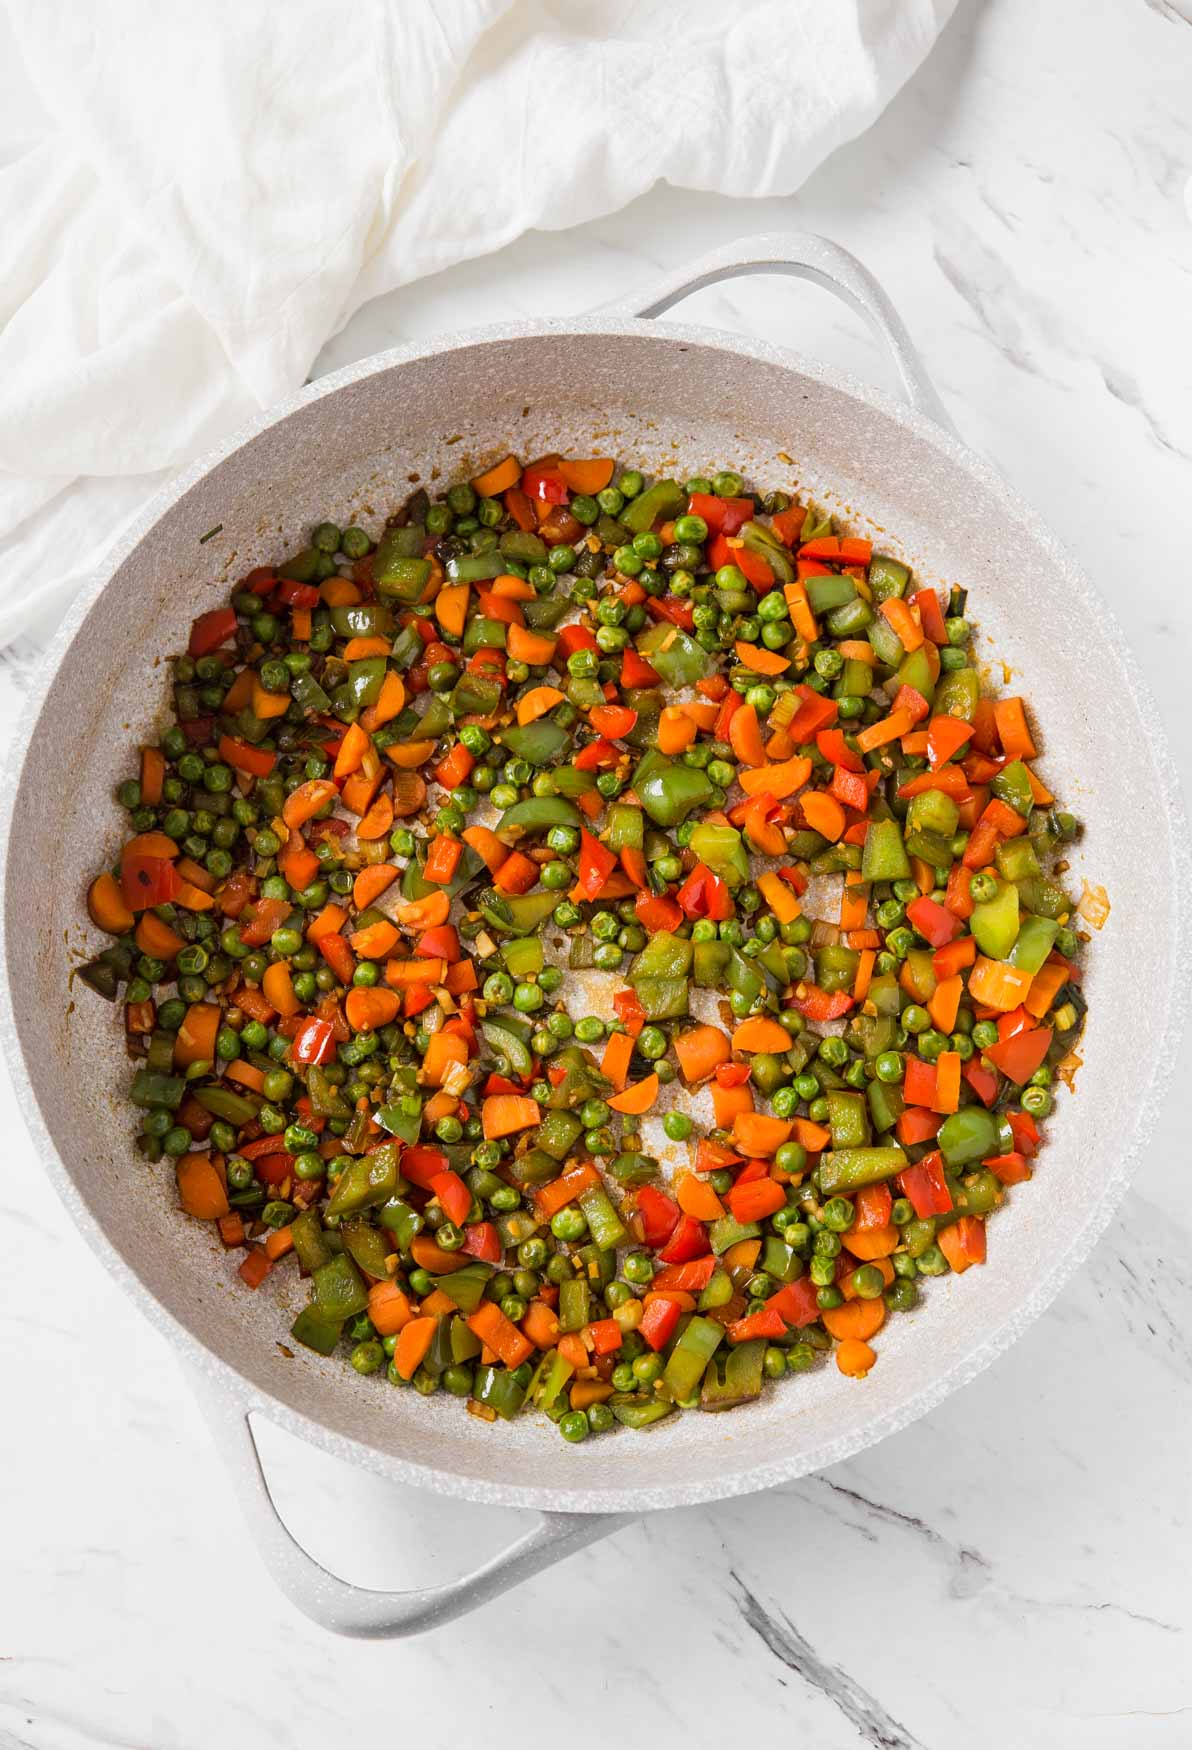
    • Then add diced fresh vegetables and cook for a few minutes or until softens. 
    • Now add soy sauce, rice vinegar and mix well. 
    • Finally, add cooked brown rice and mix well with vegetables. Garnish with fresh sliced green scallions and serve warm. 
    Stir-fried fresh vegetables in a large skillet for making vegetable healthy fried brown rice.

    Helpful tips!

    • Brown rice - preferably use Jasmine brown rice for making this Asian fried brown rice. However, it is not mandatory. Sometimes I also use long grain brown rice if I don't have Jasmine rice handy. Make sure the rice is perfectly cooked according to your likings. 
    • You can also use white rice instead of brown rice. 
    • Dice fresh vegetables like carrots, bell peppers into small cubes for even cooking. 
    • Eggs - you can add eggs and turn it into egg fried rice. It will make this rice even more filling and rich in protein. In some oil scramble a couple of eggs and add them into the prepared vegetable fried rice. 
    • Use a large nonstick skillet or large wok for making this rice dish. It helps to fry and mix vegetables with rice easily.
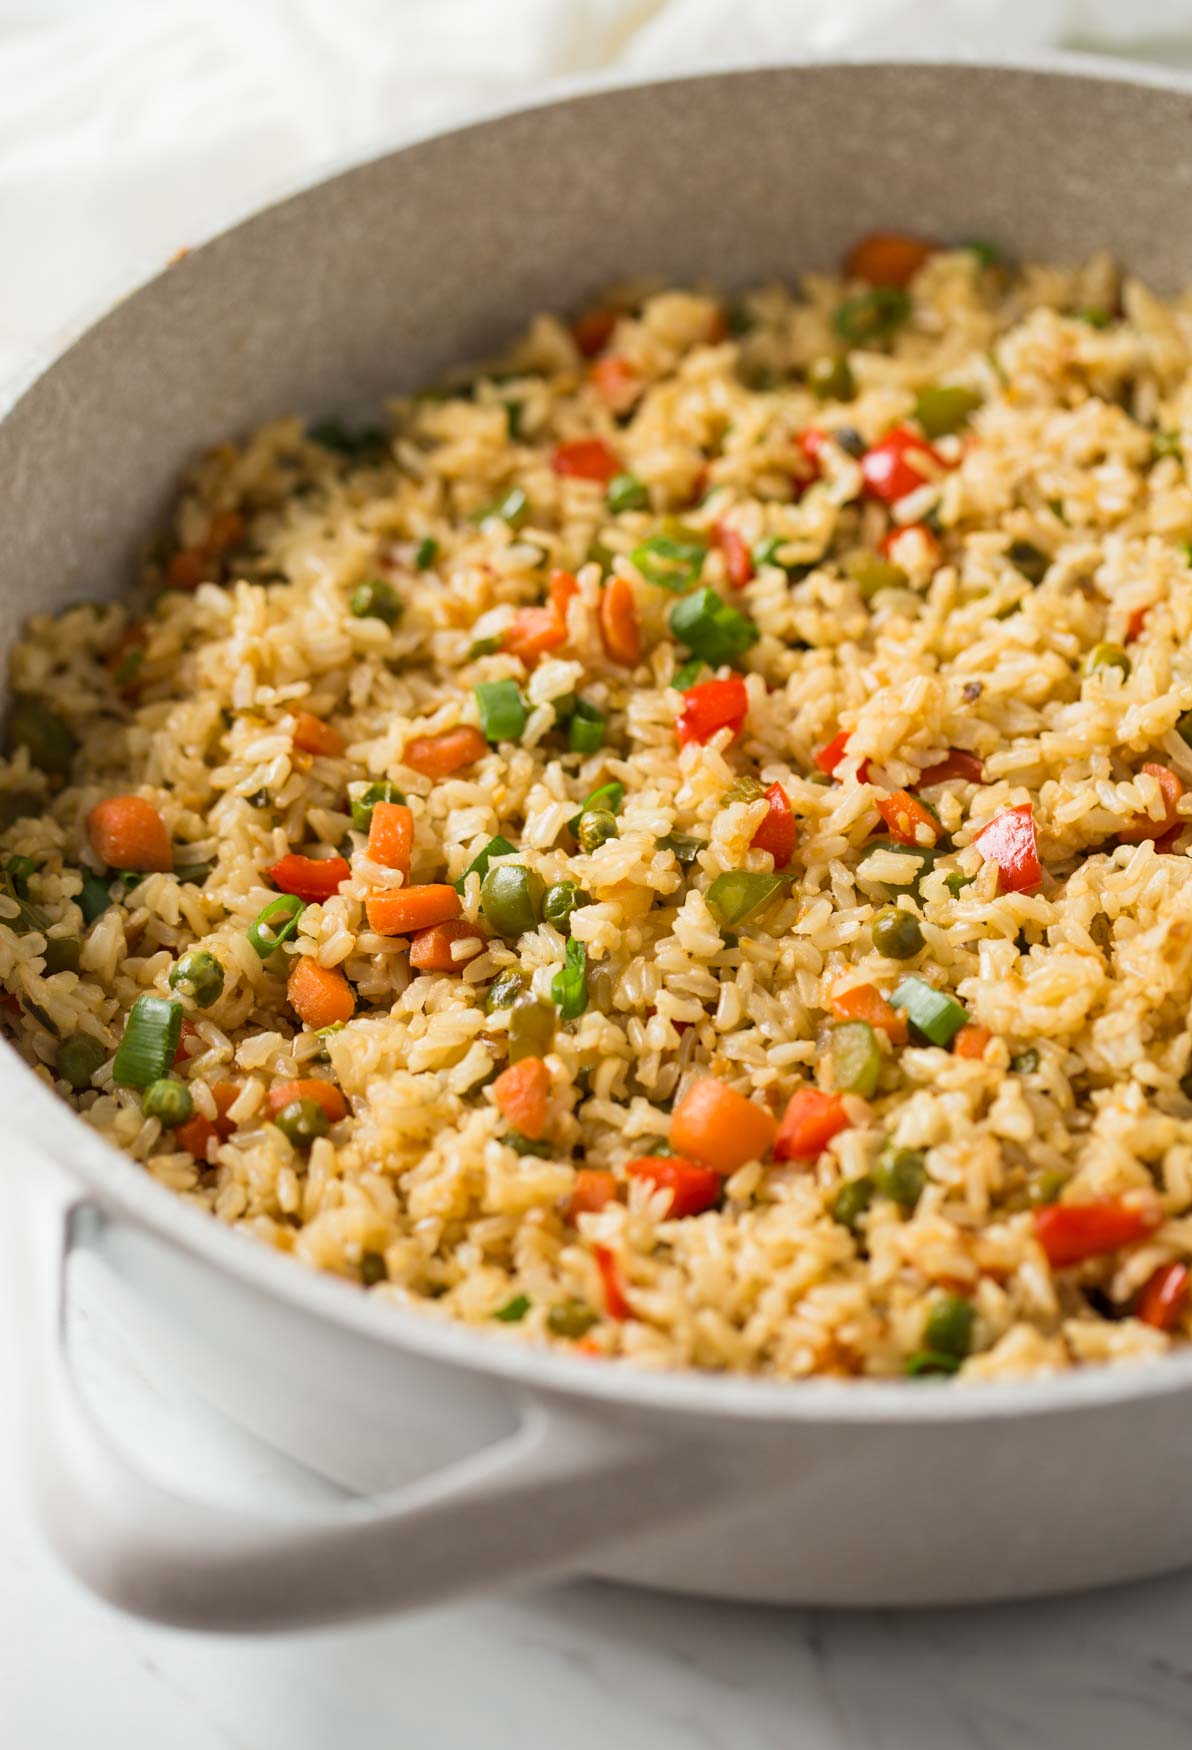
    Healthy vegetable fried rice in a large skillet.

    The best type of rice for fried rice

    In Chinese cooking, medium to long grain white rice is used for making any type of fried rice. Rice that is fluffy and does not clump together upon cooking works best for making fried rice. Usually, the Jasmine rice variety gives you this texture. However, practically any type of cooked rice will work for making this dish.

    Preferably use day old or leftover cooked rice (or fresh but cold rice) for this recipe. The rice slightly dries out over time and makes it easy to separate the grains while mixing and gives a nice fluffy texture to the dish.

    Serving suggestions

    • Serve this healthy fried brown rice on the side of stir fry vegetables or this chili garlic tofu for a complete wholesome meal.
    • Also to make a complete meal you can pair it with starters like shrimp spring rolls or tofu spring rolls, soups, etc.
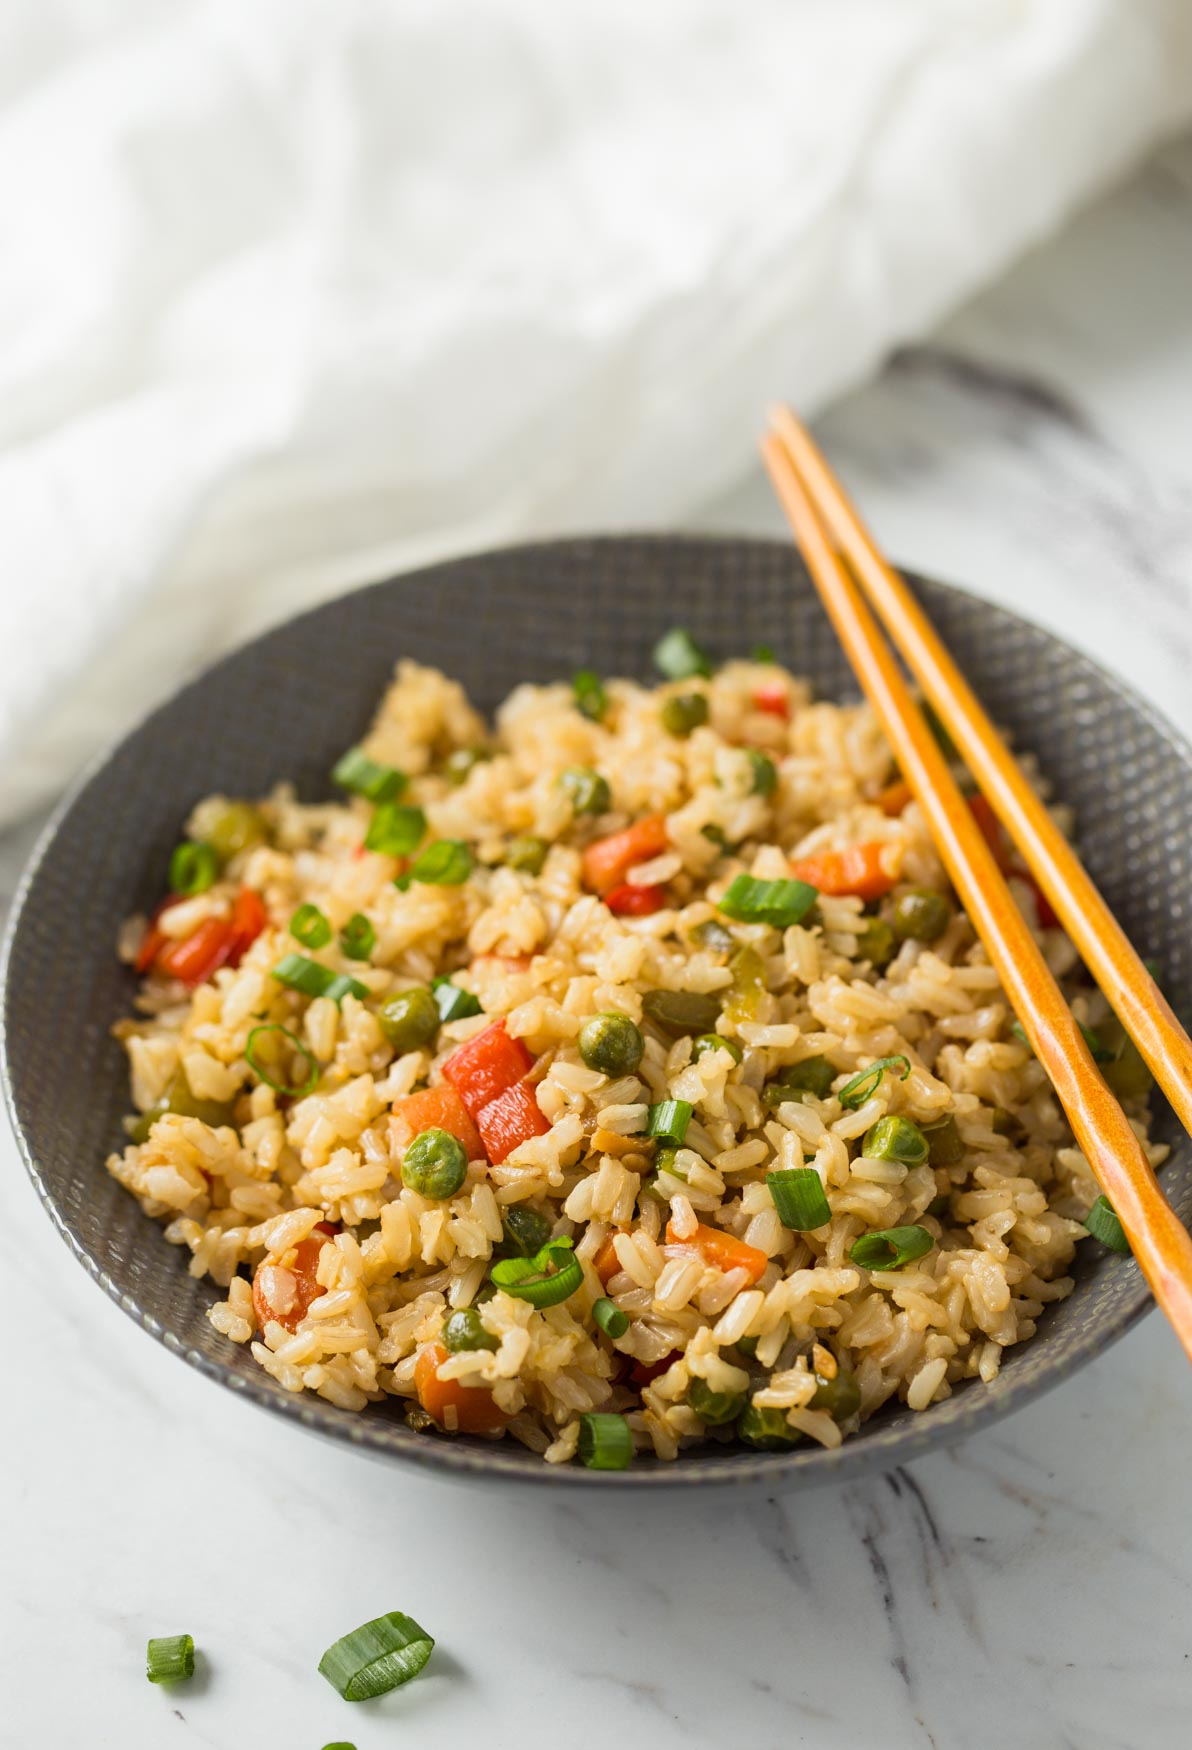
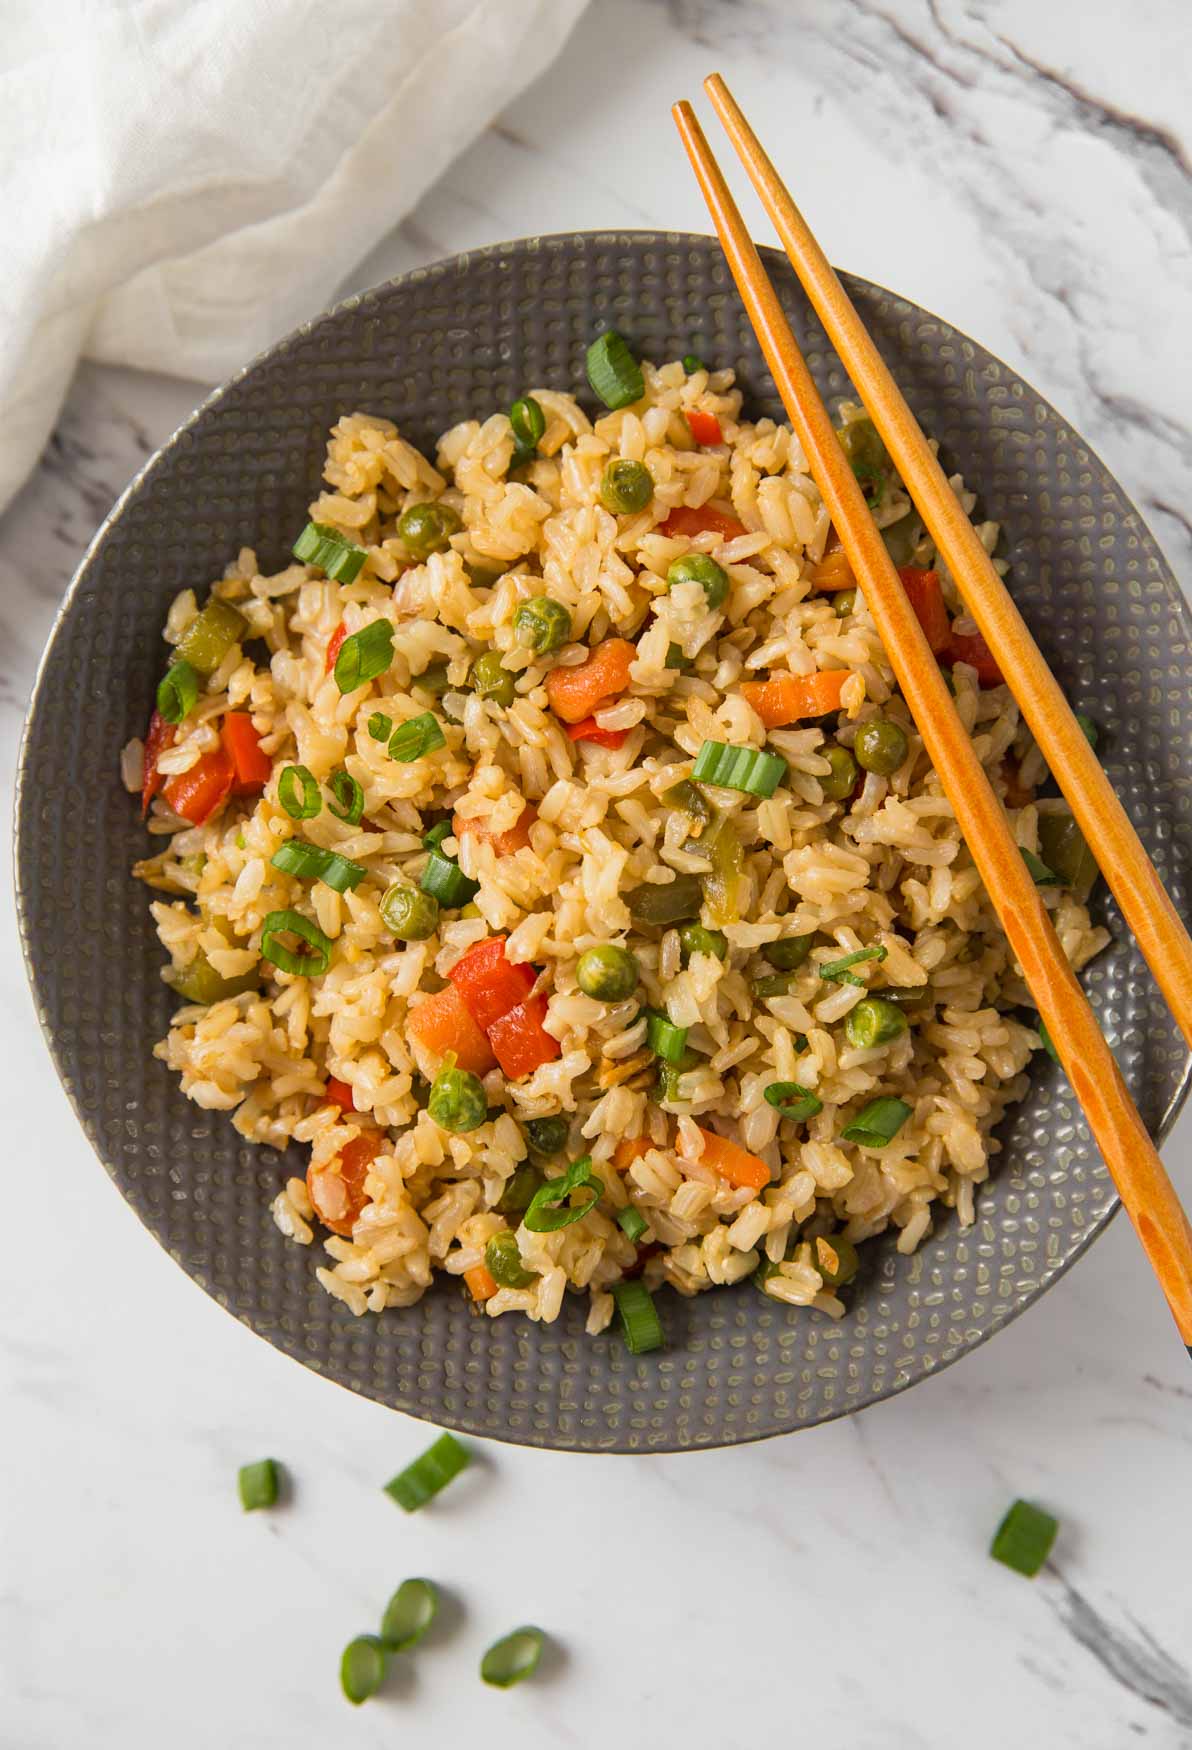
    Healthy fried rice in a serving bowl with wooden chopsticks.

    More Asian inspired recipes

    • Chili Garlic Tofu
    • Soba Noodle Soup
    • Vietnamese Shrimp Spring Rolls
    • Spring Roll Salad Bowl
    • Vegetarian Spring Rolls
    Healthy fried rice in a serving bowl with wooden chopsticks.

    Love this recipe? Please leave a 5-star ⭐⭐⭐⭐⭐ rating in the recipe card below & a review in the comments if you REALLY like this recipe. Thank You!

    📖 Recipe

    Learn how to make healthy fried brown rice with fresh vegetables. A simple, delicious and wholesome vegetable fried rice recipe that is better than takeout
    Print Pin
    5 from 2 votes

    Healthy Fried Brown Rice With Vegetables

    Learn how to make healthy fried brown rice with fresh vegetables. Simple, delicious and wholesome vegetable fried rice recipe that is better than takeout.
    Course: Main or Side
    Cuisine: Asian Inspired
    Prep Time 15 minutes minutes
    Cook Time 30 minutes minutes
    Servings :5
    Calories :336kcal
    Author:Swati Kadam Gulati

    Would you like to save this recipe?

    Email yourself a link to this post and come back to it later!

    Ingredients

    Cooking Rice

    • 2 cup Jasmine brown rice
    • 3 ½ cup water

    Preparing Vegetables

    • ½ tablespoon sesame oil
    • 3-4 medium garlic cloves finely chopped
    • ½" ginger peeled and finely chopped
    • ½ bell pepper diced red and green each
    • 1 large carrot peeled and diced
    • 1 cup green peas fresh or frozen
    • 3-4 springs of green onion (scallions)
    • 1 ½ tablespoon soy sauce
    • 1 tablespoon rice vinegar
    • salt to taste

    Instructions

    • In a medium pot add rice and water and bring mixture to boil. Then simmer on low heat with cover for 25 mins. Let it cool down completely. Using a fork fluff the rice to separate the grains before using.
    • In a large skillet or wok heat oil on medium to high heat.
    • Add chopped garlic, ginger and the white portion of scallions (reserve green for garnishing). Cook it for 1-2 mins.
    • Then add diced peppers, carrot and peas. Stir fry them for few minutes (see notes).
    • Now add soy sauce, rice vinegar and mix well.
    • Finally, add cold rice and mix well with vegetables. Season with salt if necessary.
    • Garnish with green onions and serve warm.

    Notes

    1. Cooking vegetables - If you want vegetables to be nice and crunchy, just saute them until you get the desired texture. And if you want vegetables soft in texture then add 2 tablespoon of water, cover the skillet and cook it for 3 mins. Then add soy sauce and vinegar and follow the next set of instructions.
    2. Cooking rice - You can cook rice well in advance or use leftover rice in this recipe. Cold rice works best and makes it easy to stir fry without breaking them. However, you can use freshly cooked rice if you want. The taste won't change if you use fresh rice. I always make rice fresh for this recipe and let it cool down completely before adding into vegetables.
    3. While preparing scallions, separate white part, slice and cook them with ginger and garlic. Reserve green part of the scallions to use at the end to garnish.

    Nutrition

    Calories: 336kcal
    Tried this recipe?Tag us on Instagram @watchwhatueat or tag #watchwhatueat! OR leave us a comment & rating below. Your feedback is very important to us.

    4 Comments

    Easy vegetable pasta soup recipe - this fresh veggie and pasta all-in-one pot soup is perfect for healthy weeknight dinners/lunch.

    Easy vegetable pasta soup recipe - this fresh vegetable and pasta all-in-one pot soup is perfect for any weeknight dinner or easy lunch. Nutritious, filling and a satisfying bowl of this soup is very simple and easy to prepare.

    Vegetable pasta soup in a ceramic pot with wooden ladle.

    If you are running out of easy lunch or dinner ideas then make this super easy pasta soup with vegetables. Loaded with all the goodness of Italian spices and pasta this soup will be comforting and warming.

    Moreover, it is a one-pot soup recipe. Meaning, less mess, quick meal prep, and quick cleanup. Isn't it awesome?

    I love making one pot soups. They are filling, nutritious and satisfying. Just making one dish for lunch or dinner is sufficient. No wonder why such recipes are so popular. And if you are also a fan of such dishes then you will also love these healthy barley soup, creamy broccoli soup, soba noodle soup, corn chowder, etc.

    Let's get started with our pasta and vegetable soup.

    [feast_advanced_jump_to]
    Diced vegetables and ditalini pasta for making vegetable pasta soup

    How to make vegetable pasta soup?

    To begin with dice all the fresh vegetables like peppers, eggplant, carrot and celery into small pieces. Also, dice tomatoes and onions. Then cook finely chopped garlic and onion in little oil until translucent in a large pot or dutch oven.  Add chopped tomatoes and cook them until they soften or give a sauce-like consistency. Then add diced vegetables, Italian spice mix, salt, and pepper and mix well. Now add vegetable or chicken stock plus some water and bring everything to boil. Finally, add raw pasta and cook until it is tender. Garnish with chopped fresh parsley or basil leaves and serve warm.

    Sauteing fresh veggies in tomato sauce for making vegetable pasta soup.

    Helpful tips!

    • I find pasta that is not gluten-free is perfect for making pasta soups. Because it holds its shape after cooking in the soup. However, I tried making this soup using brown rice pasta (gluten-free). The taste was great but the only difficulty I found was that leftover pasta broke into small pieces the next day when I tried to reheat.
    • Cook pasta in the soup for 1-2 min less than mentioned on the package directions. Because in the hot soup base the pasta continues to cook even after turning the heat off. Therefore, slightly undercooking the pasta will eventually turn into well done.
    • Use fresh tomatoes instead of canned ones whenever possible. It really adds freshness to the soup.

    FAQs

    Which pasta is best for soup?

    Pasta made from semolina and wheat flour is perfect for making soups. Also, pasta that is smaller in shape like the mini elbow, pipettes, orzo, and ditalini, etc., serve a perfect role in the soup with diced vegetables.

    Do you cook the pasta before putting it in soup?

    You can cook the pasta separately and then add to the prepared soup base. I would suggest in this case add pasta to the soup when it is slightly cooled to avoid overcooking.

    How do you keep pasta from getting mushy in soup?

    Overcooking the pasta will result in a mushy texture. Therefore, slightly undercook the pasta and turn off the heat so that it will hold its shape in the hot soup.

    How do you keep pasta from soaking up soup?

    You can cook the pasta separately and then add to the soup or add sufficient liquid to the soup keeping this aspect in mind. Also, while reheating the soup add more stock or water if there is insufficient liquid.

    Vegetable pasta soup in a serving soup bowl.

    More wholesome soups to try

    • Healthy Vegetarian Barley Soup
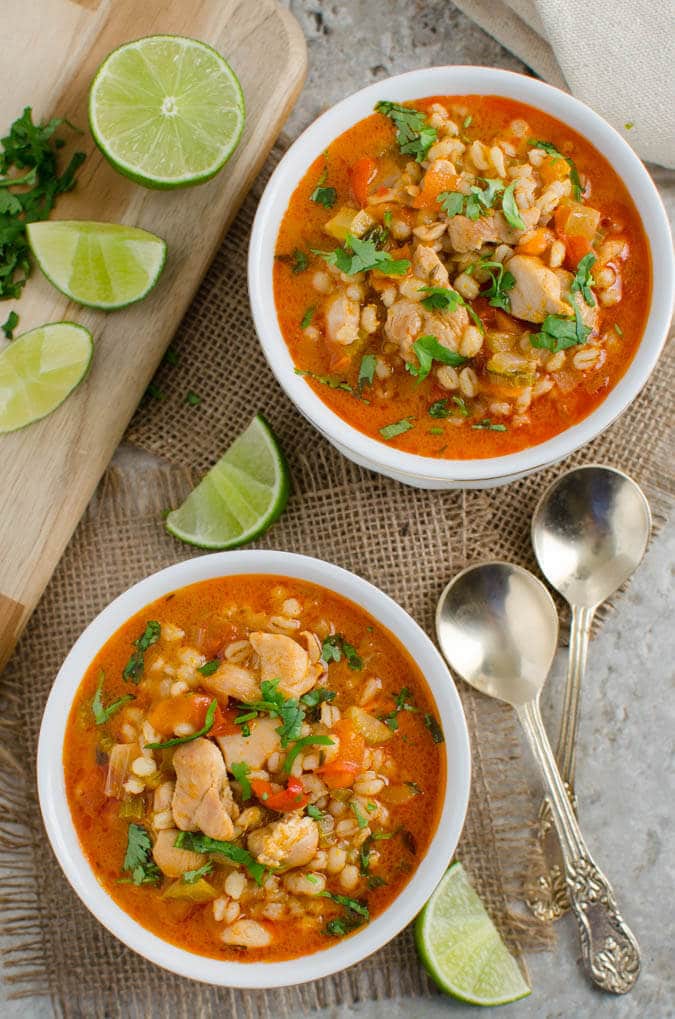
    • Chicken Barley Soup
    • Soba Noodle Soup
    • Healthy Broccoli Soup
    Fresh diced veggie & pasta cooked with garlic & tomato to prepare this delicious Italian healthy vegetable pasta soup. One pot wholesome bowl of soup for lunch/dinner. | #watchwhatueat #pastasoup #italiansoup

    Love this recipe? Please leave a 5-star ⭐⭐⭐⭐⭐ rating in the recipe card below & a review in the comments if you REALLY like this recipe. Thank You!

    📖 Recipe

    Easy vegetable pasta soup recipe - this fresh veggie and pasta all-in-one pot soup is perfect for healthy weeknight dinners/lunch.
    Print Pin
    4.58 from 7 votes

    Easy Vegetable Pasta Soup

    Fresh diced veggies and pasta cooked with garlic and tomato to prepare this delicious Italian pasta soup with vegetables. Quick, healthy and easy wholesome soup for a filling dinner or lunch.
    Course: Lunch/Dinner,Soup
    Cuisine: Italian Inspired
    Prep Time 15 minutes minutes
    Cook Time 15 minutes minutes
    Total Time 30 minutes minutes
    Servings :4
    Calories :291kcal
    Author:Swati Kadam Gulati

    Would you like to save this recipe?

    Email yourself a link to this post and come back to it later!

    Ingredients

    • 2 cup ditalini pasta (or any other)
    • ½ tablespoon olive oil
    • 1 medium onion diced
    • 2-3 whole garlic cloves finely chopped
    • 3 red tomatoes chopped (I use Roma tomatoes)
    • ½ teaspoon paprika
    • 1 tablespoon tomato paste (optional)
    • 1 medium red pepper diced
    • 2 medium carrots diced
    • 1 large celery stalk diced
    • ½ medium eggplant diced
    • 5 ½ cup vegetable stock (or chicken stock) plus water
    • 1 tsp  Italian spice blend
    • salt and pepper
    • ¼ cup loosely packed parsley

    Instructions

    • Heat oil in a large pot on medium heat. Add chopped onion and garlic and cook until translucent for about 2-3 min.
    • Add tomatoes, tomato paste, and paprika then cook until soften or gives a sauce like consistency for about 3-4 min.
    • Now add diced pepper, carrot, celery and eggplant and stir-fry for about a minute.
    • Add vegetable stock plus water and bring mixture to boil.
    • Add pasta and season with salt, pepper, and Italian spice blend and mix well.
    • Cover the pot and cook for about 6 min (see notes) or depending on the instructions given on the package. Once done remove the pot from the heat.
    • Garnish with freshly chopped parsley and serve warm.

    Notes

    1. Undercook the pasta slightly for 1-2 min less mentioned on the package. Hot soup liquid will continue to cook the pasta further.
    2. You can use Gluten Free pasta in the soup. However, try to finish the soup on the same day. Because pasta in the leftover soup does not hold its shape while reheating.
    3. To get the rich color in the soup you can use tomato paste. It is completely optional though and skipping it won't affect the taste of the dish.
    4. I usually use half water and half vegetable stock or chicken stock in my soup recipes.
    5. You can also sprinkle some parmesan cheese over the soup while serving for additional deliciousness.
    6. See the Helpful Tips section above for more useful information.

    Nutrition

    Calories: 291kcal
    Tried this recipe?Tag us on Instagram @watchwhatueat or tag #watchwhatueat! OR leave us a comment & rating below. Your feedback is very important to us.

    15 Comments

    This Instant Pot Vegetable Barley Soup is a quick and easy recipe to enjoy a wholesome and nutritious soup. Full of flavors and takes about 30-40 min to prepare. And a perfect vegetable soup for weeknight dinners. | #watchwhatueat#barley #barleysoup #vegan #instantpotsoup

    This Instant Pot Vegetable Barley Soup is a quick and easy recipe to enjoy a wholesome and nutritious soup. Full of flavors and takes about 30-40 min to prepare. And a perfect vegetable soup for weeknight dinners.

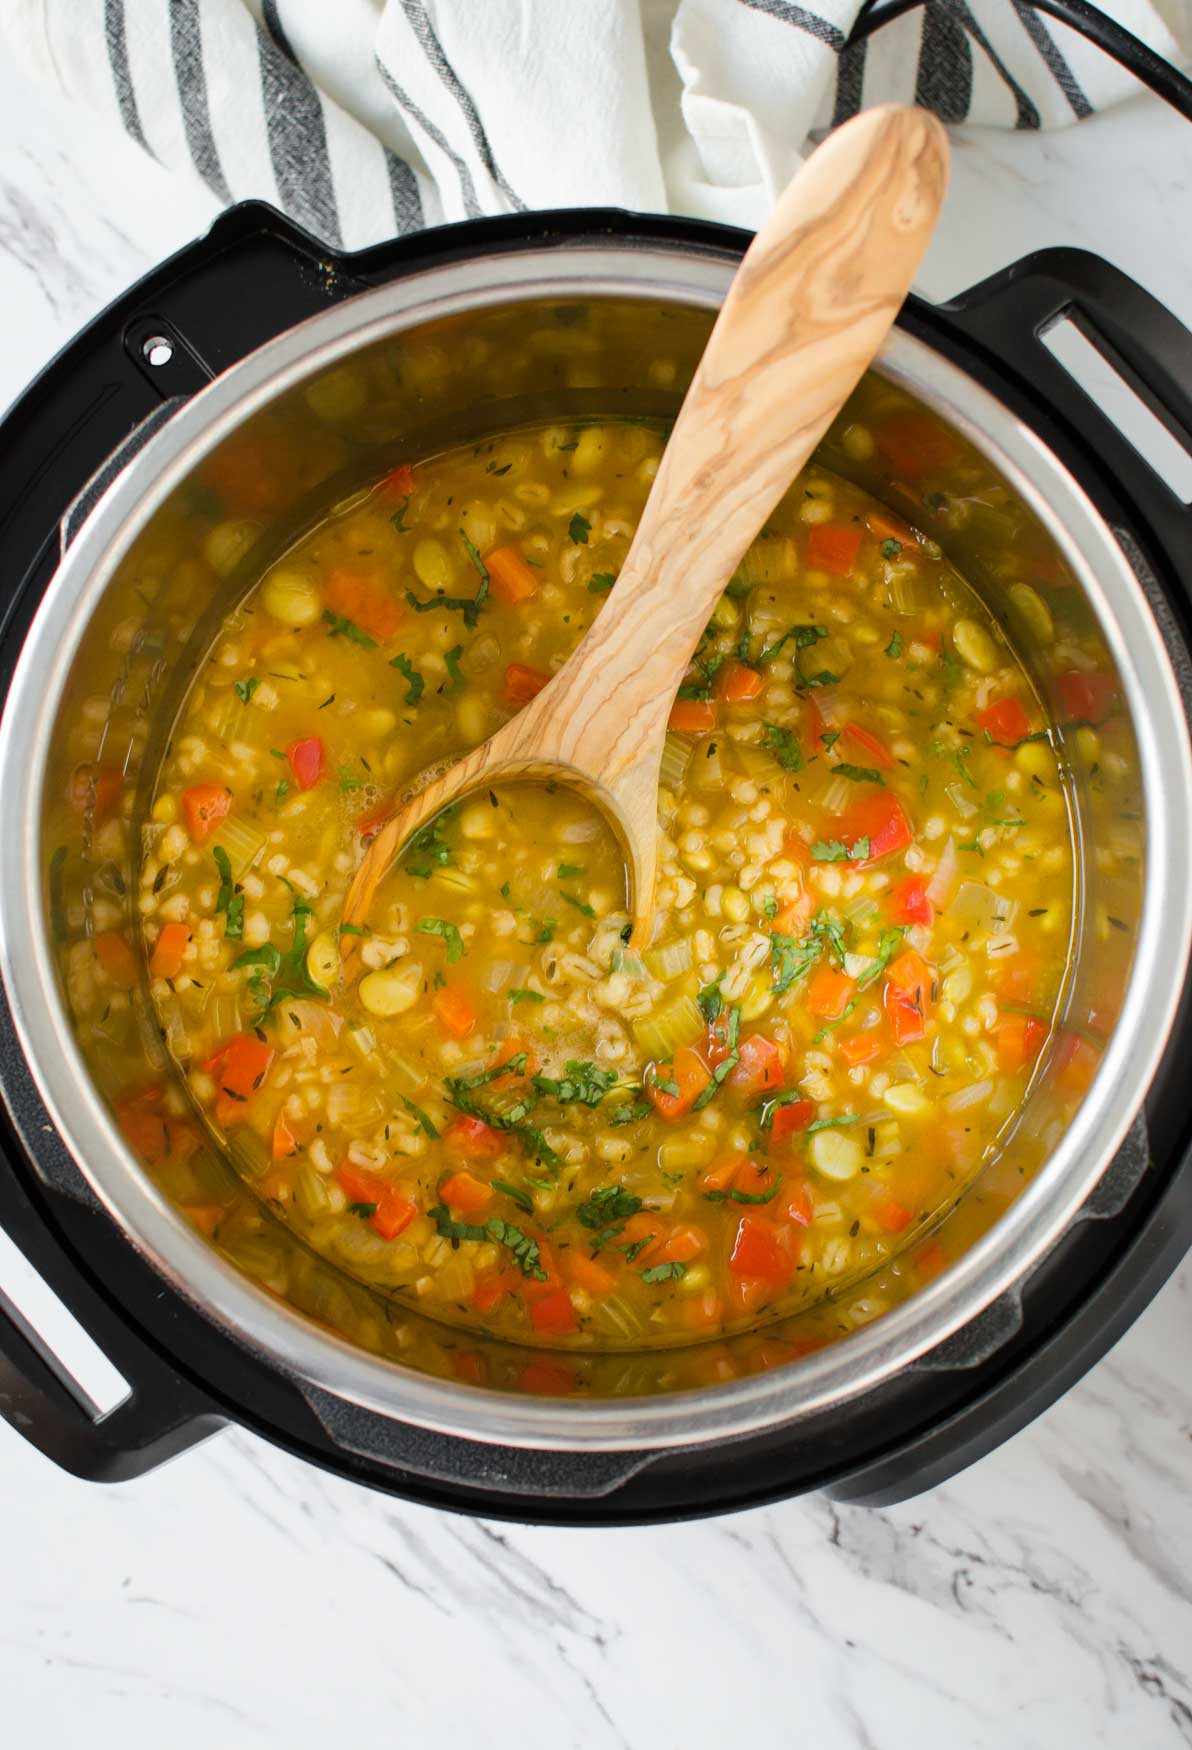
    Vegetable barley soup in Instant Pot with wooden ladle.

    Do you have an Instant Pot? Have you tried making all-in-one pot soups in it? I guess it's safe to assume you own one that's why you are visiting this page!

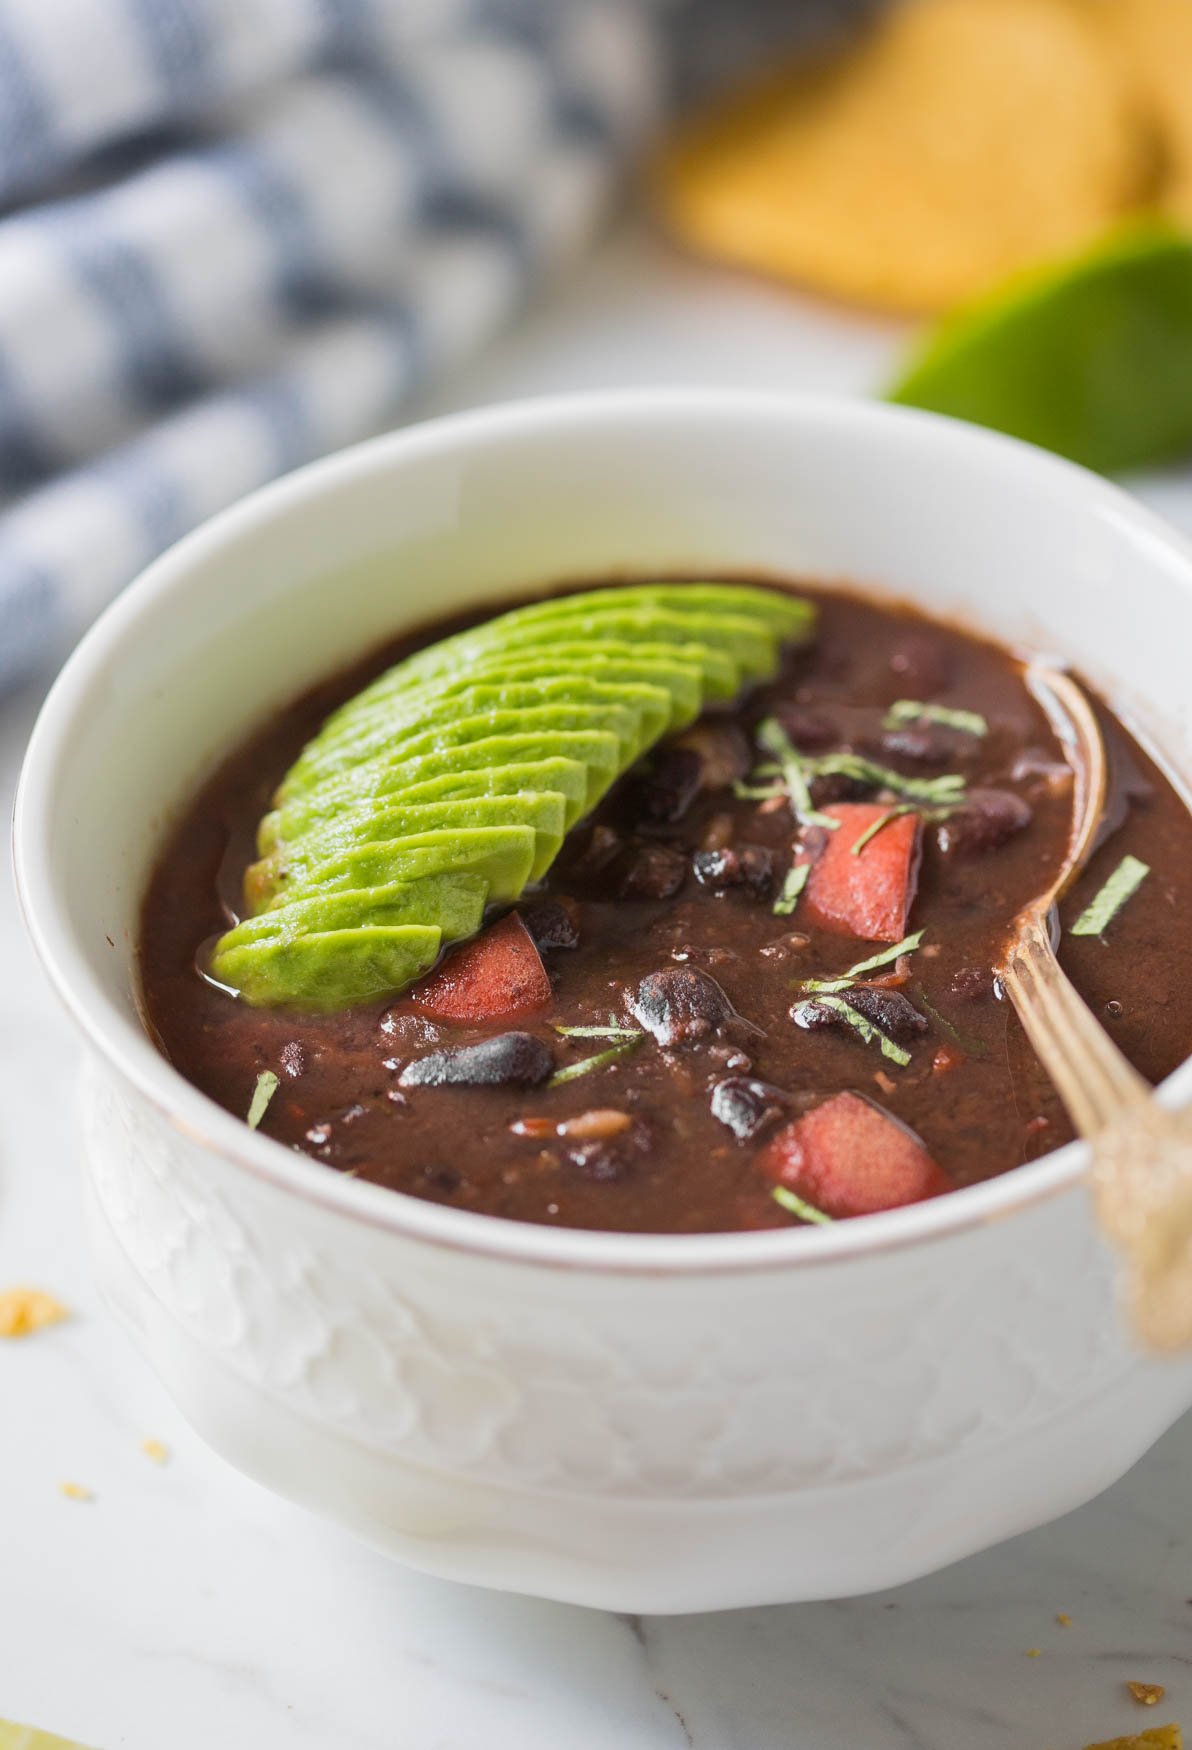
    I feel Instant Pots are perfect for making all-in-one pot dishes. You can saute, steam, boil, and pressure cook a variety of foods in it. And you can also cook whole cauliflower head and whole chicken in Instant Pot. The other thing I love about it is that you don't have to soak the grains or beans before cooking them (e.g this Instant Pot black bean soup).

    Now enough of praise, let's get back to our Instant Pot vegetable barley soup. This recipe is inspired by our most popular Healthy Barley Soup on the blog. With some slight variations, I have configured this soup for Instant Pot. It really takes far less amount of time to cook barley in the Instant Pot compared to on the stove top.

    [feast_advanced_jump_to]
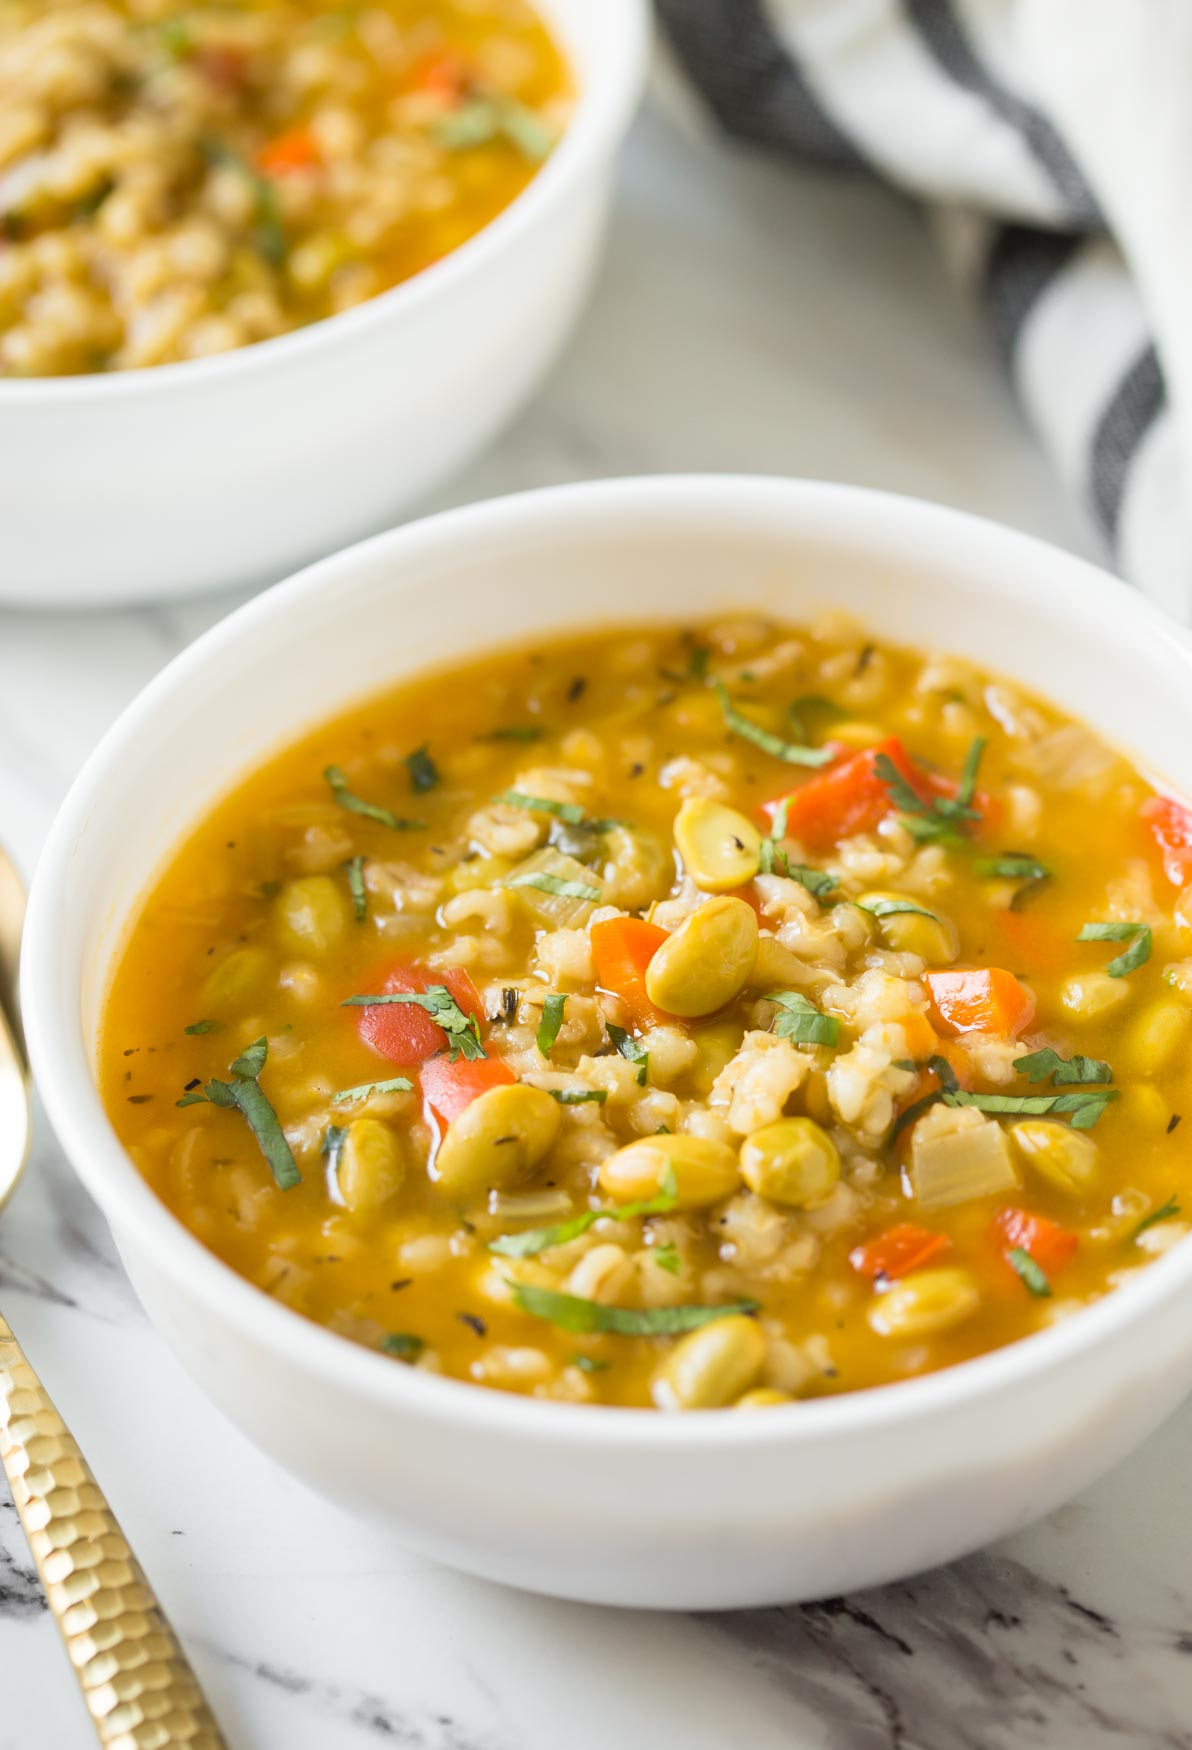
    Barley soup with vegetables in a white ceramic soup bowl.

    How long Barley Soup takes to cook in Instant Pot?

    According to Instant Pot manual whole grain barley takes around 20-25 min on high pressure. Overcooking the barley in the soup results in a starchy and thick consistency. Therefore I cook the barley on high pressure for 20 min and release the pressure manually as soon as pressure cooking is over. If you let the pressure release naturally, the barley gets overcooked which you may not like.

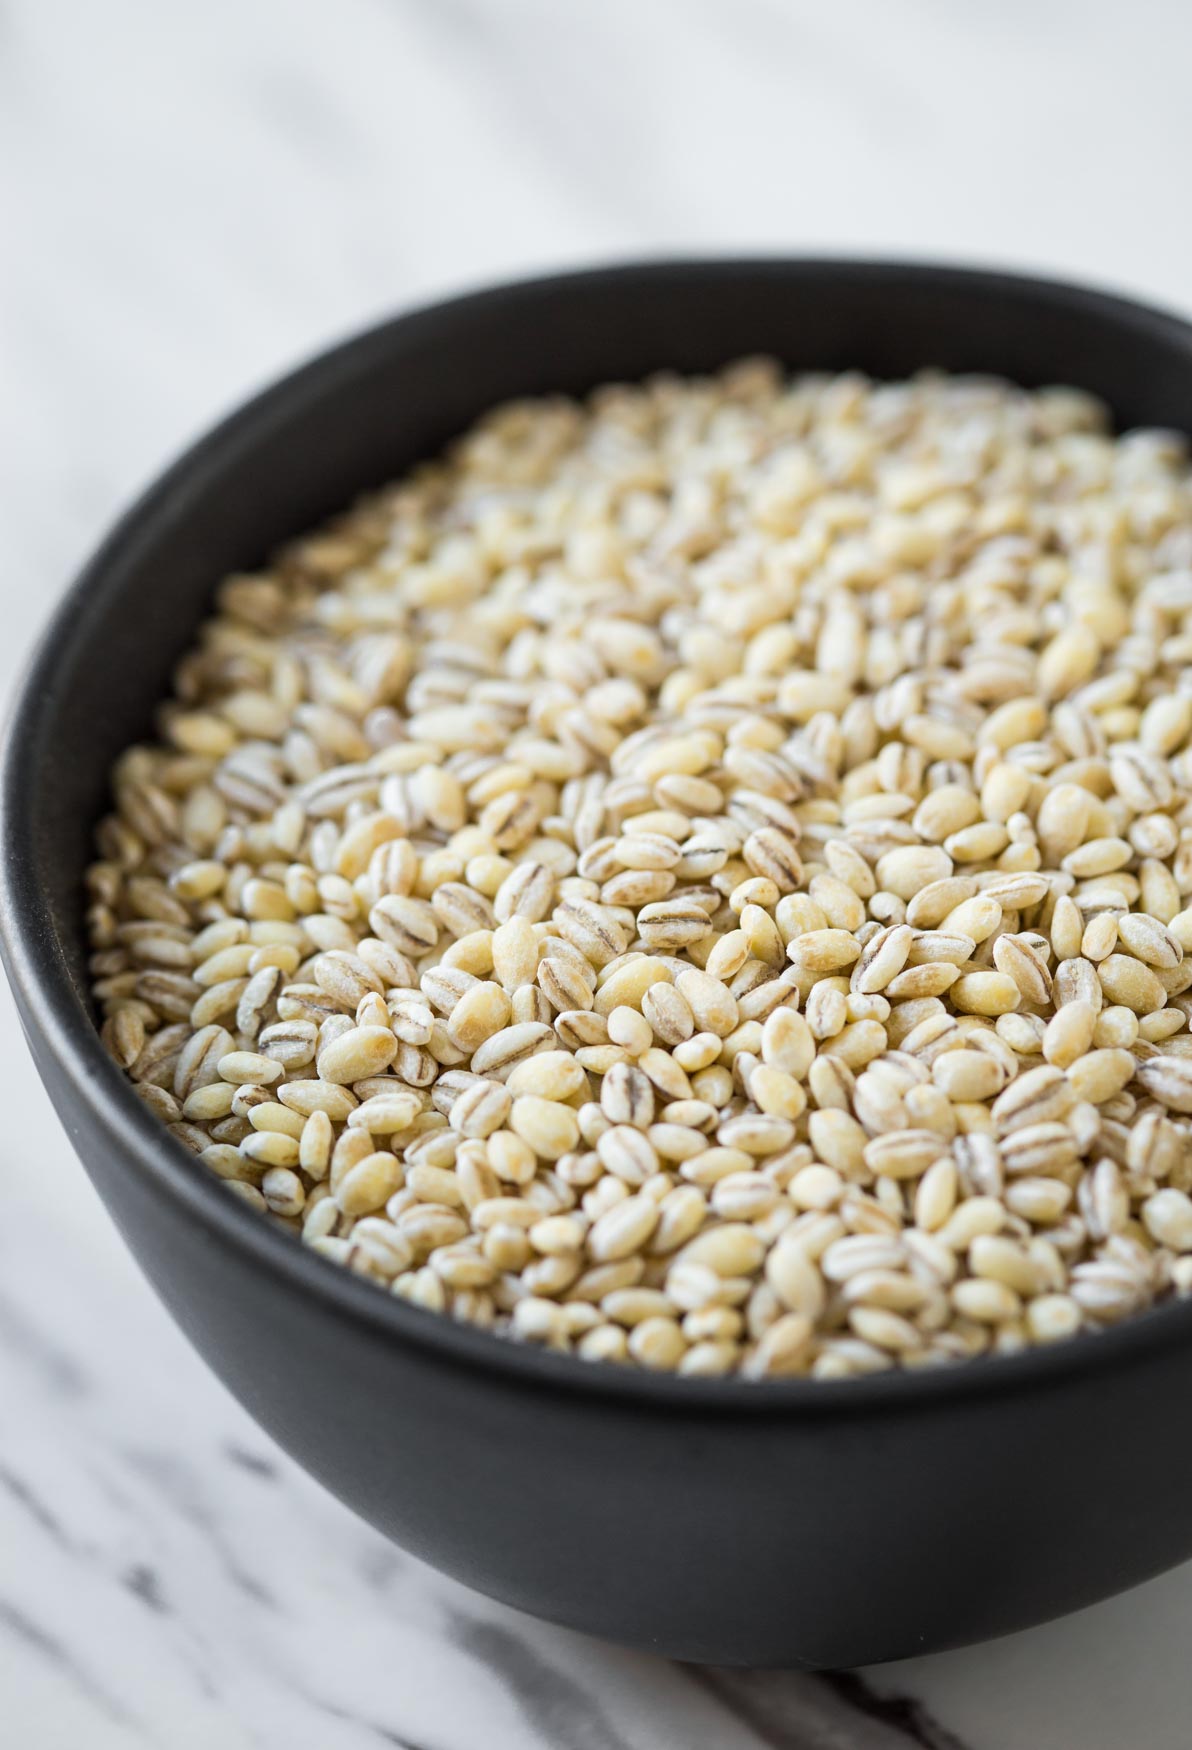
    Pearl barley grains for making Vegetable Barley Soup.

    How to make Instant Pot Vegetable Barley Soup?

    On sautee mode of the Instant Pot cook some onions and chopped garlic in little oil. Then add fresh vegetables like diced carrot, red pepper, celery, and edamame beans. Generously season with dried thyme, salt, and pepper. Finally, add water and veggie or chicken stock or broth. Close the lid and cook on high pressure for about 20 min.

    Fresh vegetables and beans in bowl for making Vegetable Barley Soup.

    Helpful tips!

    • I use pearl barley grains for making this soup.
    • Use chicken stock or vegetable stock to make the soup more delicious and to increase its nutrient value.
    • Do not forget to release the pressure manually and open the lid after pressure cooking timer turns off. Leaving the steam to release naturally will overcook the barley. 
    Barley soup with vegetables in a white ceramic soup bowl.

    More wholesome soups to try

    • Healthy Vegetarian Barley Soup
    • Chicken Barley Soup
    • Soba Noodle Soup
    • Healthy Broccoli Soup

    You will also love these Instant Pot recipes

    • Black Bean Soup In Instant Pot
    • Instant Pot Whole Chicken with Gravy
    • Instant Pot Whole Cauliflower with Gravy
    • Chicken Drumsticks In Instant Pot

    Love this recipe? Please leave a 5-star ⭐⭐⭐⭐⭐ rating in the recipe card below & a review in the comments if you REALLY like this recipe. Thank You!

    📖 Recipe

    This Instant Pot Vegetable Barley Soup is a quick and easy recipe to enjoy a wholesome and nutritious soup. Full of flavors and takes about 30-40 min to prepare. And a perfect vegetable soup for weeknight dinners. | #watchwhatueat#barley #barleysoup #vegan #instantpotsoup
    Print Pin
    4.94 from 15 votes

    Instant Pot Vegetable Barley Soup

    Cook fresh vegetables and whole barley in Instant Pot to prepare this one-pot delicious and healthy soup in about 30 mins.
    Course: Lunch / Dinner,Main Dish
    Cuisine: American Inspired
    Prep Time 10 minutes minutes
    Cook Time 20 minutes minutes
    Total Time 30 minutes minutes
    Servings :4
    Calories :328kcal
    Author:Swati Kadam Gulati

    Would you like to save this recipe?

    Email yourself a link to this post and come back to it later!

    Ingredients

    • ¾ cup pearl barley
    • 1 tsp  cooking oil
    • 1 medium onion diced
    • 2-3 garlic cloves finely chopped
    • 1 carrot peeled and diced
    • ½ red pepper diced (or more)
    • 2 small celery stalks diced
    • 1 ½ cup edamame beans.
    • 1 tsp  thyme
    • salt and pepper
    • 4 cup vegetable stock (or chicken stock)
    • 2 cup water
    • 1 tablespoon lime juice optional
    • fresh cilantro for garnishing

    Instructions

    • Heat oil in Instant Pot on saute mode. Cook garlic and onion until translucent.
    • Add carrot, pepper, celery, edamame beans, and barley. Give it a quick mix.
    • Season with thyme, salt, and pepper.
    • Finally, add water, vegetable stock or chicken stock and mix well.
    • Put the lid and cook the soup on manual high pressure for 20 min. Quick release the pressure manually once cooking is over.
    • Add more seasonings and lime juice if needed.
    • Lastly, add chopped cilantro to garnish. Serve warm.

    Notes

    1. I usually rinse and drain barley grains before adding them to the soup to clean any dirt or dust from it.
    2. Try to use clear chicken stock or vegetable stock in the soup. If the stock is dark in color your soup will turn out with the same color.
    3. I like to cook garlic and onion in little oil to bring more flavors. However, you can add everything in the pot without sauteeing and pressure cook everything directly. It will save you some time.
    4. This recipe is inspired by Healthy Barley Soup Recipe.

    Nutrition

    Calories: 328kcal
    Tried this recipe?Tag us on Instagram @watchwhatueat or tag #watchwhatueat! OR leave us a comment & rating below. Your feedback is very important to us.

    47 Comments

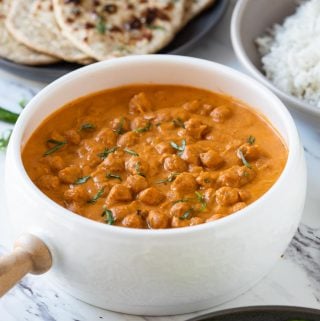
    Toasted chickpeas dunked in creamy tomato authentic tikka sauce to make this easy restaurant-style healthy chickpea tikka masala.

    Enjoy authentic Indian flavors in this homemade healthy chickpea tikka masala. A perfect vegetarian dish for a weeknight meal or to serve at a party.

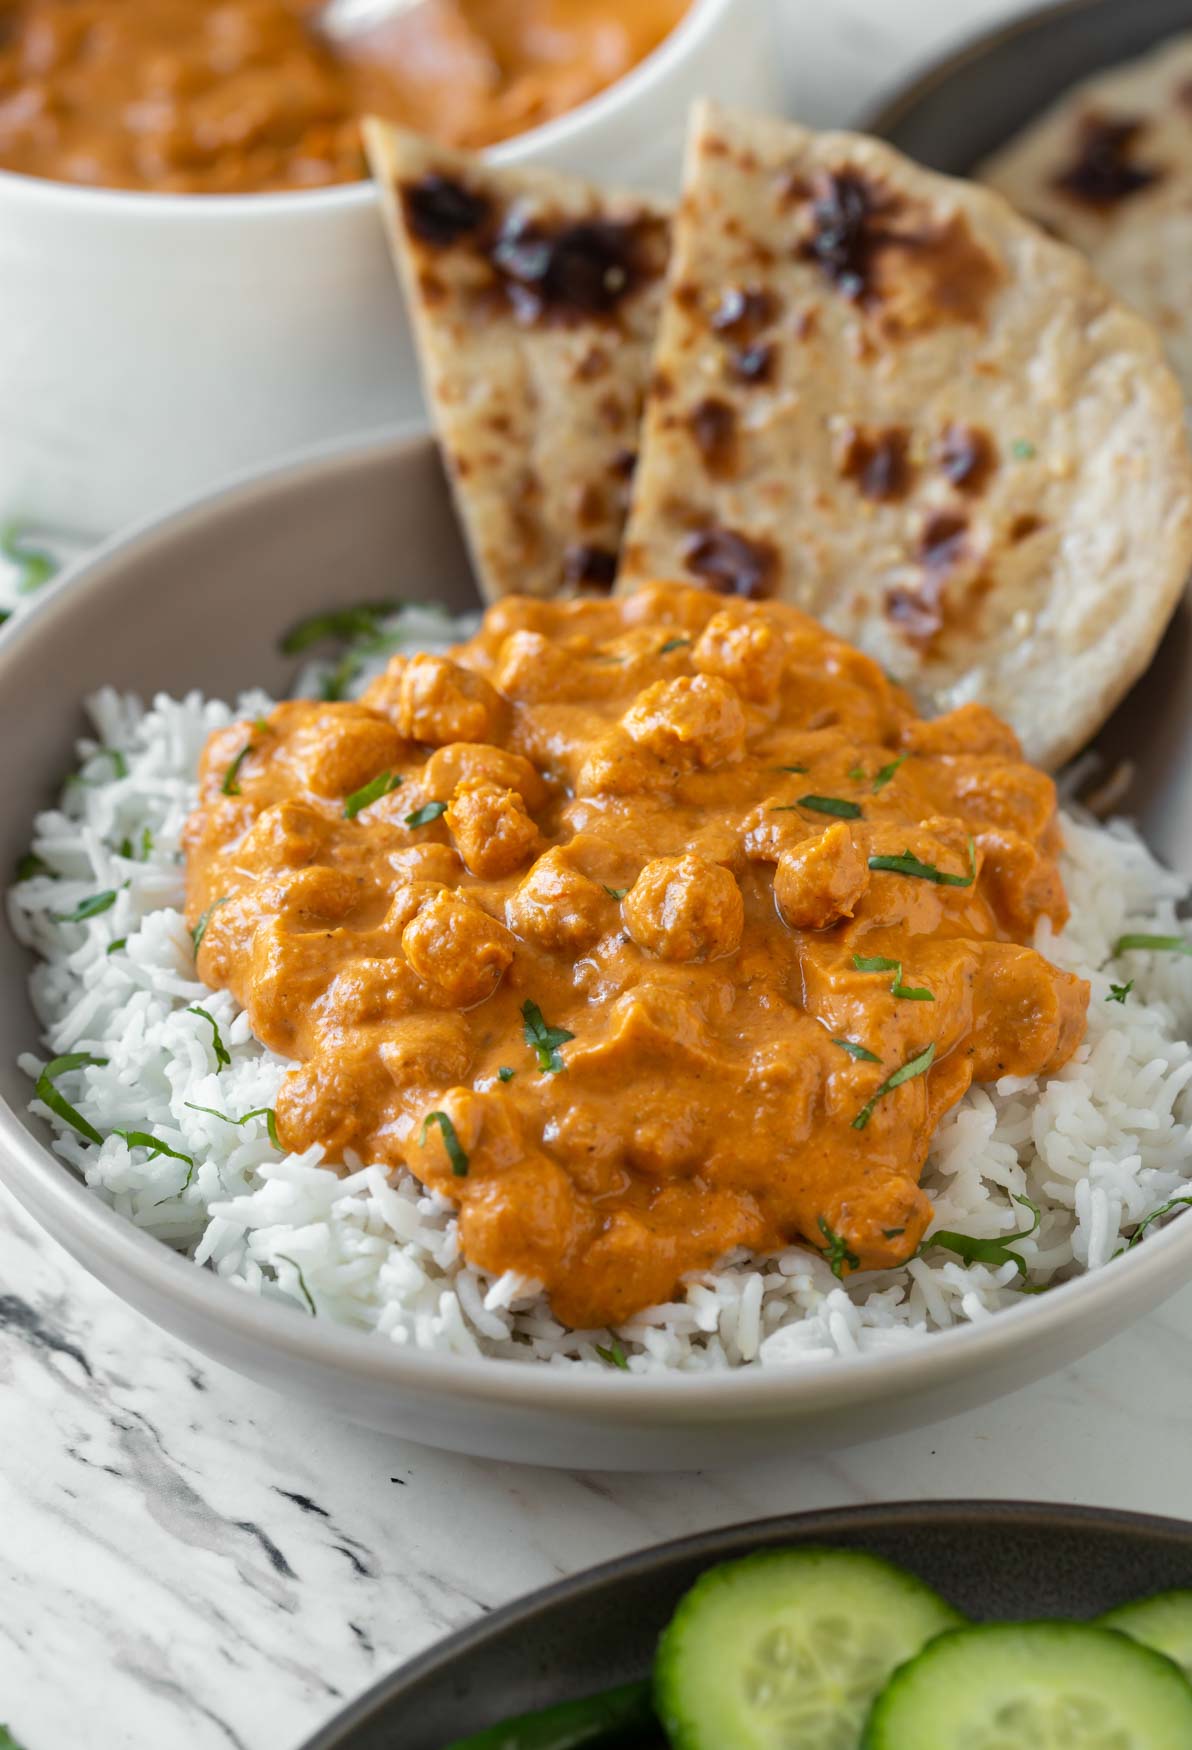
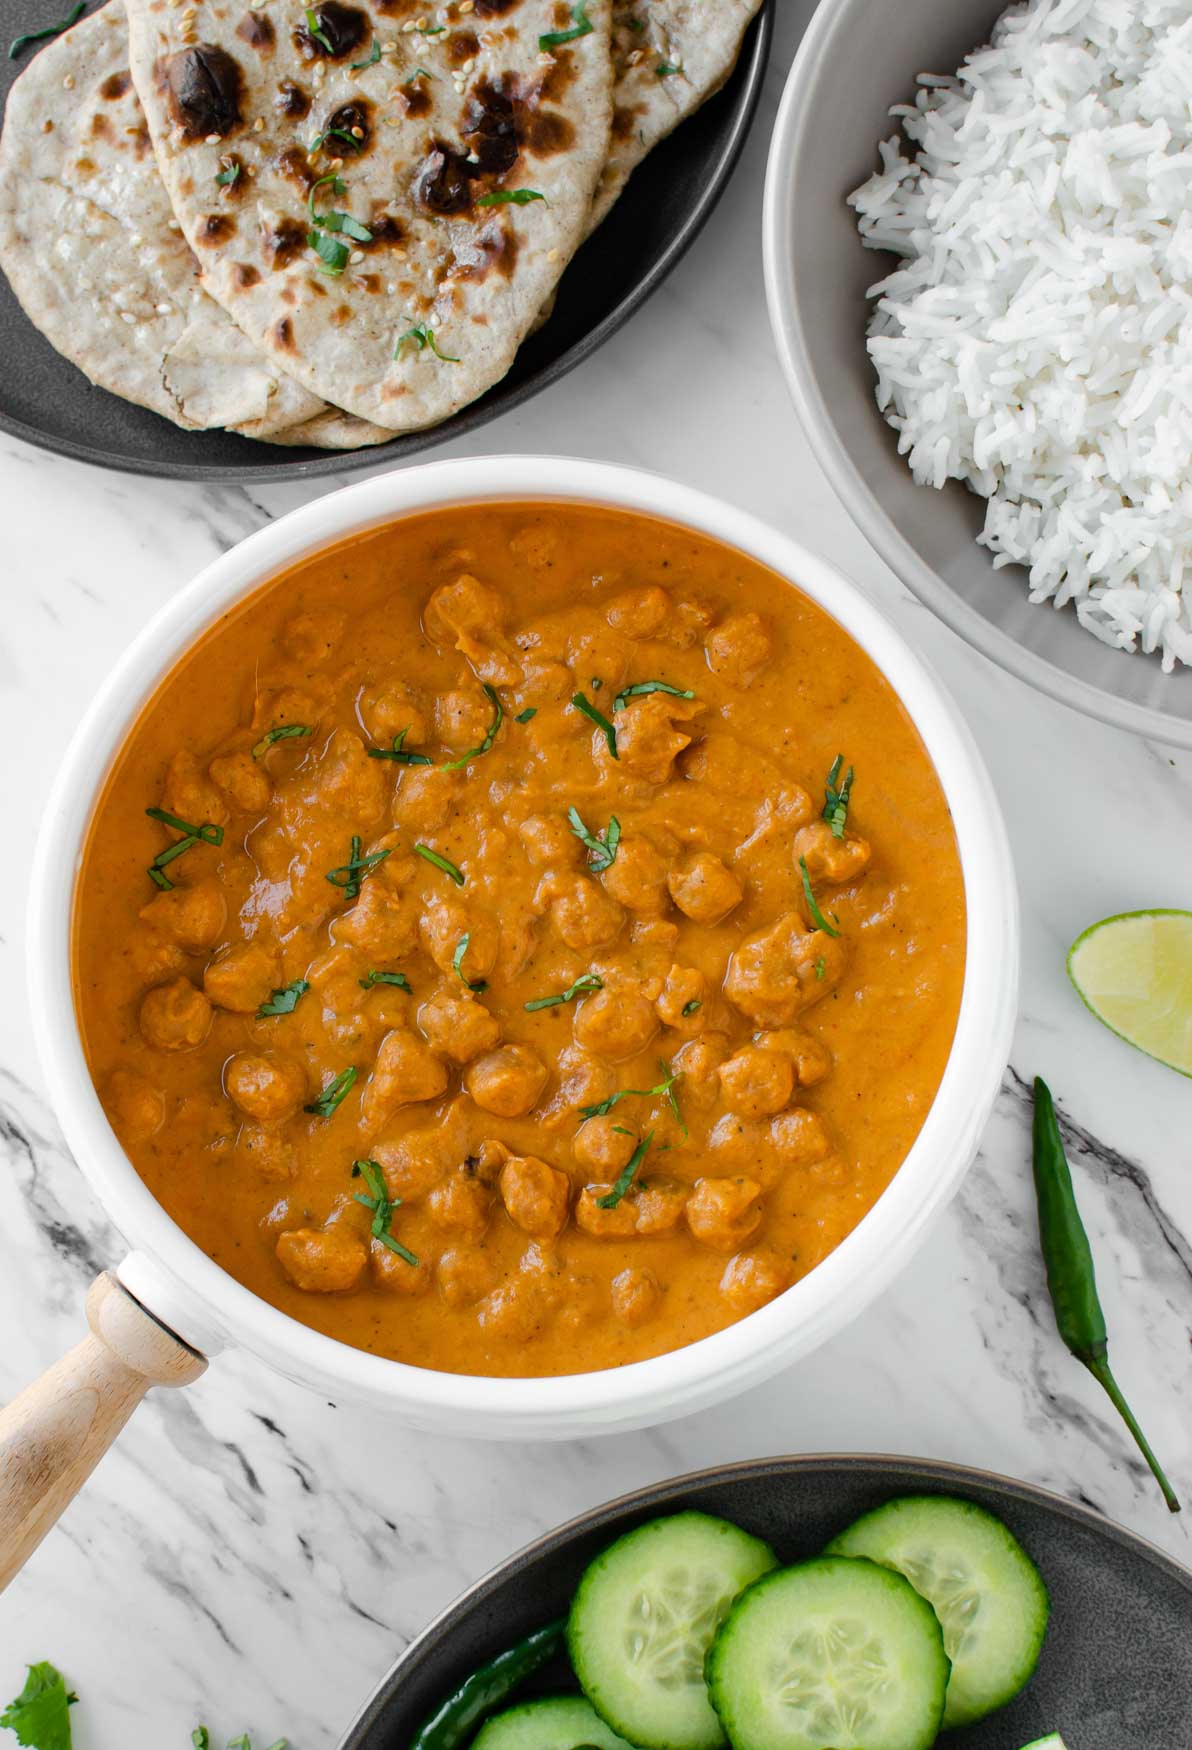
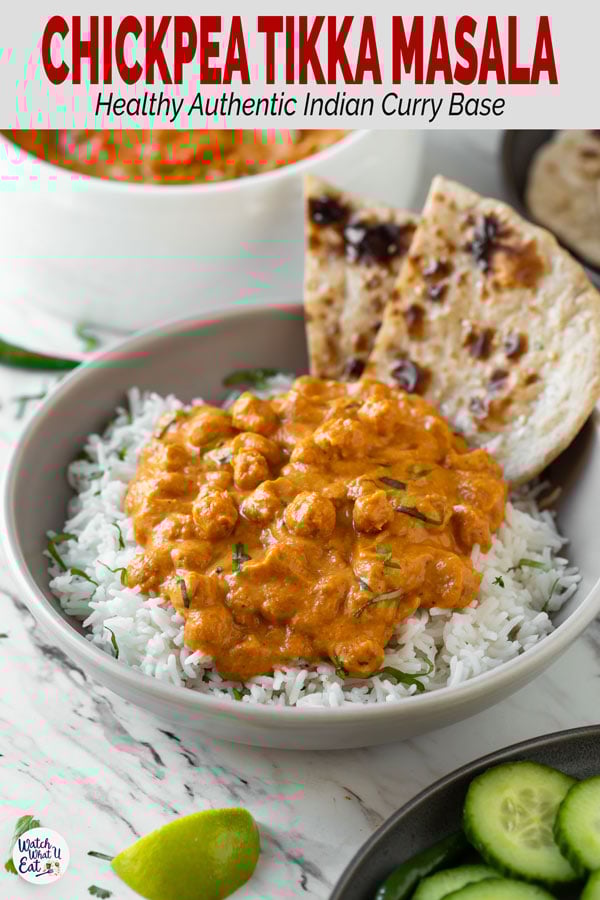
    Vegetarian chickpea tikka masala served over a bed of white rice and with whole wheat naan on the side.
    [feast_advanced_jump_to]

    Have you ever tried tikka masala dishes in any Indian restaurant and wondered how they make it? Then you have come to the right place.

    Here I am sharing with you our all-time favorite chickpea tikka masala recipe.

    Usually, you will find paneer or chicken tikka masala in Indian restaurants. However, going out of the box, I make this recipe using chickpeas.

    Why chickpeas?

    Because chickpeas are among some of the perfect options for making a protein-rich meatless dish, and you still get all the authentic flavors in this recipe. I am sure you won't miss chicken or paneer (Indian cottage cheese) in this dish.
    Let's get started.

    Toasted chickpeas dunked in creamy tomato authentic tikka sauce to make this easy restaurant-style healthy chickpea tikka masala.

    Key Ingredients

    • Chickpeas - you will need cooked chickpeas to prepare this dish. You can either cook them at home or use canned chickpeas.
    • Garlic and ginger - add raw ginger pieces and garlic cloves to the sauce. Use fresh garlic and ginger, it makes a lot of difference in the taste.
    • Onion and tomato - cut onion and tomato into thick pieces to prepare the gravy base.
    • Cashews - helps to thicken the sauce and make the dish creamy.
    • Spices - tikka masala sauce is rich in spices, so you will need garam masala (a classic blend of Indian spices), ground coriander, and ground cumin to add flavors. Additionally, use some chili powder to add some heat and nice color to the final dish.
    • Oil - Use your choice of cooking oil. I prefer using avocado or olive oil suitable for sauteing and grilling.

    Find the full list of ingredients and quantity in the recipe card below.

    Recipe Substitutions/Variations

    • Raw almonds - Use whole almonds instead of cashews to thicken the sauce. Add some water and then boil/blanch them in the microwave for 3 mins. This helps to loosen the skin. Allow them to cool down, remove the skin and then use these peeled almonds instead of cashews in the recipe.
    • Replace cashews - if you are allergic to nuts, use heavy whipping cream or whole milk to prepare the sauce base. Also, some readers have successfully made it with coconut milk.
    • Broth - use chicken or vegetable broth to prepare the sauce instead of water.
    • Use tofu/paneer - add grilled tofu/paneer tikka instead of roasted chickpeas.
    • Chicken - follow this chicken tikka masala recipe to make this dish using chicken.

    How To Make Restaurant-Style Chickpea Tikka Masala

    This recipe involves two steps:

    1. Making Roasted Chickpea Tikka

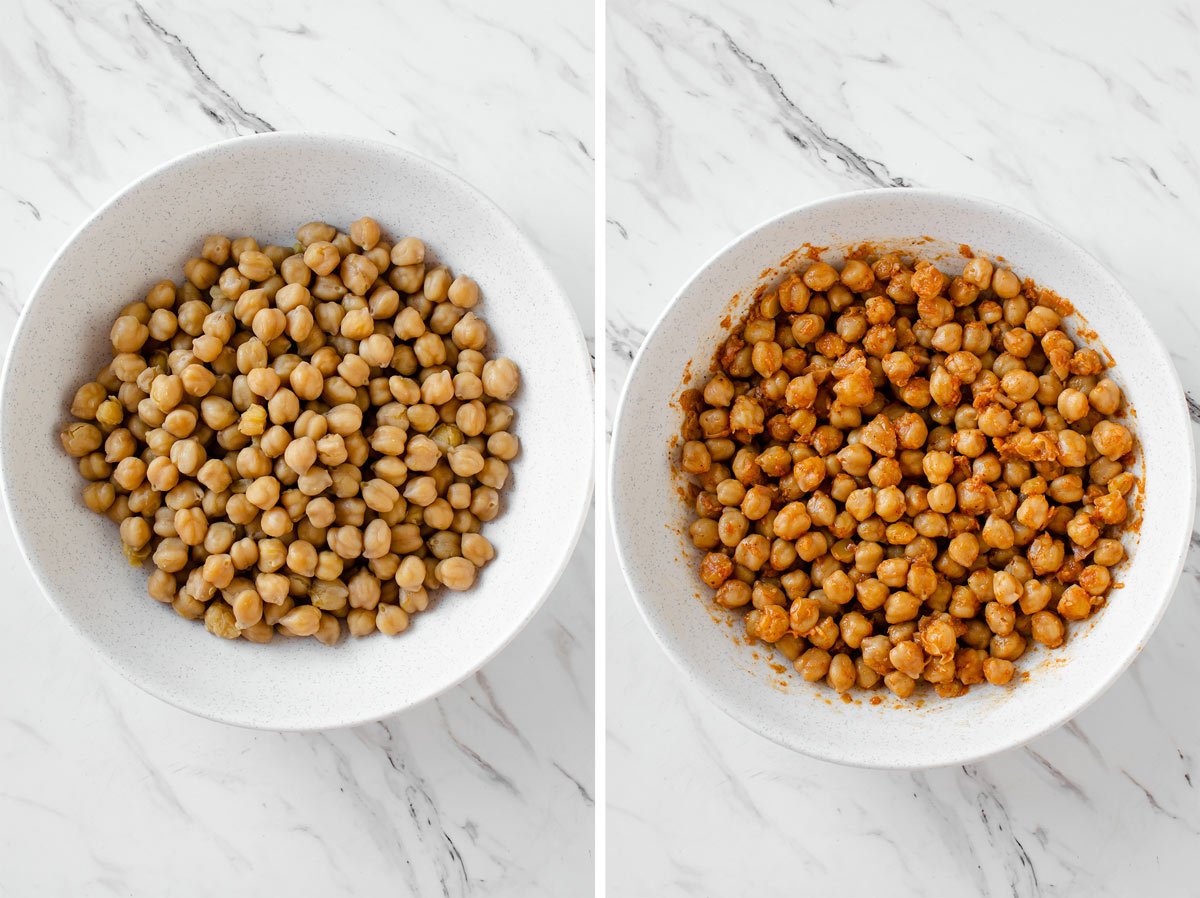
    a. In a medium mixing bowl, add cooked chickpeas. Mix them with oil, finely minced fresh garlic and ginger, garam masala, chili powder, and lemon juice. Also, add salt to taste.

    Raw chickpeas marinated with authentic Indian spices in a large white ceramic bowl.

    b. Bake these spiced chickpeas in a preheated oven to develop the roasted taste.

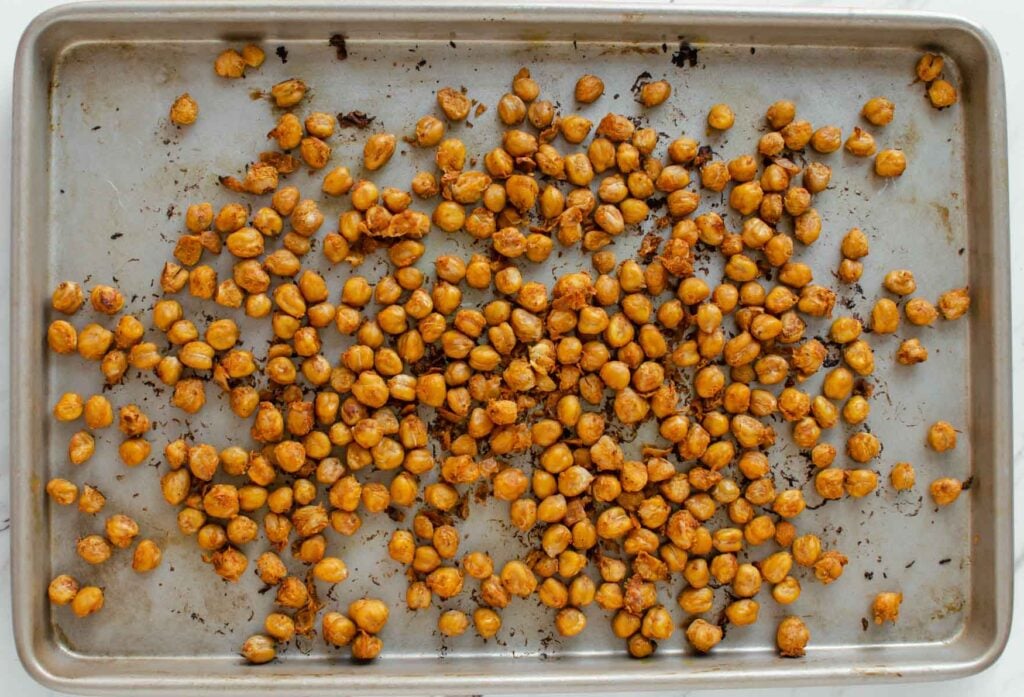
    Roasted chickpeas in a baking tray after baking.
    Roasted chickpeas after baking

    2. Preparing authentic tikka masala sauce

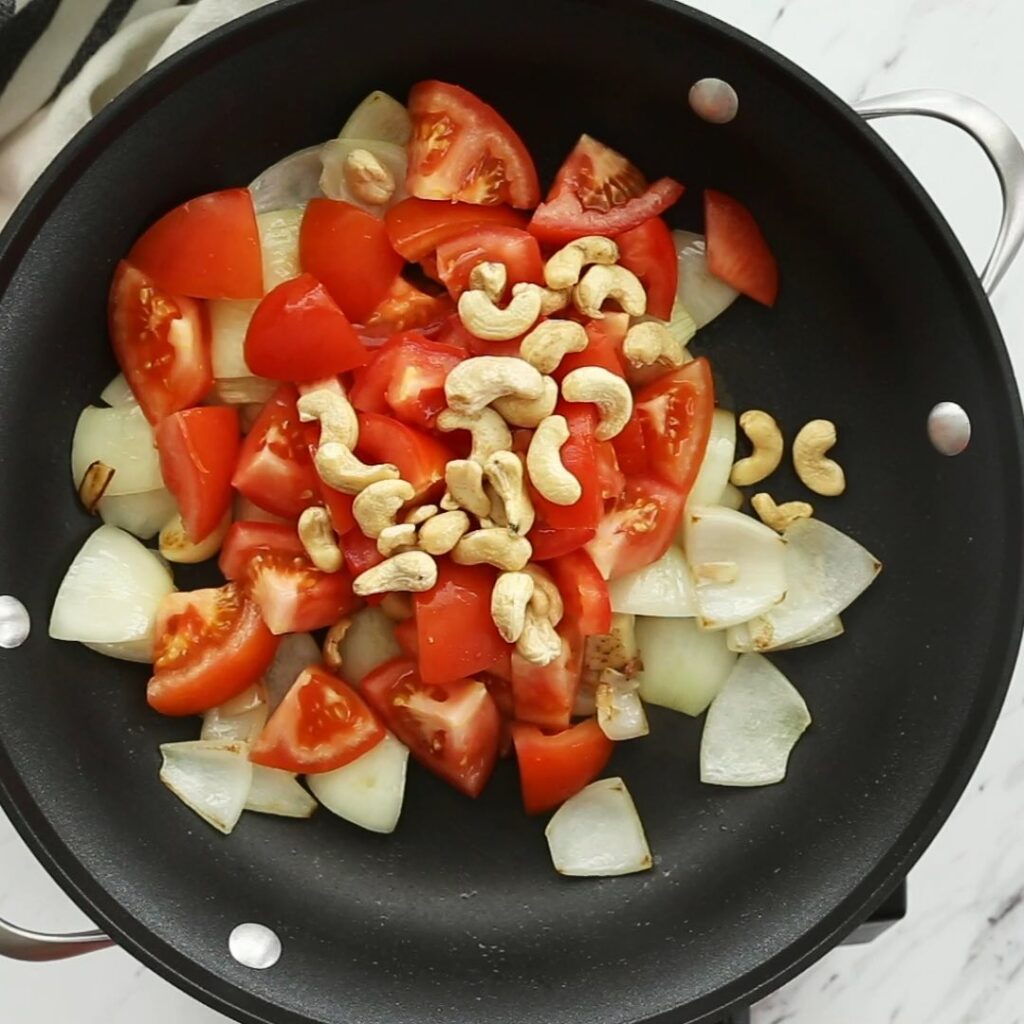
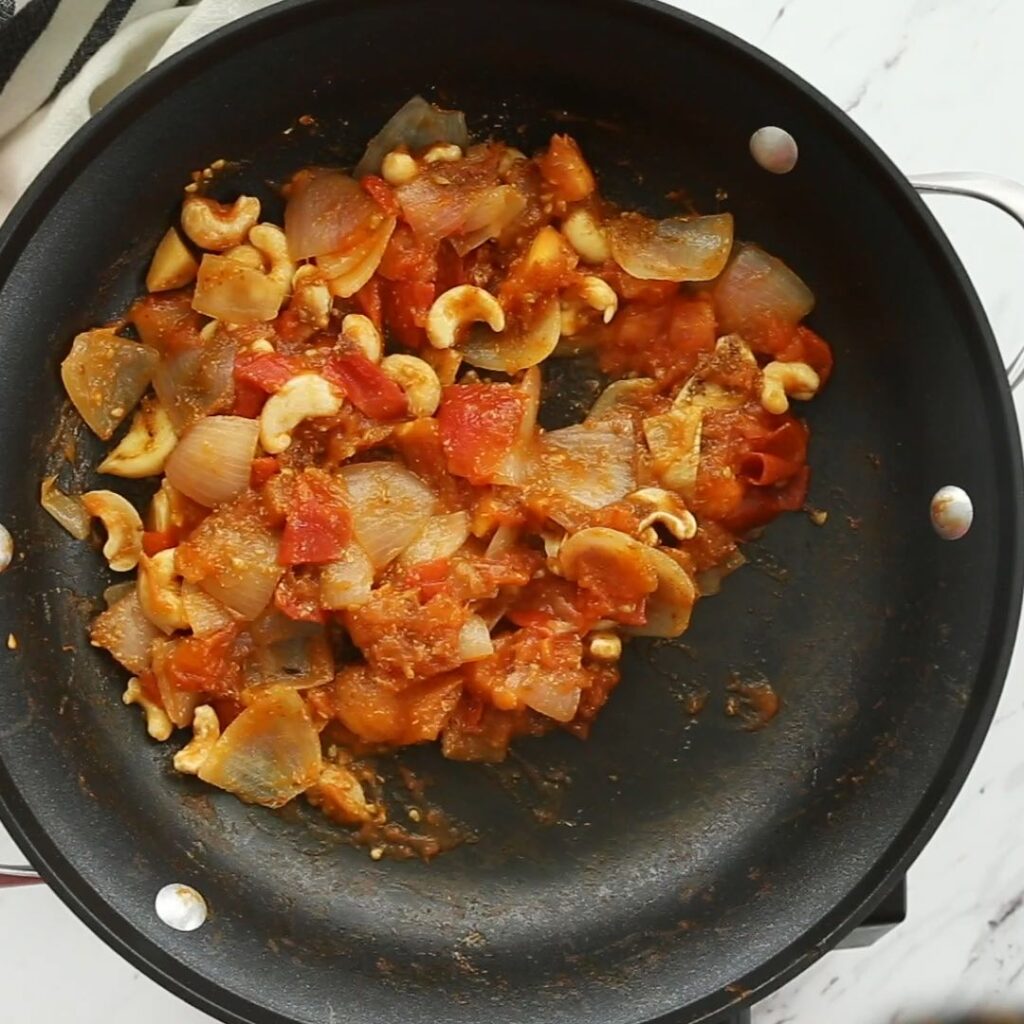
    a. To prepare the sauce, cook onion, garlic, ginger, tomato, and raw cashews in oil. In the end, add ground cumin and ground coriander.

    Diced onion, tomato and raw cashews in a large skillet before cooking.
    Diced onion, tomato and raw cashews in a large skillet after sautéing.

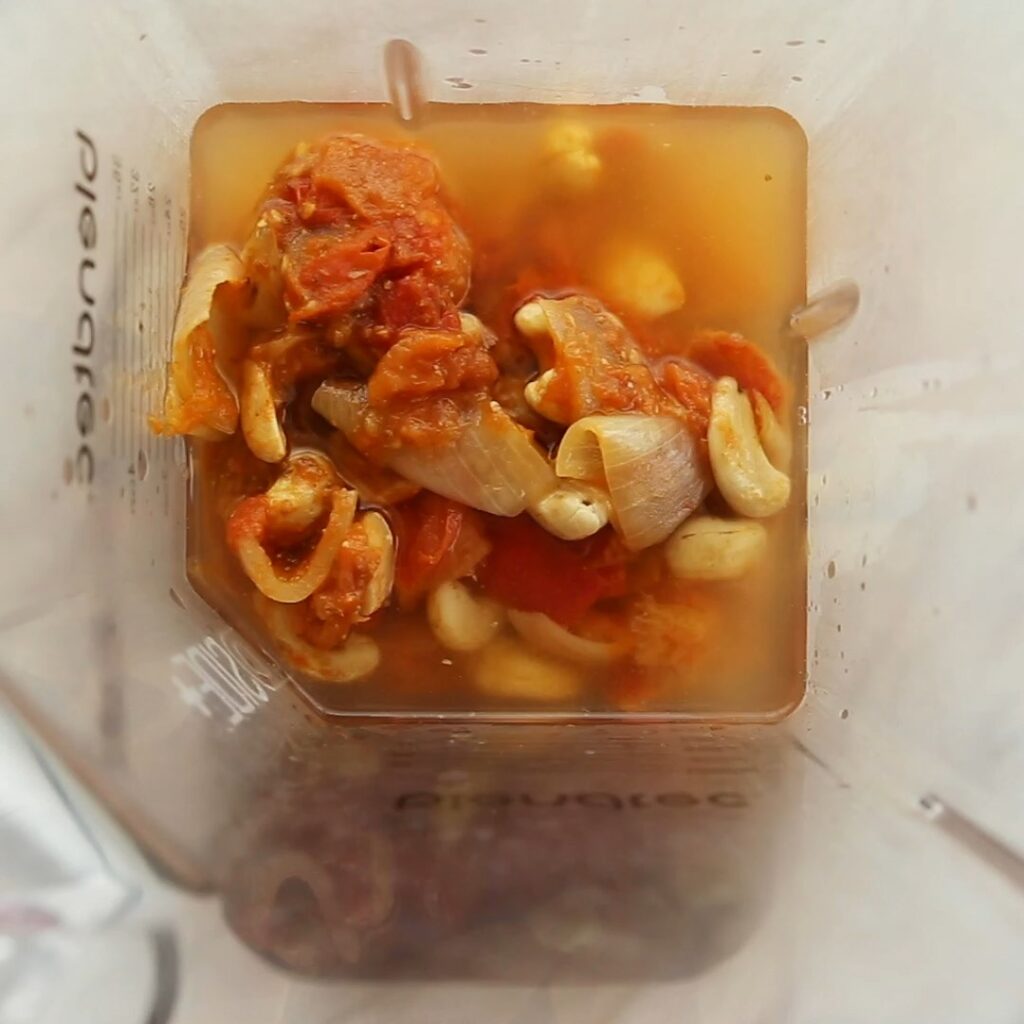
    b. Blend this masala base with little water in a blender to a smooth puree.

    Sautéed onion and tomato mixture in a blender jar.
    Pureed sautéed onion and tomato in a blender jar.

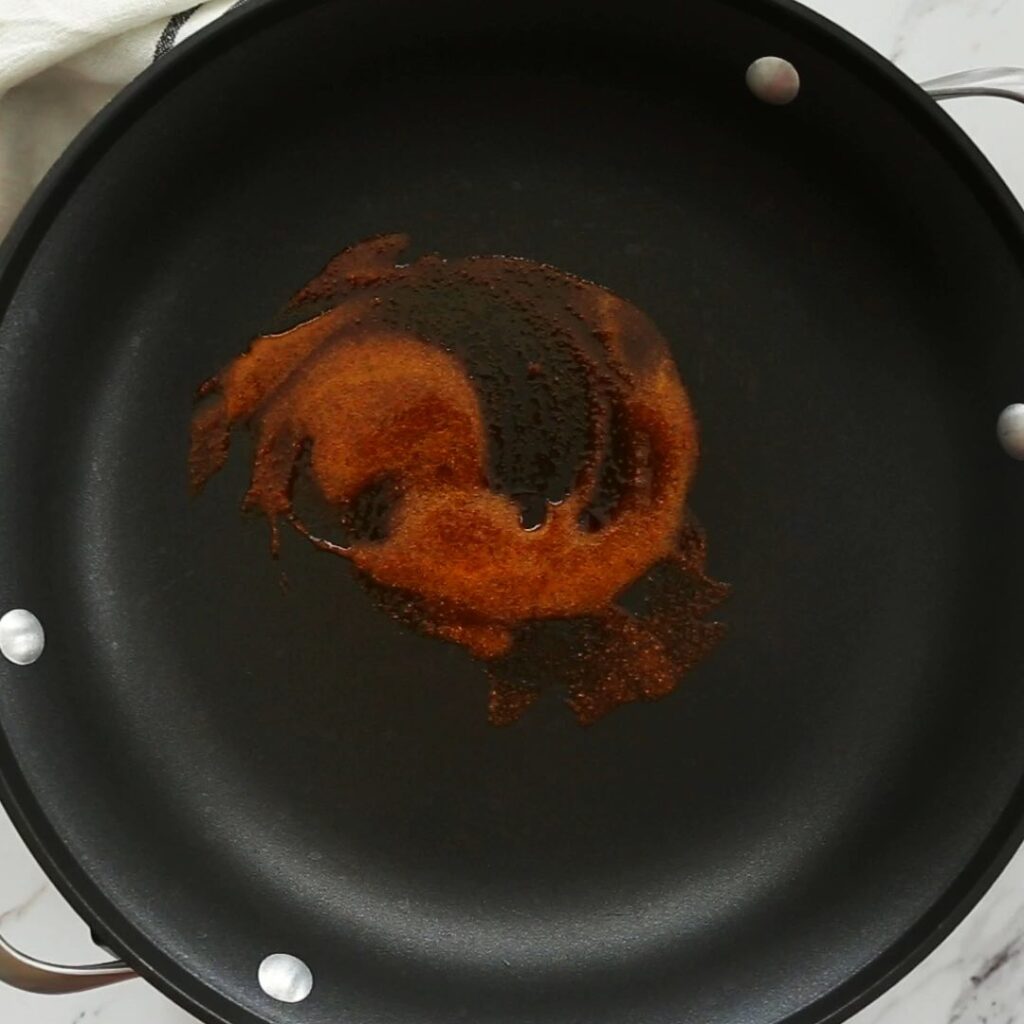
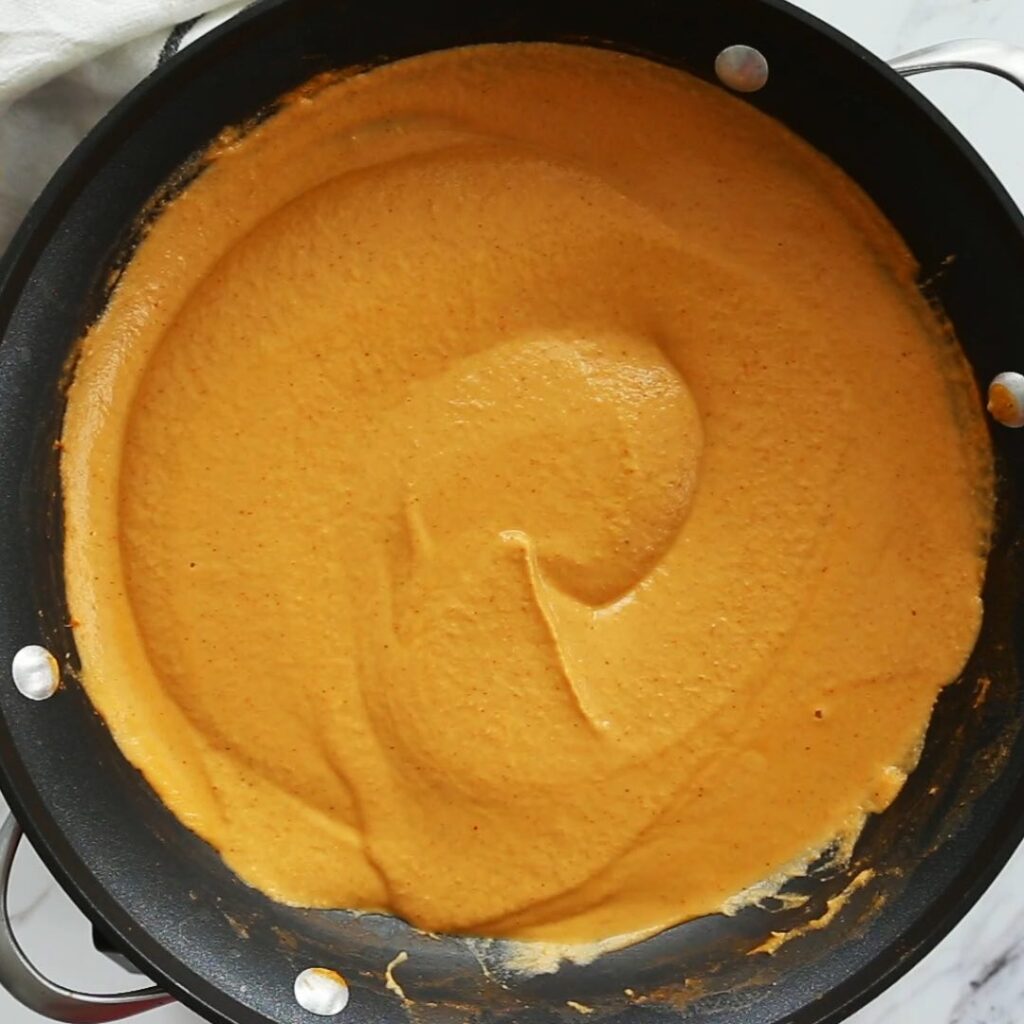
    c. Fry some chili powder in oil in the frying pan and add the prepared onion-tomato puree. If you do not want to use chili powder, skip this step and add puree directly to the pan.

    Process of frying some chili powder in oil in a skillet.
    Cooking pureed onion and tomato mixture in a skillet.

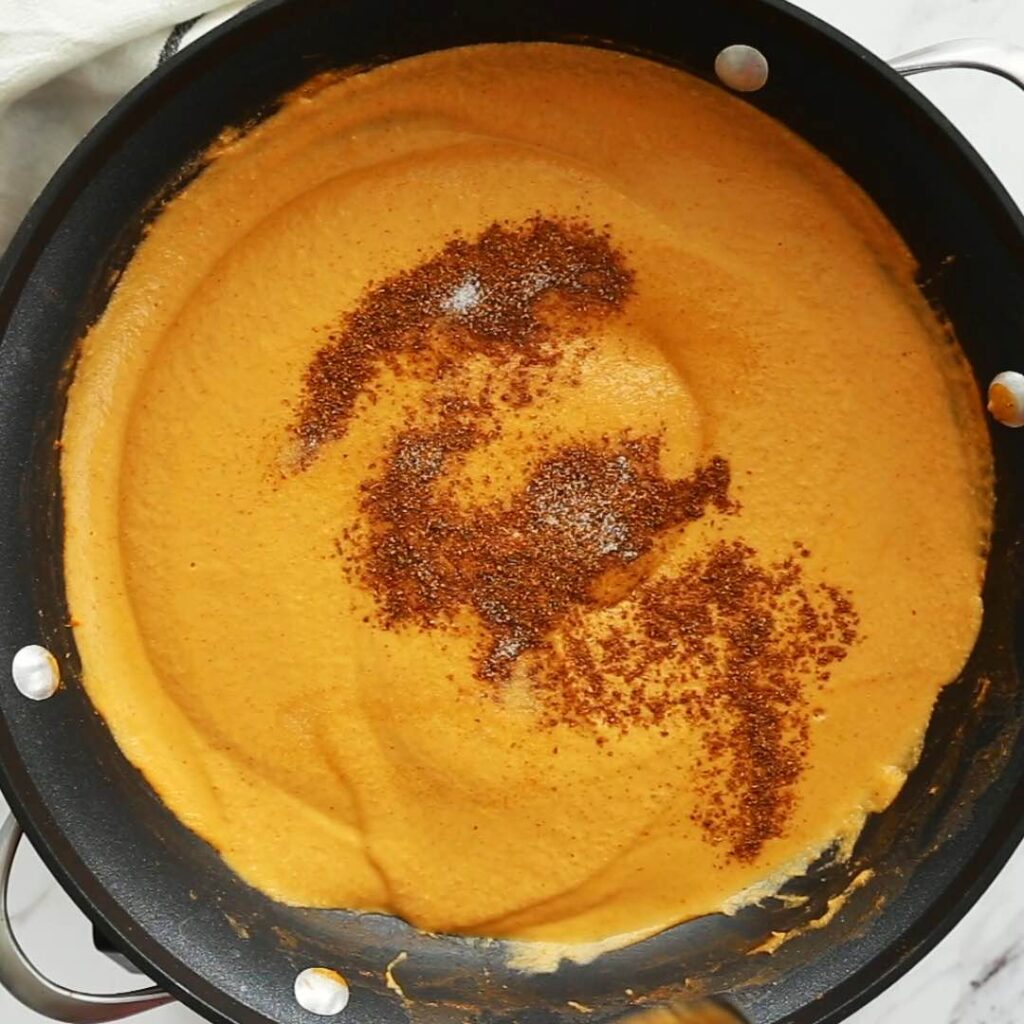
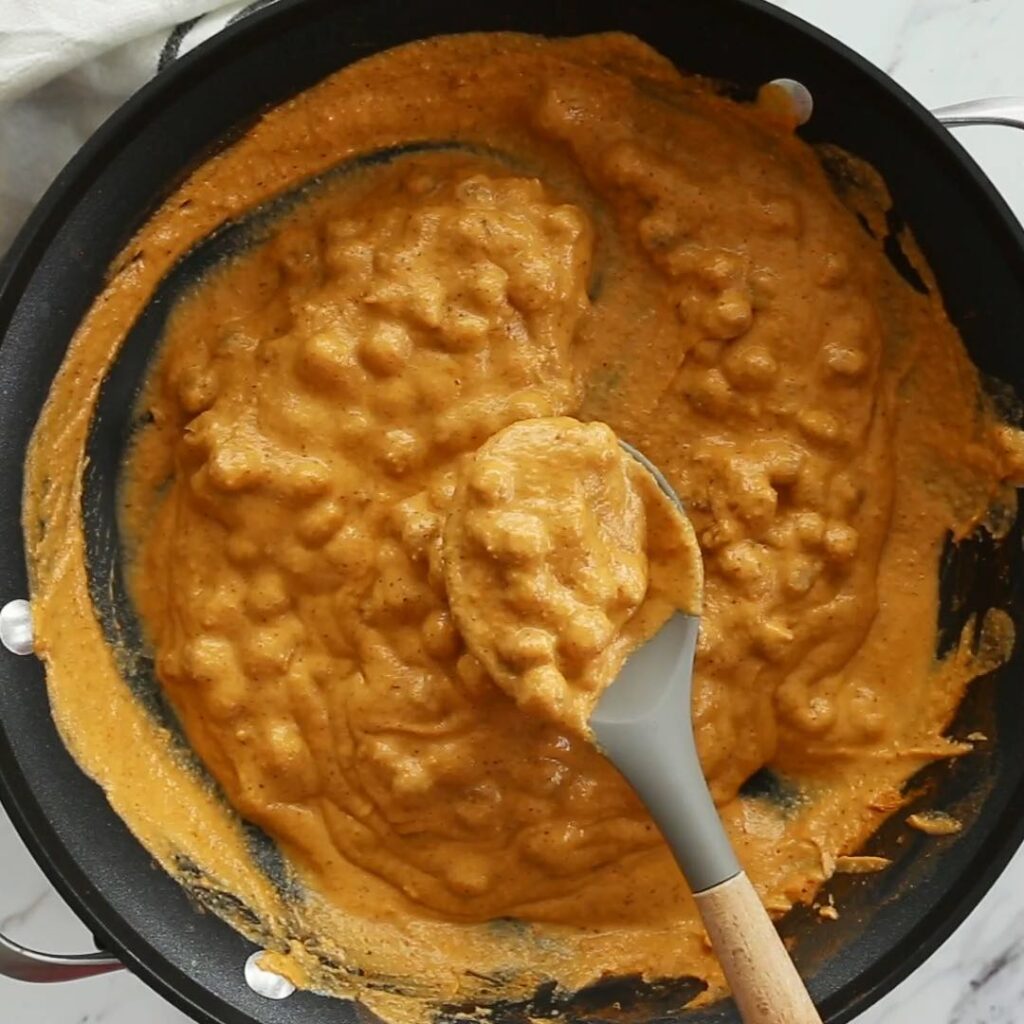
    d. Finally, add some garam masala and salt according to taste. Once the sauce is ready, add toasted chickpeas. Mix well and serve warm. Find detailed step-by-step instructions in the recipe card below.

    Cooking pureed onion and tomato mixture with garam masala in a skillet.
    Chickpea tikka masala in a skillet with a serving spoon.

    Serving Suggestions!

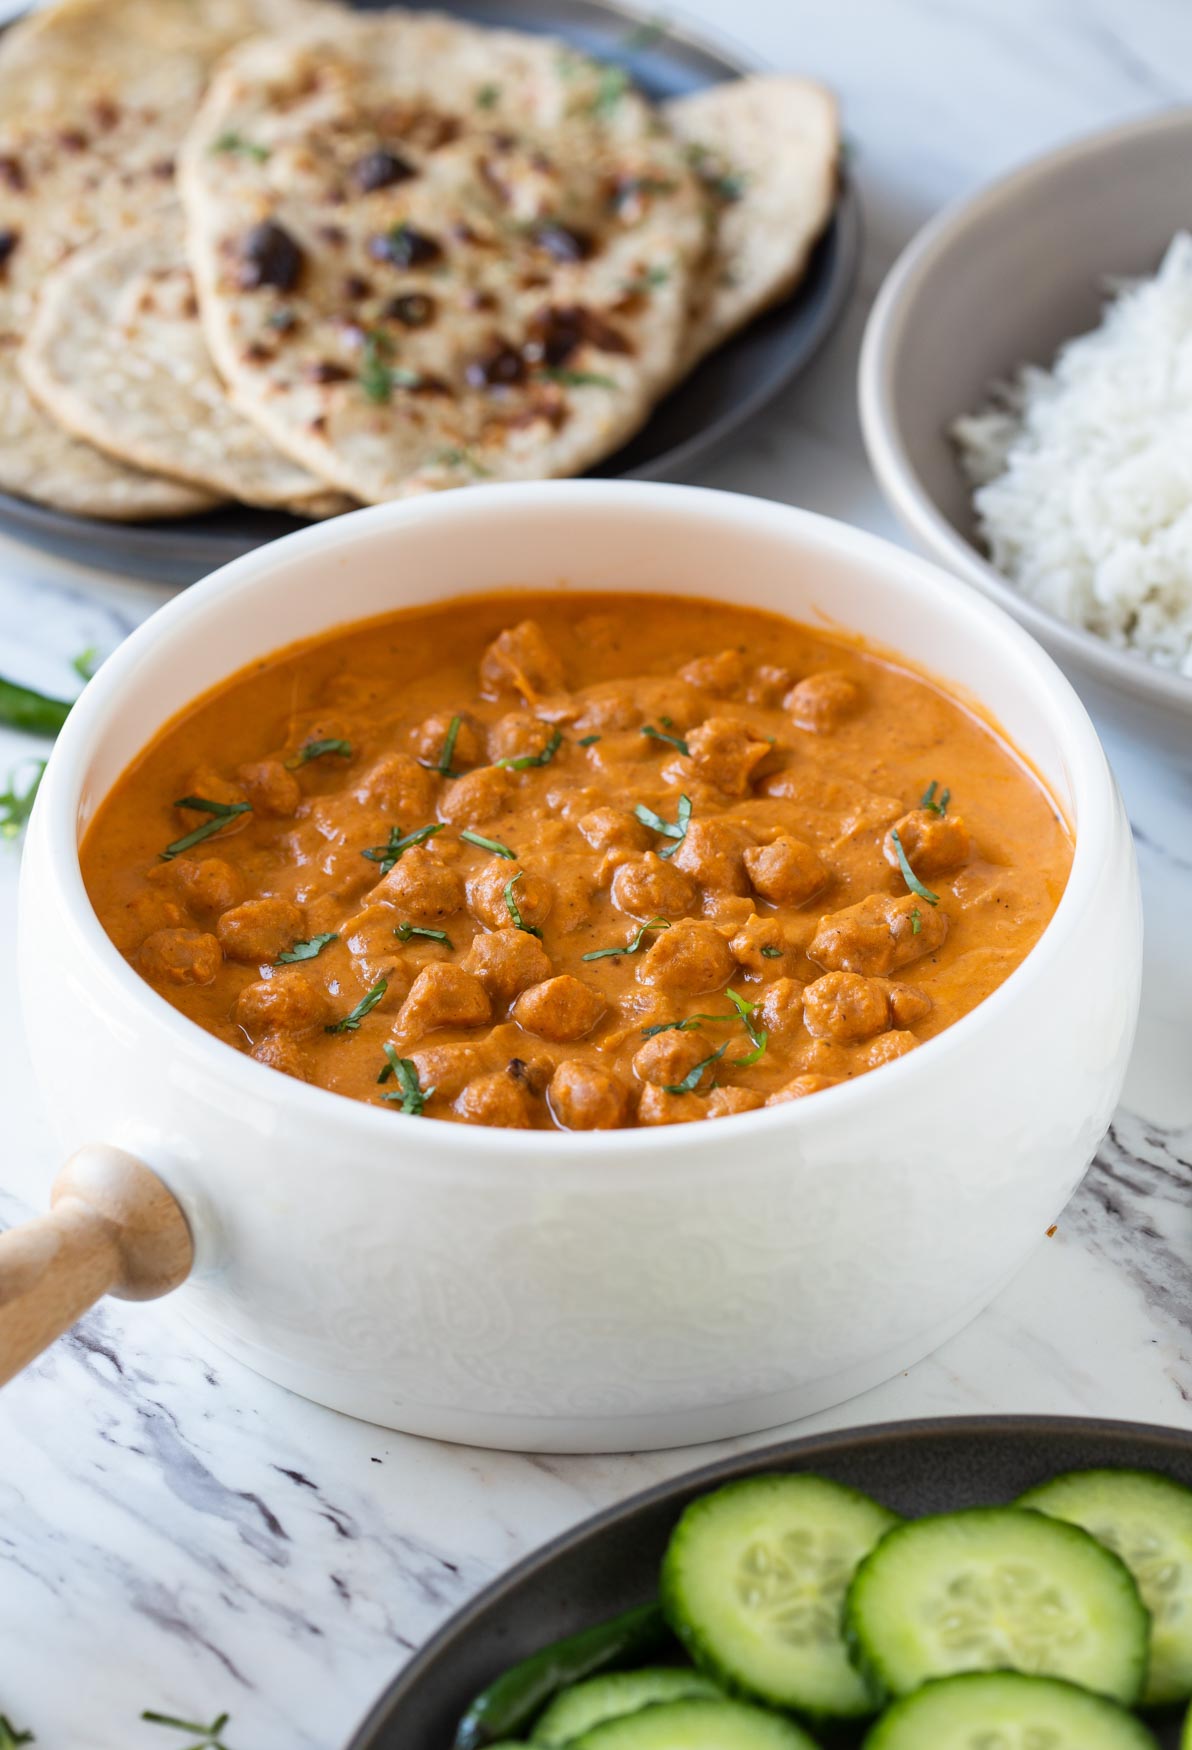
    • Serve it with simple wheat flatbread (Indian chapati), homemade naan bread, and/or plain white rice with sliced cucumbers and onion on the side for a wholesome meal.
    • Add it to the party menu along with whole wheat naan, vegetarian biryani or chicken biryani, rice pulao, homemade mango lassi, etc.
    Chickpea tikka masala garnished with fresh cilantro in a serving bowl and served with whole wheat naan, plain rice, and cucumber slices on the side.

    Helpful tips!

    • Do not use overcooked chickpeas in this recipe. Preferably cook chickpeas at home. Just soak them for a few hours and cook until tender yet firm. You can also use canned chickpeas--just make sure they are not too soft to break easily. I use my Instant Pot to cook raw chickpeas. It takes 5-6 minutes to cook if chickpeas are soaked and about 40 minutes otherwise (without soaking).

    • Use fresh tomatoes to make the sauce. It gives a nice fresh taste to the dish.
    • This dish is dairy-free or vegan. However, you can cheat and add a little heavy whipping cream at the end of cooking if you want to make the dish richer in taste.
    Enjoy authentic Indian flavors in this Healthy Chickpea Tikka Masala. Simple and easy vegetarian tikka masala recipe for a weeknight meal or to serve in a party. | #watchwhatueat #tikkamasala #chickpea #chickpeacurry #Indiancooking

    Recipe FAQs

    How to store and use leftovers?

    Let the leftover tikka masala cool down completely, then store it in the air-tight container in the refrigerator for 2-3 days.
    Reheat the leftovers on the stovetop or in the microwave until steamy hot. Serve warm.

    Can I freeze this chickpea masala?

    Yes, freeze the leftovers in freezer-friendly containers or bags for up to one month. However, I always prefer using it while it is fresh.

    How can I get the rich orange color as in the photos?

    Deep red-colored tomatoes and chili powder give a rich orange color to this dish. You can also add a bit of concentrated tomato paste to enhance the color.

    Can I use coconut milk?

    Yes, you can add some coconut milk to give a creamy texture to the sauce.

    More Unique Indian Recipes To Try

    • One Pot Easy Palak Paneer Rice or Healthy Spinach Rice | Indian palak paneer turned into one pot rice dish. #spinach #palakpaneer #healthyrecipes
      One Pot Easy Palak Paneer Rice
    • Protein Rich Easy Coconut Chickpea Curry | Vegan, Gluten Free
    • One pot easy vegetable biryani. Healthy and nutritious | watchwhatueat.com
      One Pot Easy Vegetable Biryani
    • Naan bread vegan wraps filled with toasted chickpeas. This wrap is healthy and filling. No naans... then replace with pita or soft tacos.
      Vegan Chickpea Naan Wraps

    Love this recipe? Please leave a 5-star ⭐⭐⭐⭐⭐ rating in the recipe card below & a review in the comments if you REALLY like this recipe. Thank You!

    📖 Recipe

    Toasted chickpeas dunked in creamy tomato authentic tikka sauce to make this easy restaurant-style healthy chickpea tikka masala.
    Print Pin
    4.72 from 38 votes

    Vegetarian Chickpea Tikka Masala

    Toasted chickpeas dunked in creamy tomato tikka sauce to make this authentic and restaurant-style healthy chickpea tikka masala.
    Course: Lunch / Dinner,Main Course
    Cuisine: Indian,Indian Inspired
    Diet Gluten Free,Low Fat,Vegan,Vegetarian
    Prep Time 15 minutes minutes
    Cook Time 20 minutes minutes
    Total Time 35 minutes minutes
    Servings :4
    Calories :268kcal
    Author:Swati Kadam Gulati

    Would you like to save this recipe?

    Email yourself a link to this post and come back to it later!

    Equipment

    • Large Baking Sheet

    Ingredients

    For Chickpea Tikka

    • 2 cup chickpeas cooked
    • 2-3 garlic cloves finely minced
    • ½" ginger finely minced
    • ¾ teaspoon garam masala
    • ½ tsp  chili powder
    • 1 tablespoon lemon juice
    • ½ tablespoon oil
    • salt to taste

    For Tikka Masala Sauce

    • 1 small onion cut in 8 pieces
    • 4 medium tomatoes cut in quarters
    • 2-3 garlic whole cloves
    • ½" ginger peeled and cut into 2-3 pieces
    • ¼ cup raw cashews
    • 1 teaspoon cumin powder
    • 1 ½ teaspoon coriander powder
    • 2 teaspoon oil divided
    • ½ teaspoon chili powder
    • 1 teaspoon garam masala
    • 1 cup water
    • salt to taste

    Instructions

    Roasted Chickpea Tikka

    • Preheat oven to 400 F.
    • In a medium mixing bowl add and mix all the ingredients listed under Chickpea Tikka above. Spread it evenly on a nonstick baking tray.
    • Bake the chickpeas in preheated oven for 10 min. Using a spatula stir them and again continue baking for 10 more min.

    Tikka Masala Sauce

    • Meanwhile, heat 1 teaspoon oil in a large frying pan or skillet. Add whole garlic cloves, ginger, and onion. Cook the onion until translucent for 2-3 min.
    • Then add tomatoes and raw cashews. Cook them until tomato softens and gives sauce like consistency for about 4-5 min. 
    • Now add cumin powder and coriander powder. Mix well and transfer this mixture to the blender jar, add 1 cup water and blend until smooth and creamy.
    • Heat remaining oil in the frying pan on low heat. Add chili powder and cook it slightly until fragrant.
    • Add blended tomato mixture and bring it to boil.
    • Now add garam masala and salt to taste. Mix well and simmer (cover with lid) on low heat for 5 min.
    • Finally, add roasted chickpeas, garnish with cilantro and serve warm.

    Video

    Notes

    1. Use vegetable or chicken broth (or stock) instead of water to prepare the sauce.
    2. You can add a little more water if you do not want the sauce to be too thick for your liking.
    3. Use freshly ground roasted cumin and coriander seeds powder whenever possible. It really adds an amazing aroma and flavor to the dish. I usually roast around 1 teaspoon cumin and 2 teaspoon coriander seeds (for this recipe) together in a frying pan. And using a stone molcajete, I crush the roasted seeds into powder.
    4. For more useful tips, see the Helpful Tips section above.

    Nutrition

    Calories: 268kcal
    Tried this recipe?Tag us on Instagram @watchwhatueat or tag #watchwhatueat! OR leave us a comment & rating below. Your feedback is very important to us.
     

    2 Comments

    Healthy Roasted Turmeric Cauliflower Soup - easy vegetarian or vegan recipe to prepare creamy cauliflower soup. Roasted garlic and potatoes along with cauliflower give amazing flavors to the soup. Perfect for winter nights. | #watchwhatueat #soup #cauliflowersoup #vegan #cauliflowerrecipe

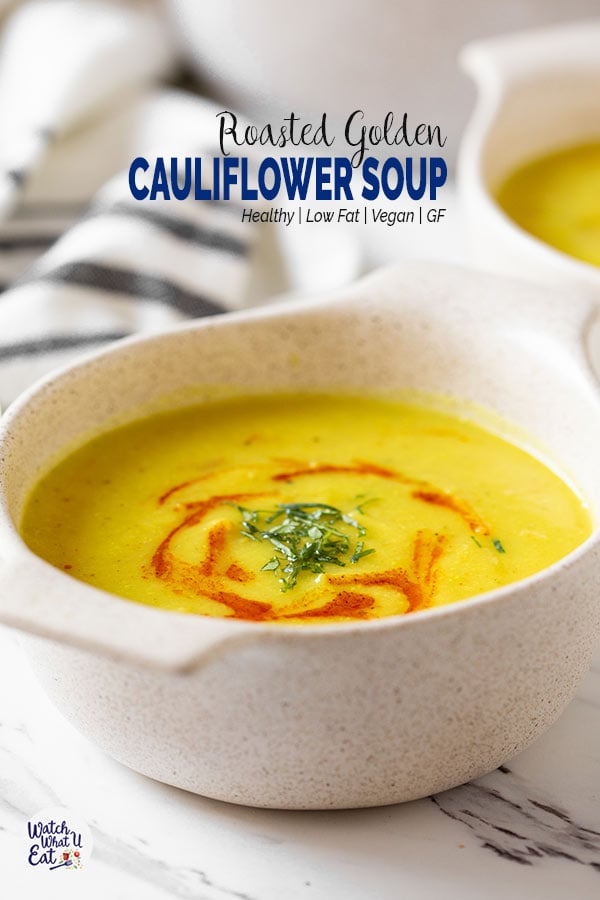
    Roast fresh cauliflower florets in the oven and turn them into this amazing roasted turmeric cauliflower soup. Perfect cold-night golden healthy soup to get the warmth.

    Roasted cauliflower soup in a serving soup bowl.

    Looking for fresh and healthy cauliflower recipes?  Making soup from cauliflower is one of the most delicious and healthy cauliflower recipes you can try.

    And this creamy roasted turmeric cauliflower soup is perfect to get the warmth during chilly winter nights.

    [feast_advanced_jump_to]
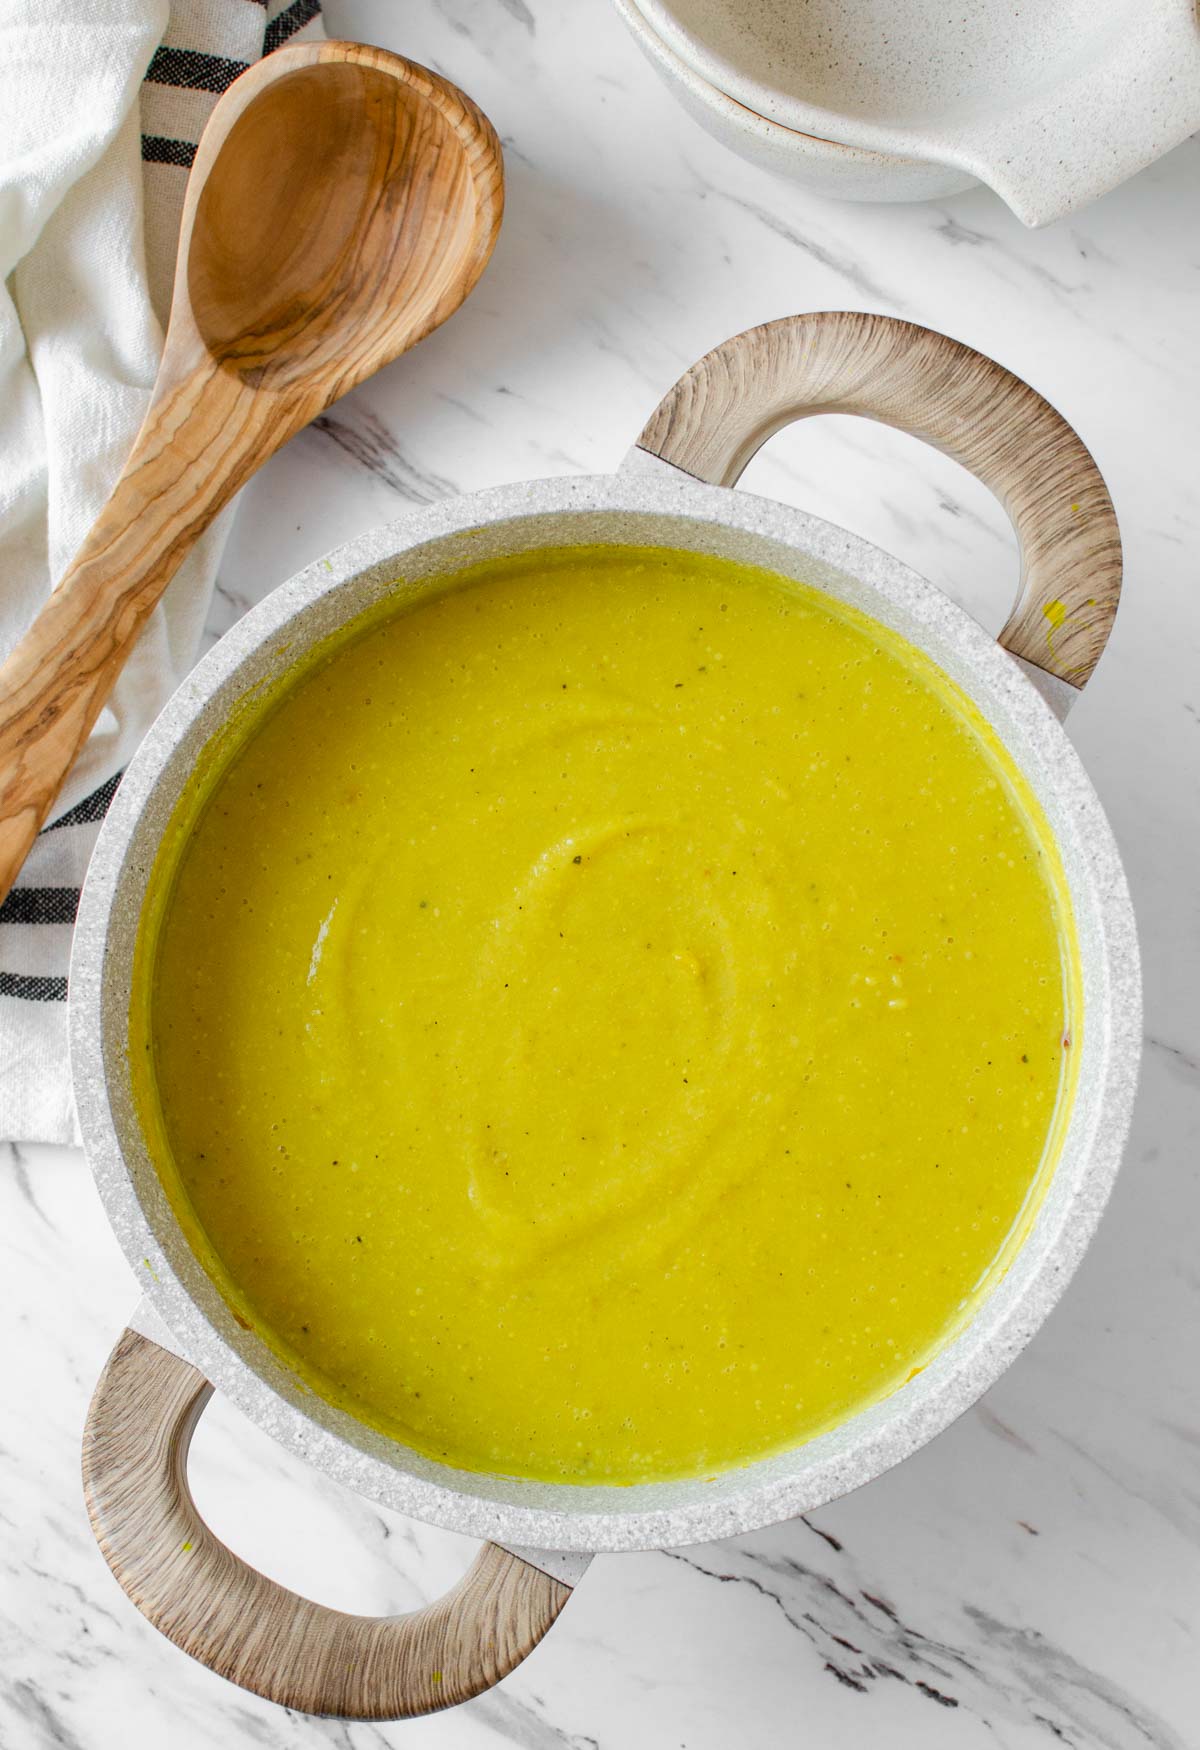
    Roasted turmeric cauliflower soup in a pot with wooden ladle.

    In the last 2 to 3 weeks here in upstate New York we have been experiencing some of the coldest days of the season. We had a big snowstorm and then a polar vortex within a few days!

    When nature is at its peak, we enjoy comforting foods at home, sitting on the couch, and enjoying our favorite TV shows. For such nights there is nothing better than a warm bowl of soup with toasted bread or a homemade sandwich. Sometimes I like winters for this reason.

    So no wonder I am in the mood of trying different types of soups in my kitchen. These days, in addition to our popular creamy broccoli soup and healthy barley soup, this roasted turmeric cauliflower soup is our new favorite.

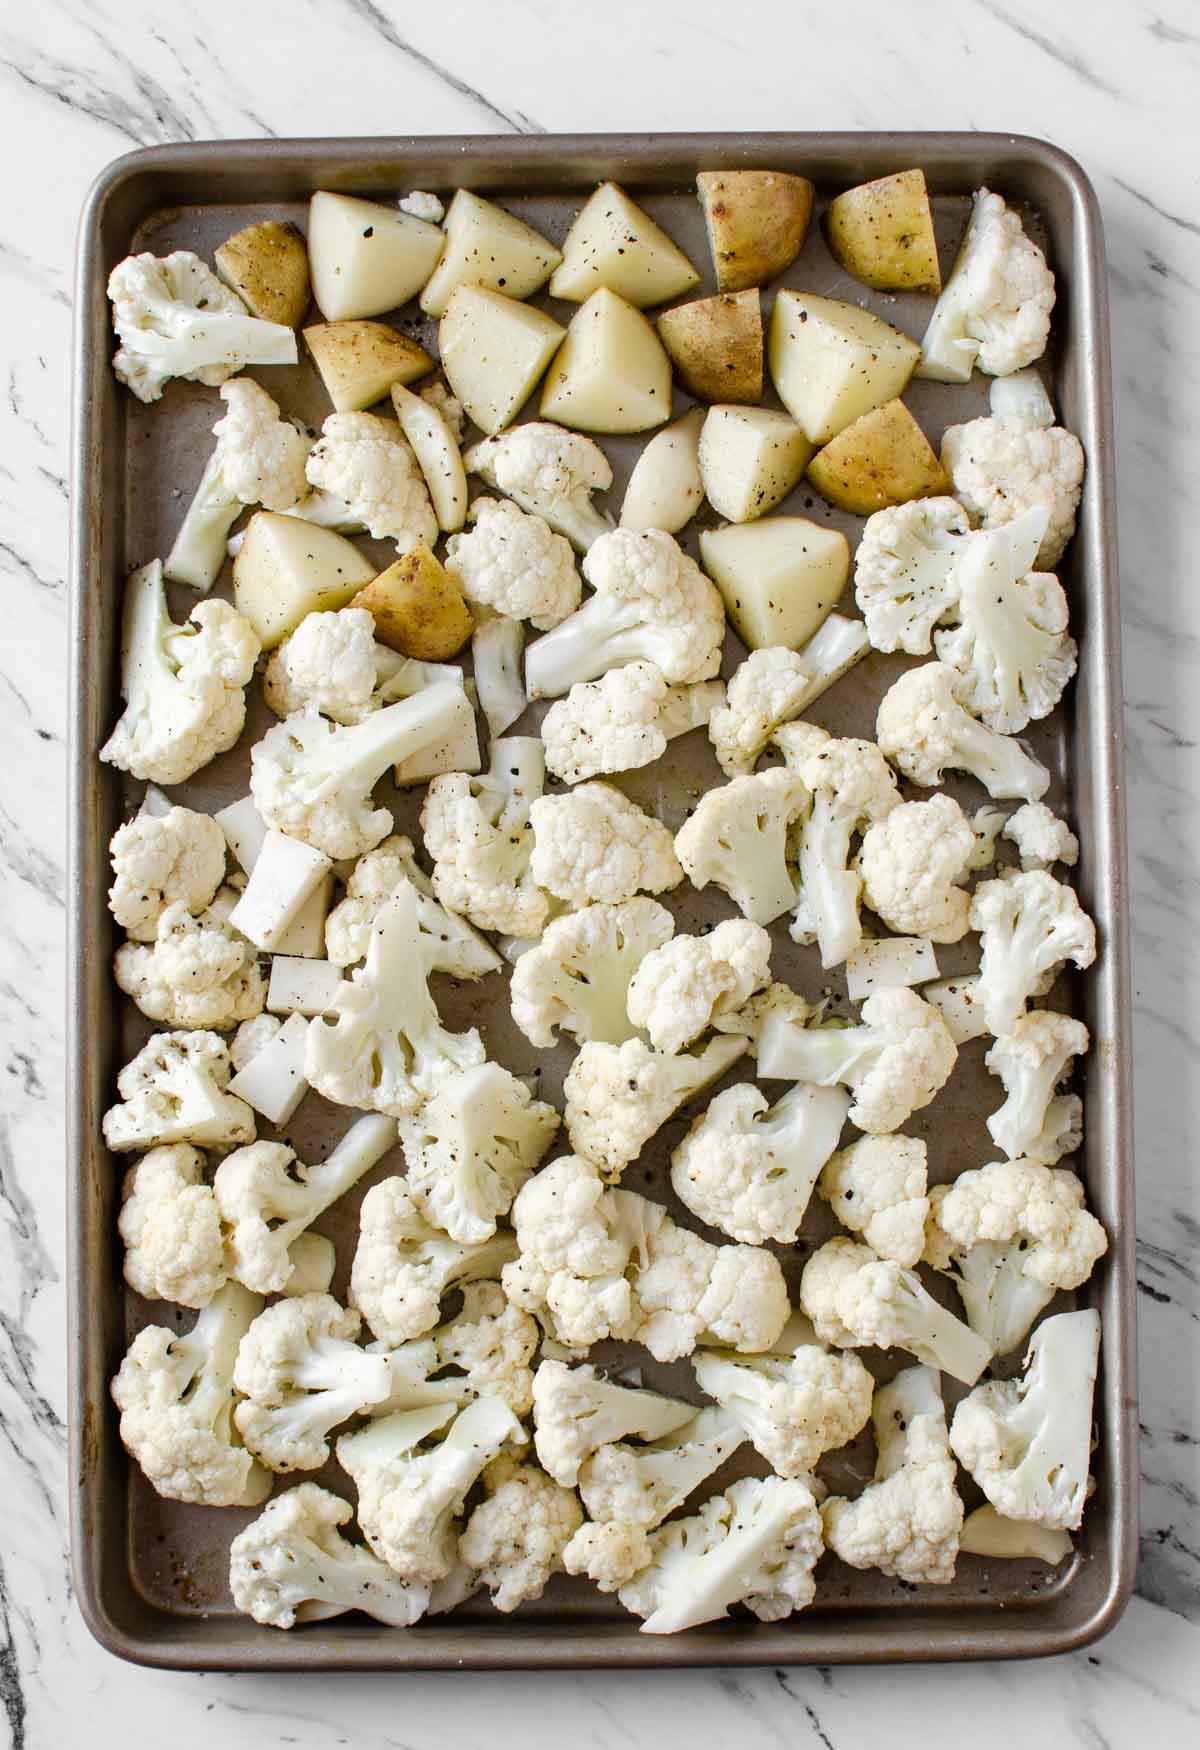
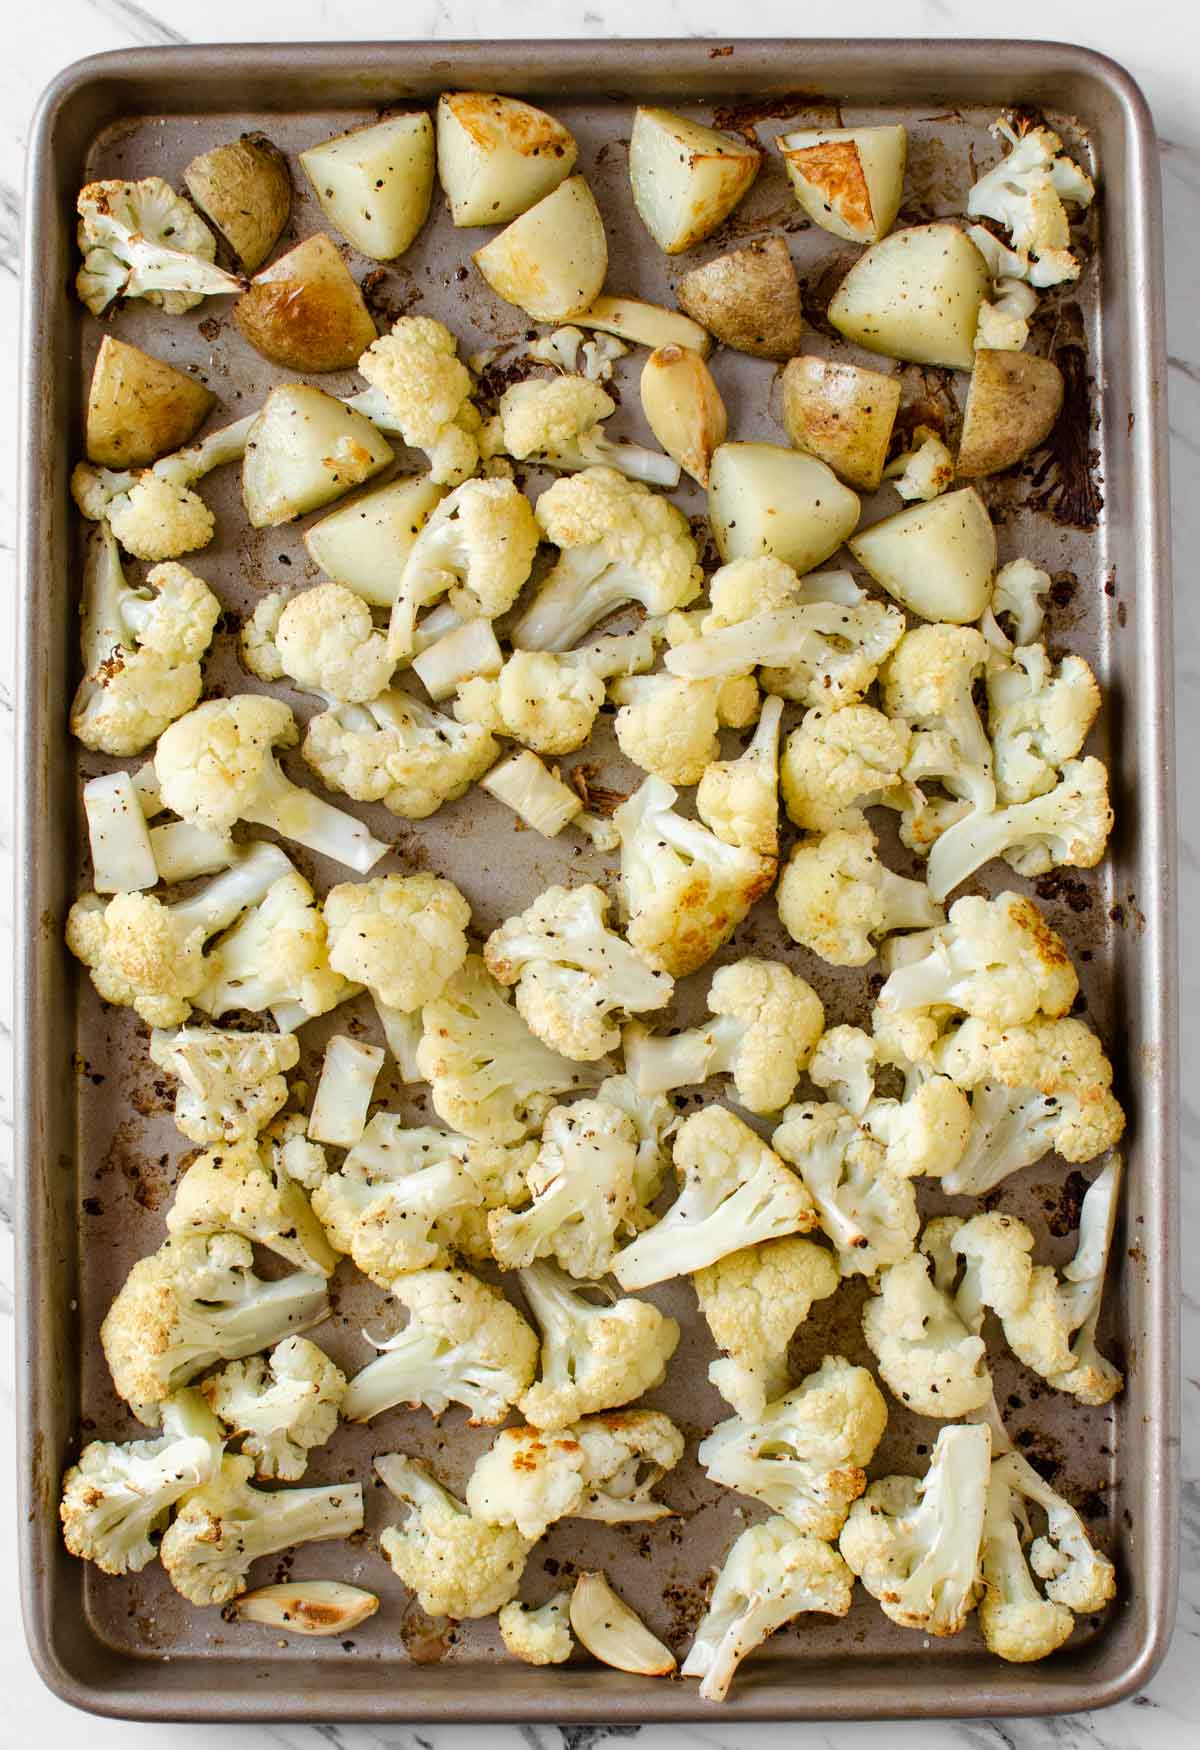
    Oven roasted cauliflower florets, garlic and potato for making Healthy Roasted Turmeric Cauliflower Soup
    Oven roasted cauliflower florets, garlic and potato for making Healthy Roasted Turmeric Cauliflower Soup

    How to make roasted turmeric cauliflower soup?

    To prepare this soup bake cauliflower florets, potatoes, and some garlic cloves in the oven until golden brown. Then blend everything in the blender with some water or broth until smooth. Fry some turmeric in little oil and add roasted cauliflower puree. Cook for a few minutes and serve warm. Find the ingredients list and instructions in detail below.

    How to thicken the soup?

    To give a thick and creamy consistency to the soup, you can use whole dairy cream or raw cashews or potatoes. However, using dairy cream will decrease the health benefits of the soup. If you want to use raw cashews, add some while blending the roasted cauliflower florets in the blender. In this recipe, I use potatoes. Cut them into small pieces and bake them along with the cauliflower.

    What goes with this golden cauliflower soup?

    • With this creamy, healthy cauliflower soup, you can serve toasted plain or garlic bread slices or croutons or make this whole wheat focaccia bread.
    • You can also have this soup on the side of a homemade chicken sandwich or veggie sandwich for a complete wholesome meal.
    Roast fresh cauliflower florets in the oven and turn them into this amazing roasted turmeric cauliflower soup. Perfect cold-night easy golden healthy soup to get the warmth.

    Helpful Tips!

    • Use chemical and pesticide-free organic cauliflower whenever possible. Remove any dark spots from the surface using a knife. Separate clusters of florets from the stem. Rinse and drain the clusters and then cut them into smaller 1-2" size florets.
    • Use potatoes for a smooth and creamy consistency of the soup. Cut them into similar sizes as the florets in order to speed up the cooking.
    • Once the baking is over, you can cook the florets on broil mode for a minute or so to get the desired color and smokey taste.

    Required Tools and Equipment!

    • Baking Sheet or Tray - For cooking cauliflower florets, garlic, and potatoes in the oven
    • Blender - To turn cooked cauliflower and potatoes into a creamy puree. You can also use an Immersion Hand Blender for this job.
    • Soup Pot - Finally to cook the soup you will need a large soup pot or dutch oven.

    Healthy Roasted Turmeric Cauliflower Soup - easy vegetarian or vegan recipe to prepare creamy cauliflower soup. Roasted garlic and potatoes along with cauliflower give amazing flavors to the soup. Perfect for winter nights. | #watchwhatueat #soup #cauliflowersoup #vegan #cauliflowerrecipe

    More Soup Recipes You Will Love To Try

    • Healthy Broccoli Soup
    • Healthy Barley Soup
    • Instant Pot Black Bean Soup
    • Creamy Roasted Tomato Soup

    Love this recipe? Please leave a 5-star ⭐⭐⭐⭐⭐ rating in the recipe card below & a review in the comments if you REALLY like this recipe. Thank You!

    📖 Recipe

    Healthy Roasted Turmeric Cauliflower Soup - easy vegetarian or vegan recipe to prepare creamy cauliflower soup. Roasted garlic and potatoes along with cauliflower give amazing flavors to the soup. Perfect for winter nights. | #watchwhatueat #soup #cauliflowersoup #vegan #cauliflowerrecipe
    Print Pin
    5 from 1 vote

    Healthy Roasted Turmeric Cauliflower Soup

    Roast fresh cauliflower florets in the oven and turn them into delicious creamy roasted turmeric cauliflower soup. Perfect golden healthy soup to get the warmth during winter time.
    Course: Soup
    Cuisine: American Inspired
    Prep Time 10 minutes minutes
    Cook Time 35 minutes minutes
    Total Time 45 minutes minutes
    Servings :4
    Calories :207kcal
    Author:Swati Kadam Gulati

    Would you like to save this recipe?

    Email yourself a link to this post and come back to it later!

    Equipment

    • Hand Blender
    • Large Baking Sheet
    • Sharp Knife (10% Code: WATCHWHATUEAT)

    Ingredients

    • 1 large cauliflower head cut into 1-2" florets
    • 2 medium white potatoes cut into 1-2" pieces
    • 4 garlic cloves
    • 1 tablespoon olive oil divided
    • 1 teaspoon turmeric
    • ¼ teaspoon red chili flakes
    • salt and pepper
    • 1 tablespoon lemon juice
    • 4 cup water or water + vegetable or chicken stock

    Instructions

    • Preheat oven to 400 F.
    • On a baking tray spread cauliflower florets, potatoes, and garlic cloves. Drizzle around ½ tablespoon oil and sprinkle some salt and pepper. Give them a quick mix.
    • Then cook them in preheated oven for about 15 min. Using spatula stir the florets and potatoes and cook for another 10-15 min or until well done.
    • Once roasting is done allow it to cool down for some time.
    • Transfer everything to the blender. Add 2 cups of water and blend the florets until it forms a puree.
    • Heat remaining oil in a medium pot on low heat. Add turmeric and red chili flakes and cook for a few seconds.
    • Add the roasted cauliflower puree, some more water or vegetable stock and bring mixture to a boil. Then add lemon juice and more salt and pepper if necessary.
    • Cook the cauliflower soup on low heat for about 5 min and serve warm.

    Notes

    1. Spread florets, potatoes, and garlic in a single layer on the baking tray. This will help to cook the potato and cauliflower evenly.
    2. You can adjust the consistency of the soup with more or less liquid mentioned in the ingredients as per your liking.
    3. Want to use Immersion Hand Blender? -- After heating turmeric and chili flakes (mentioned above in step 6)  add roasted cauliflower florets, potatoes, and garlic. Add all the liquid and then blend everything using a hand blender. Then follow the remaining instructions.

    Nutrition

    Calories: 207kcal | Carbohydrates: 33.5g | Protein: 9.2g | Fat: 5.4g | Saturated Fat: 1g | Potassium: 1226mg | Fiber: 8g | Sugar: 8.3g | Iron: 2mg
    Tried this recipe?Tag us on Instagram @watchwhatueat or tag #watchwhatueat! OR leave us a comment & rating below. Your feedback is very important to us.

    3 Comments

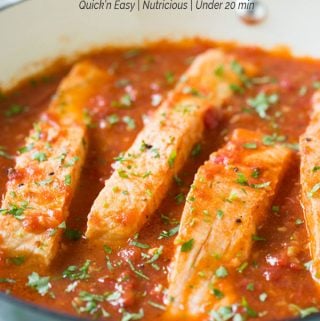
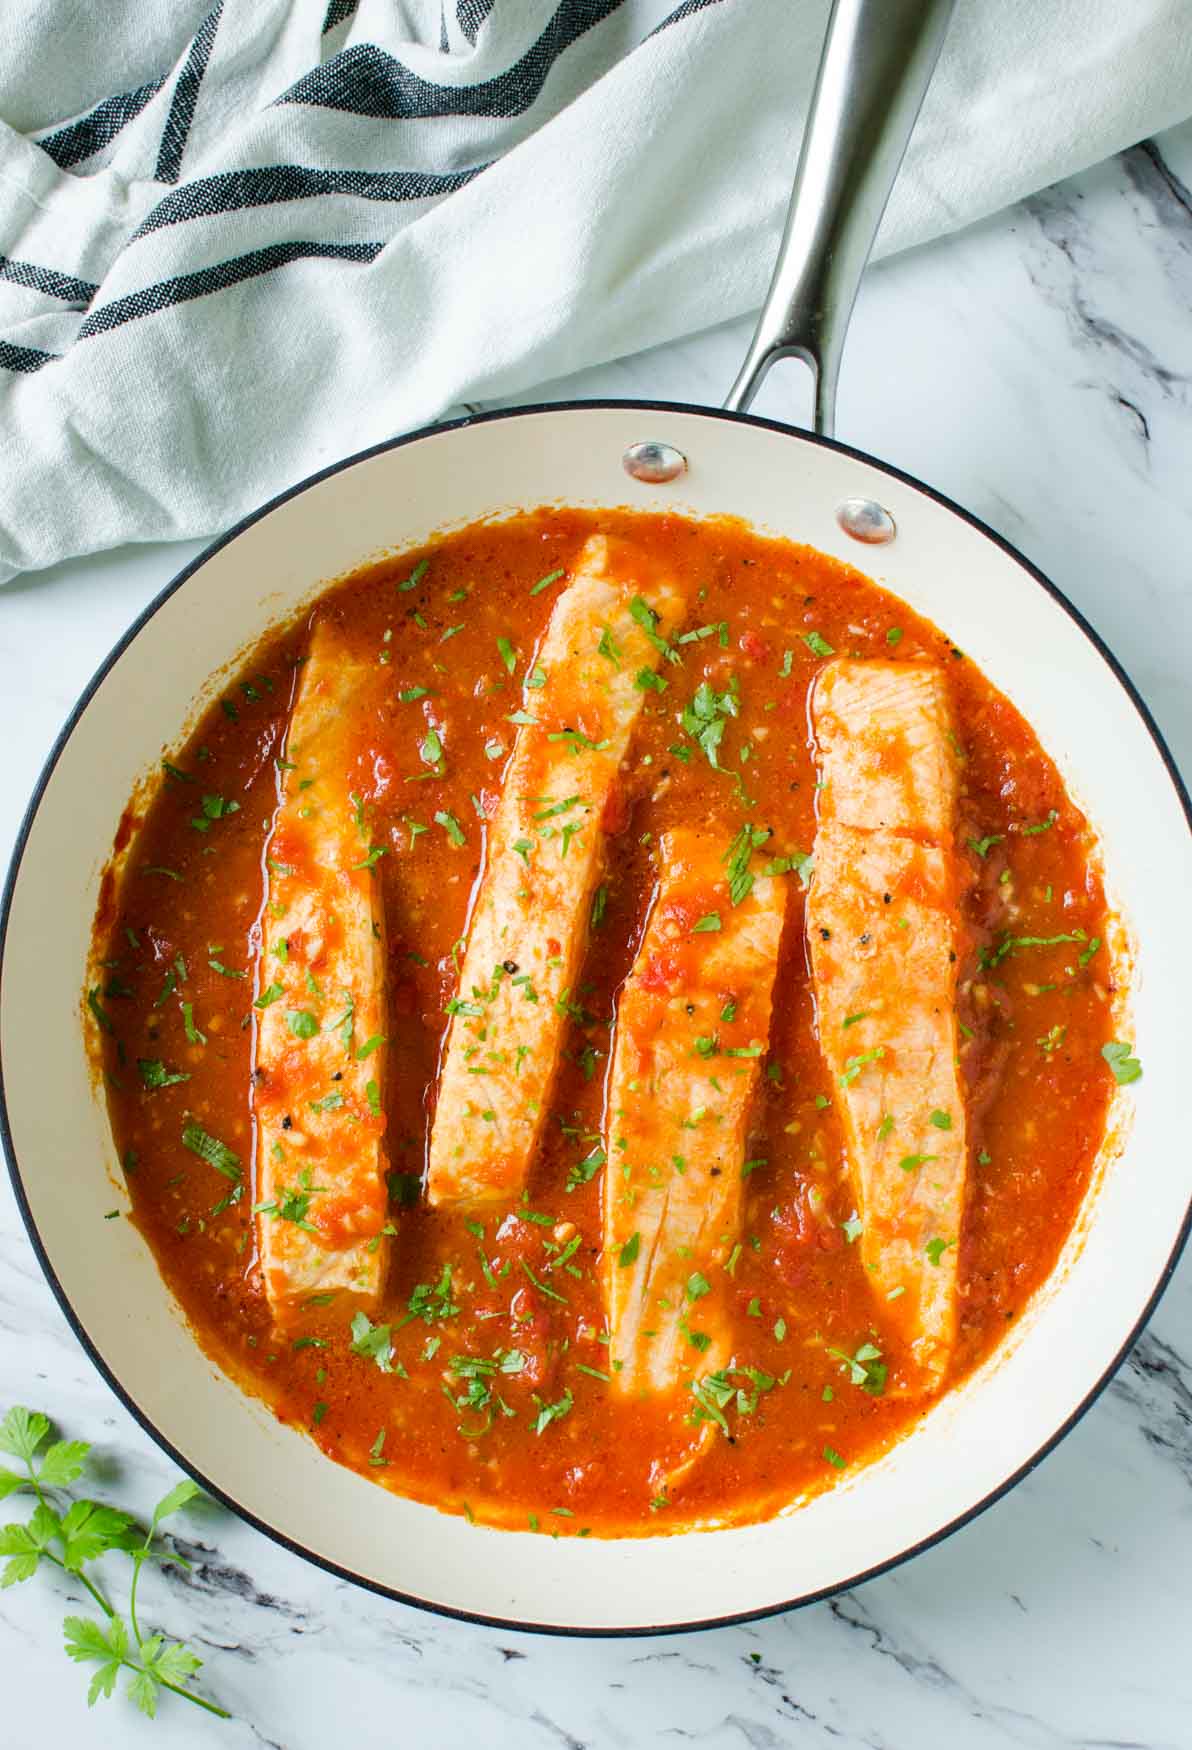
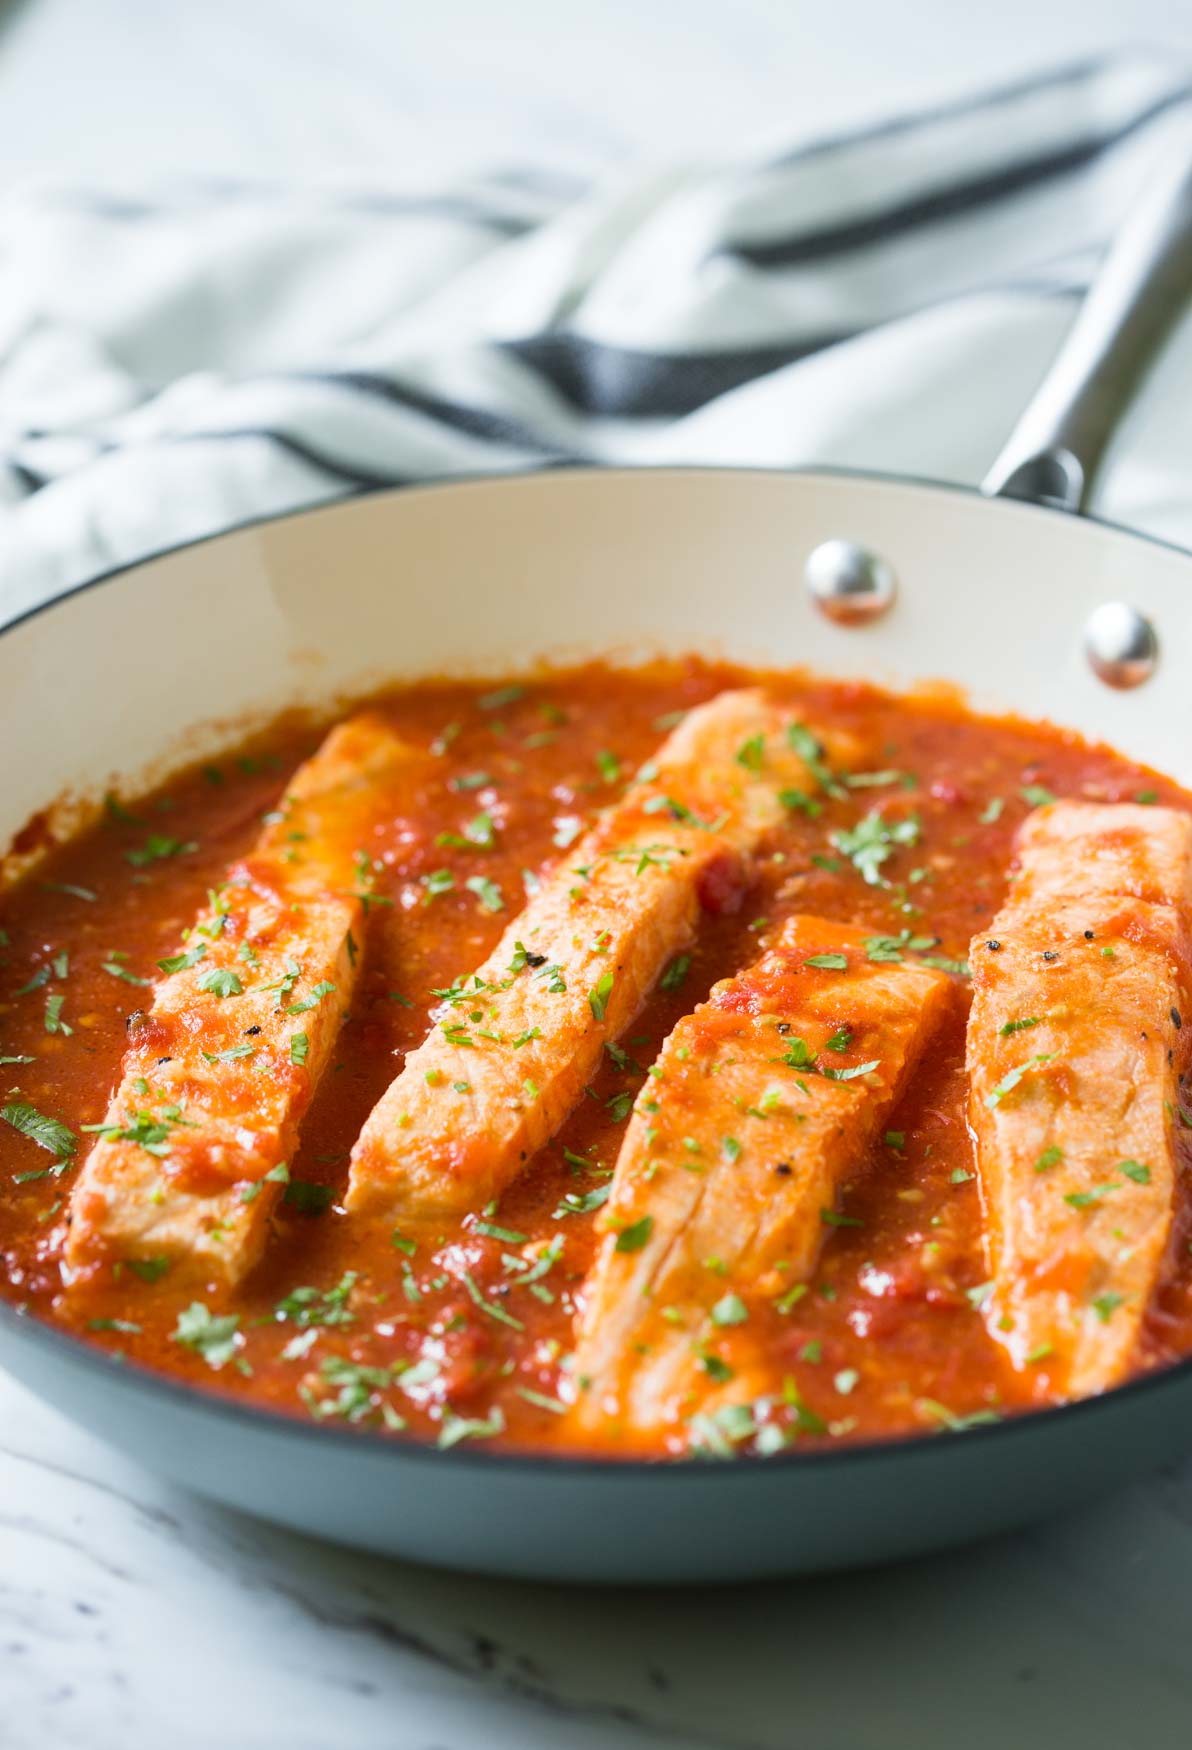
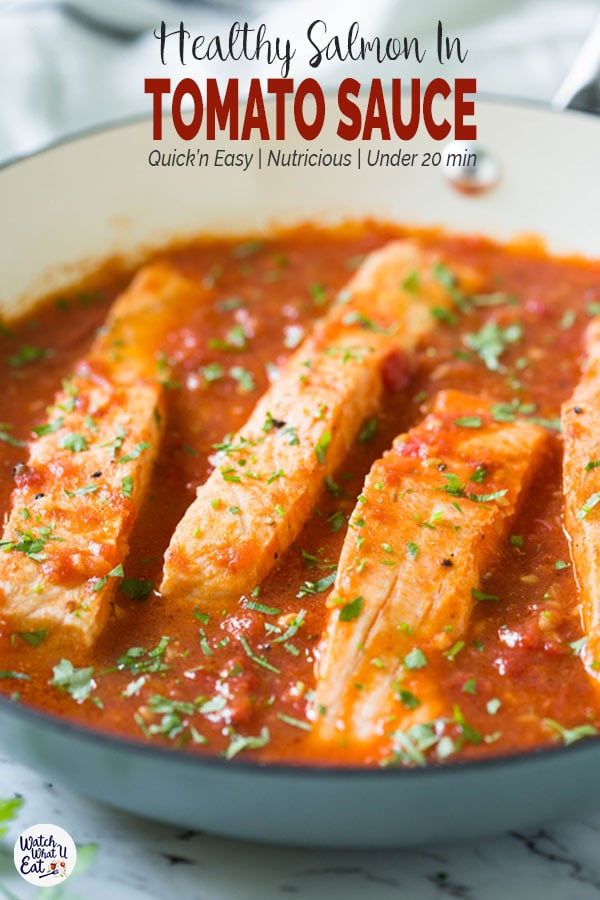
    Salmon in Tomato Sauce - cook salmon in fresh garlic and tomato sauce. Serve on the side of pasta, grits or rice for complete healthy dinner or lunch. Quick and easy weeknight meal. #watchwhatueat #salmon #seafood #tomatosauce #healthyrecipes

    This super easy and quick garlic salmon in tomato sauce is perfect to pair with plain rice or grits or pasta. Your meal will be ready to serve in under 30 minutes.

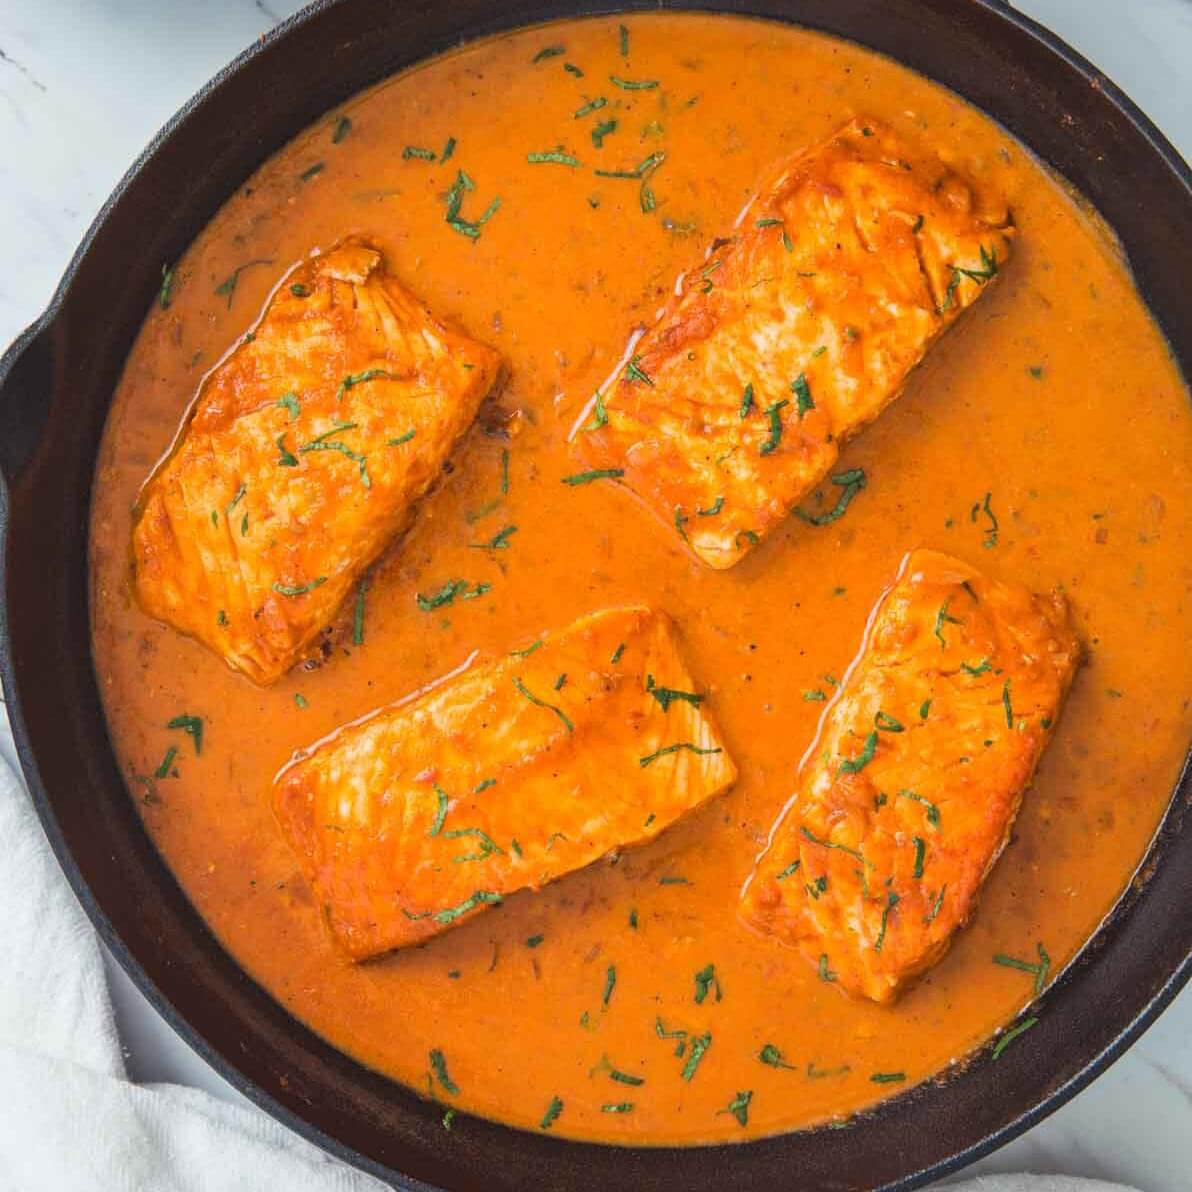
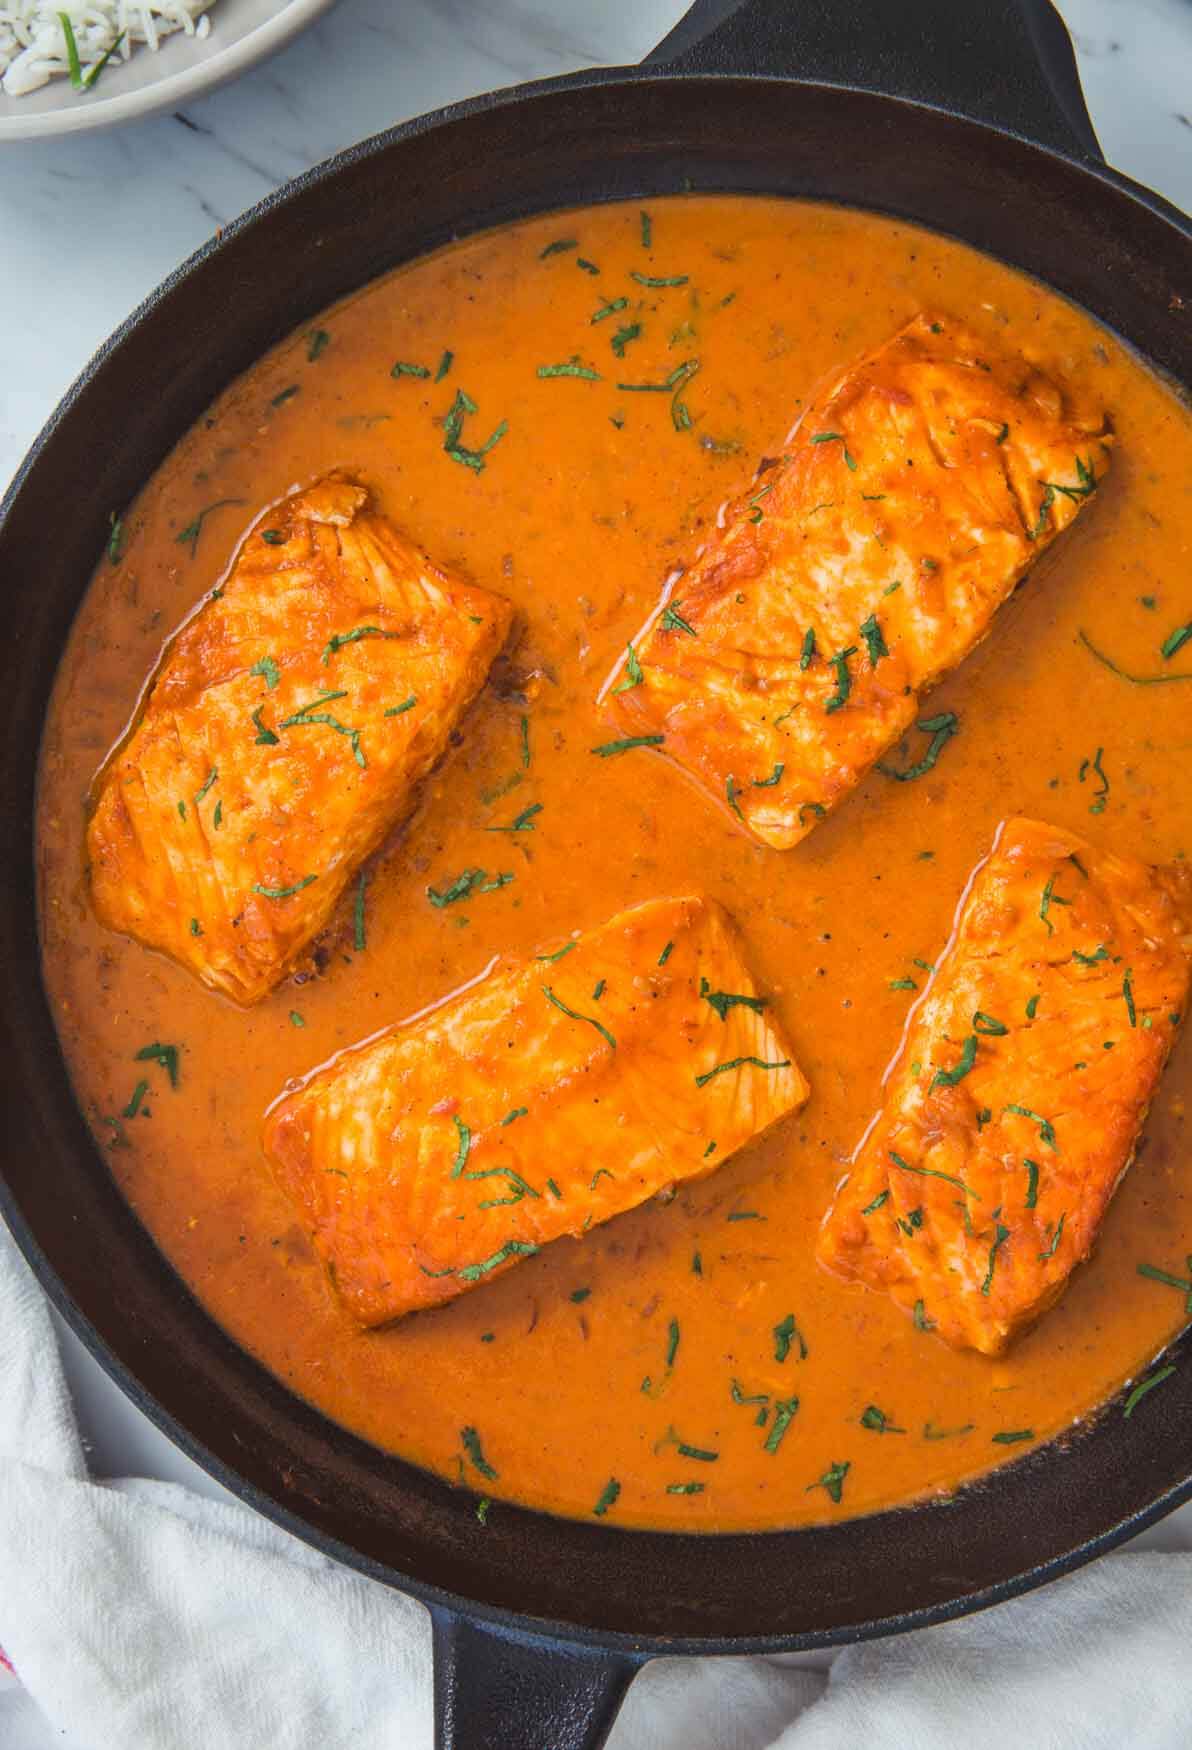
    Salmon in Tomato Sauce - cook salmon in fresh garlic and tomato sauce. Serve on the side of pasta, grits or rice for complete healthy dinner or lunch. Quick and easy weeknight meal.
    Salmon in Tomato Sauce

    Happy New Year Guys!!

    I know it's almost the end of January, and I am wishing you all so late. I was in India on a long vacation and came back last week.

    It was truly an amazing trip. And the most beautiful part of our trip was the Christmas celebrations. We celebrated Christmas at Ganapatipule, India. It is one of the most beautiful places on the western shore of India. In Sahaja Yoga, this place has special importance. Thousands of yogis (Sahaja Yoga practitioners) from around the world gather here to attend the International Sahaja yoga Christmas Seminar every year. And last year, we were fortunate to be part of the event!

    Another thing I loved about my trip to India this time was getting away for one and a half months from the winter here in upstate New York. I can't write enough about this trip. I guess it will need a separate article.

    Let's get back to our recipe for now - Salmon in tomato sauce.

    Salmon in Tomato Sauce - Under 30 min quick and easy weeknight meal. Serve with pasta, grits or plain rice.

    Salmon in Tomato Sauce

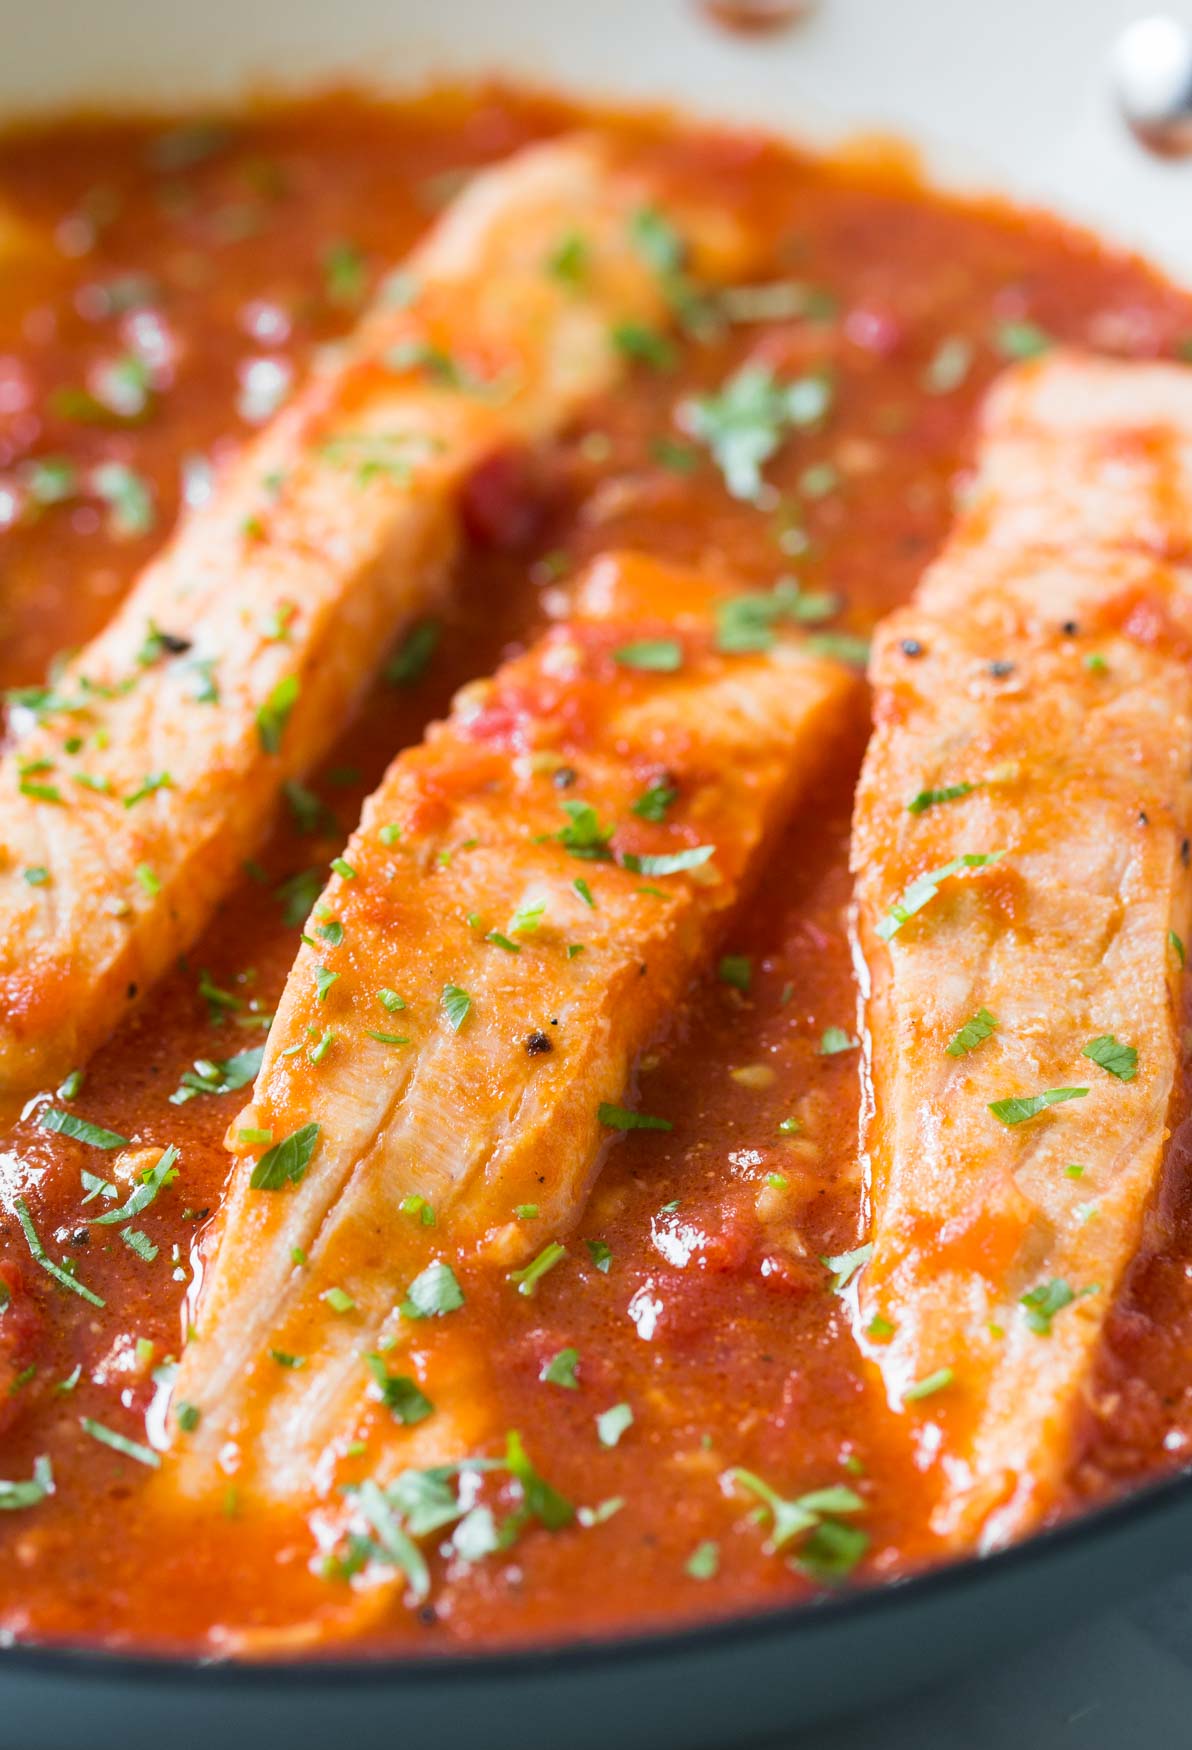
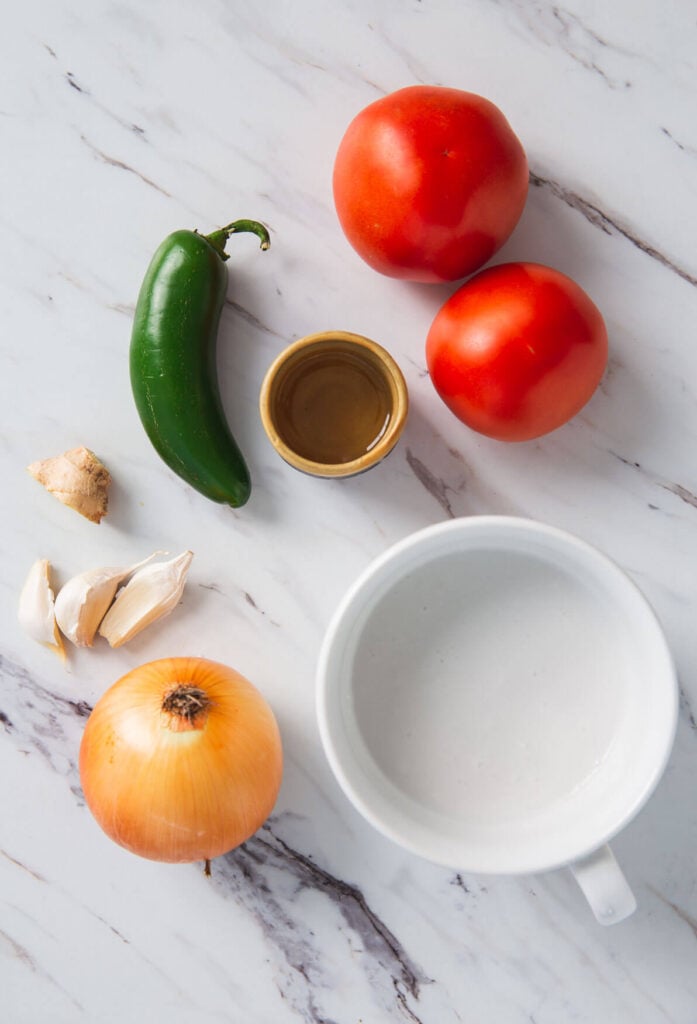
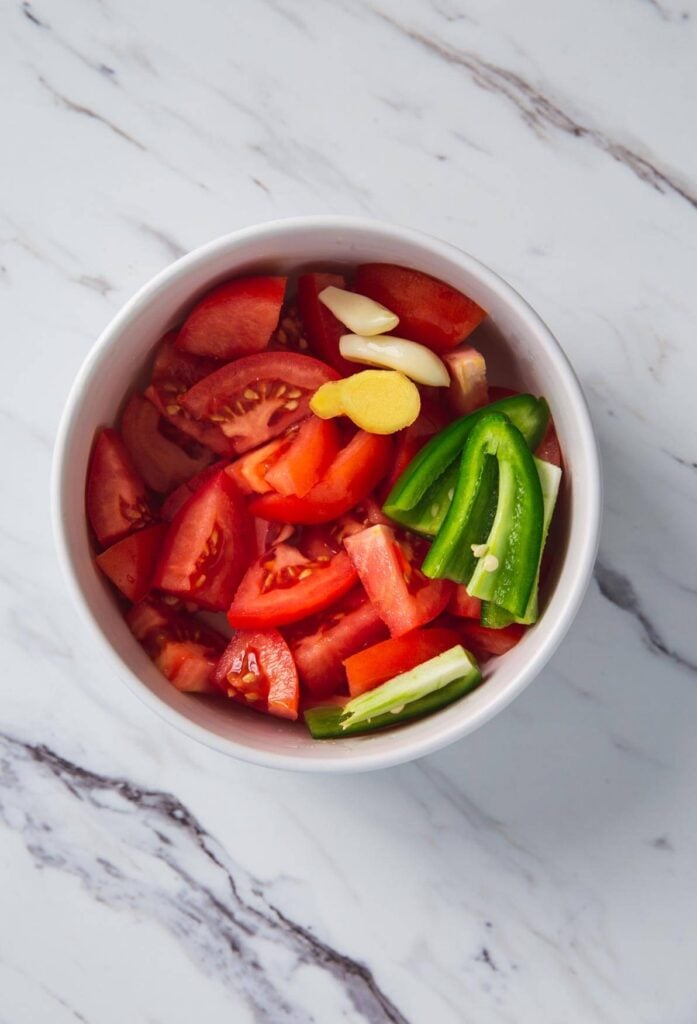
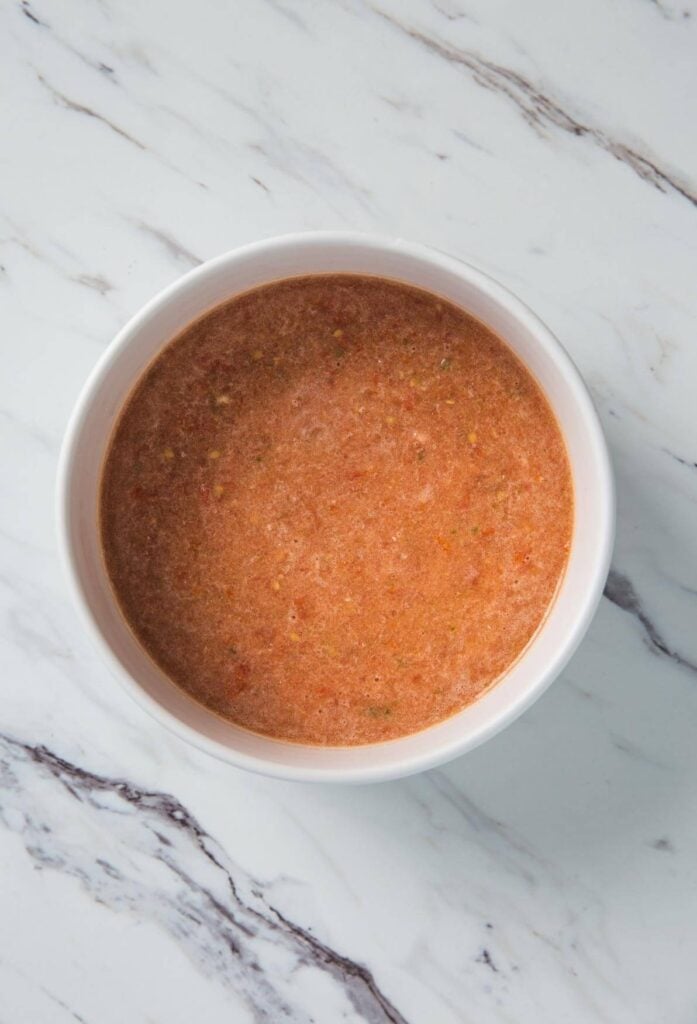
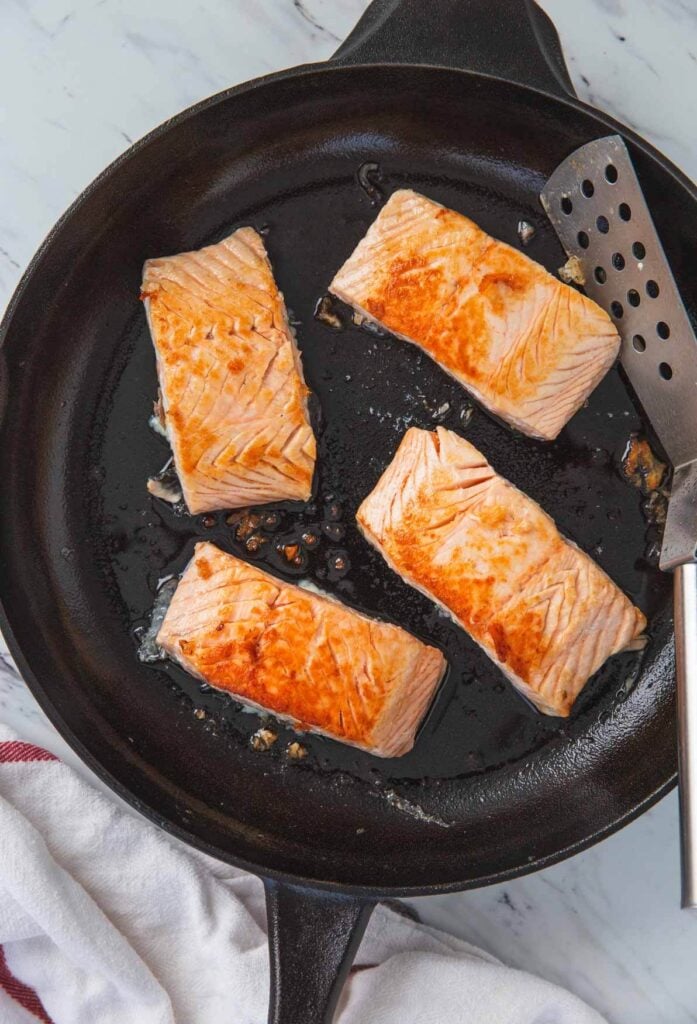
    Use fresh tomatoes to prepare the base of the sauce. Just cook them with fresh garlic. When you get it to a sauce-like consistency, add salmon fillets and cook until well done. Salt, pepper, and paprika are enough to season this dish--so convenient, right?.

    Serve warm on the side of pasta or pasta salad or plain rice. It even goes well with plain creamy grits.

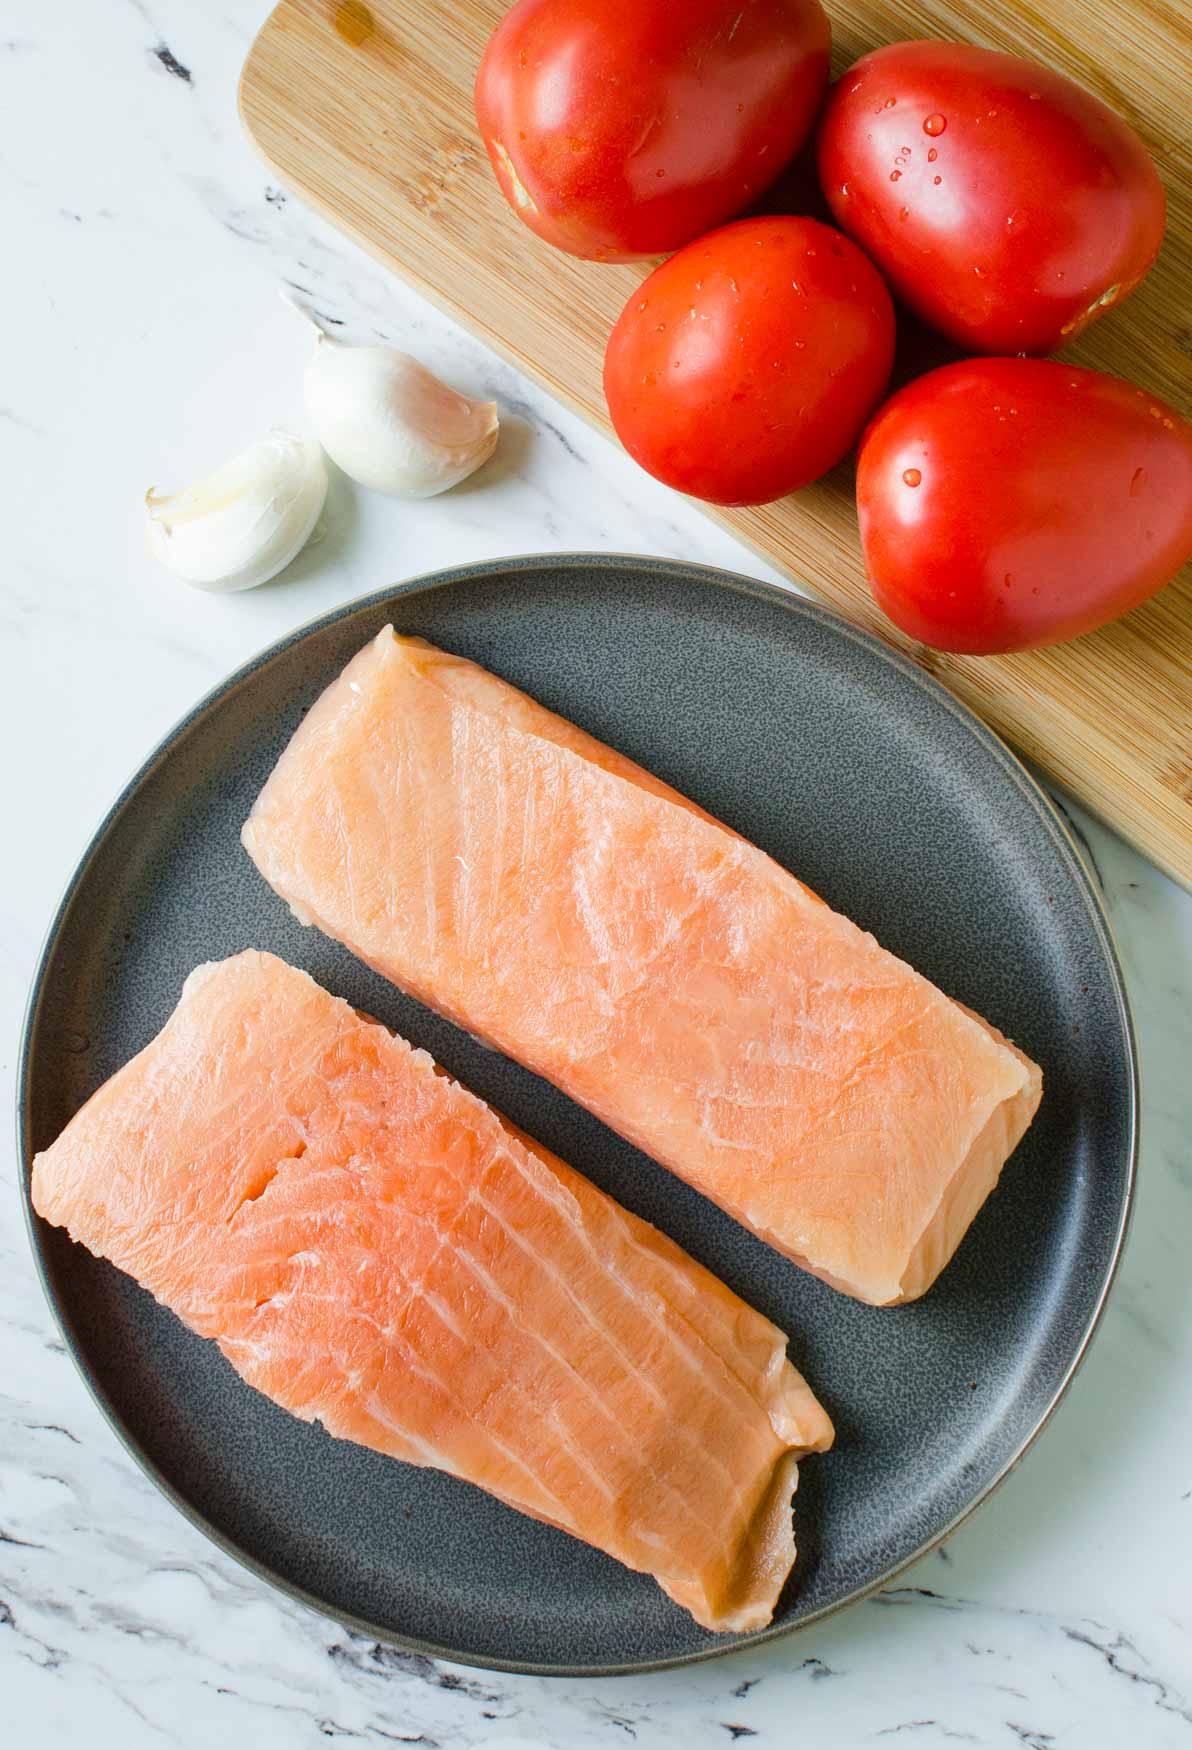
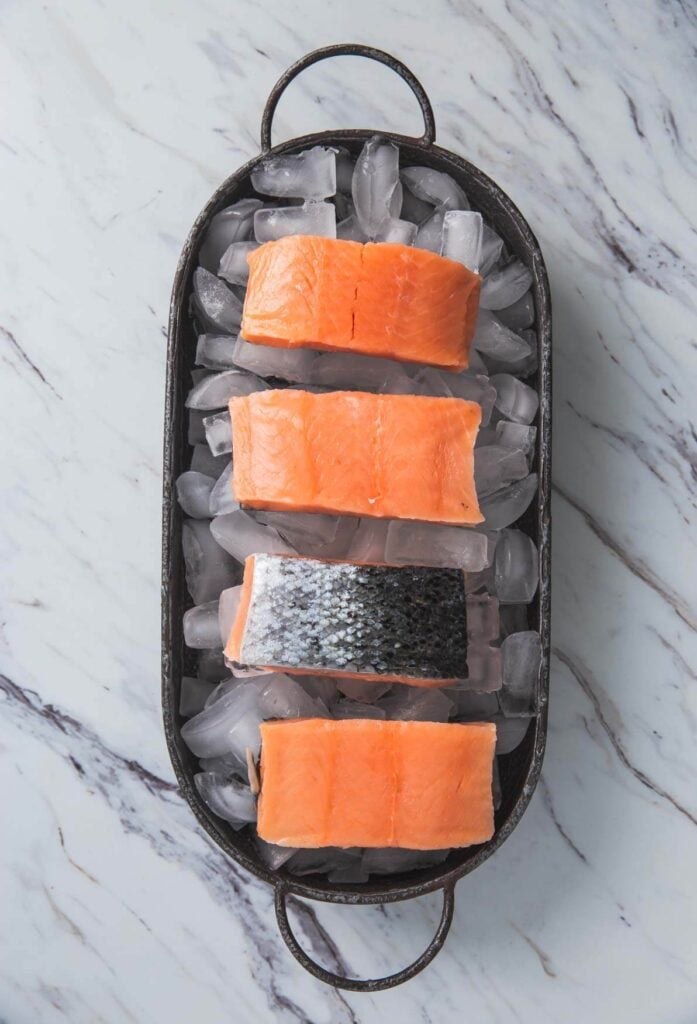
    Ingredients for making Salmon in Tomato Sauce

    Helpful Tips!!

    • Salmon - Use organic fish whenever possible. Also, always buy fresh or frozen seafood from sources that follow the standards of sustainable farming.
    • If you are using frozen salmon, then thaw it well in advance before making the dish. I mean that you allow enough time for the fish to thaw naturally.
    • Use fresh tomatoes instead of canned ones. Though canned tomatoes are very convenient to use, fresh tomatoes give a very nice aroma and taste to the dish.
    Salmon in Tomato Sauce - Under 30 min quick and easy weeknight meal. Serve with pasta, grits or plain rice.

    More Seafood Recipes You Will Love to Try

    • Coconut Shrimp Curry
    • Garlic Shrimp in Tomato Sauce
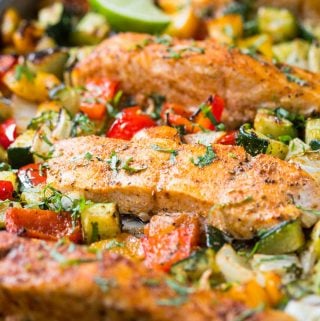
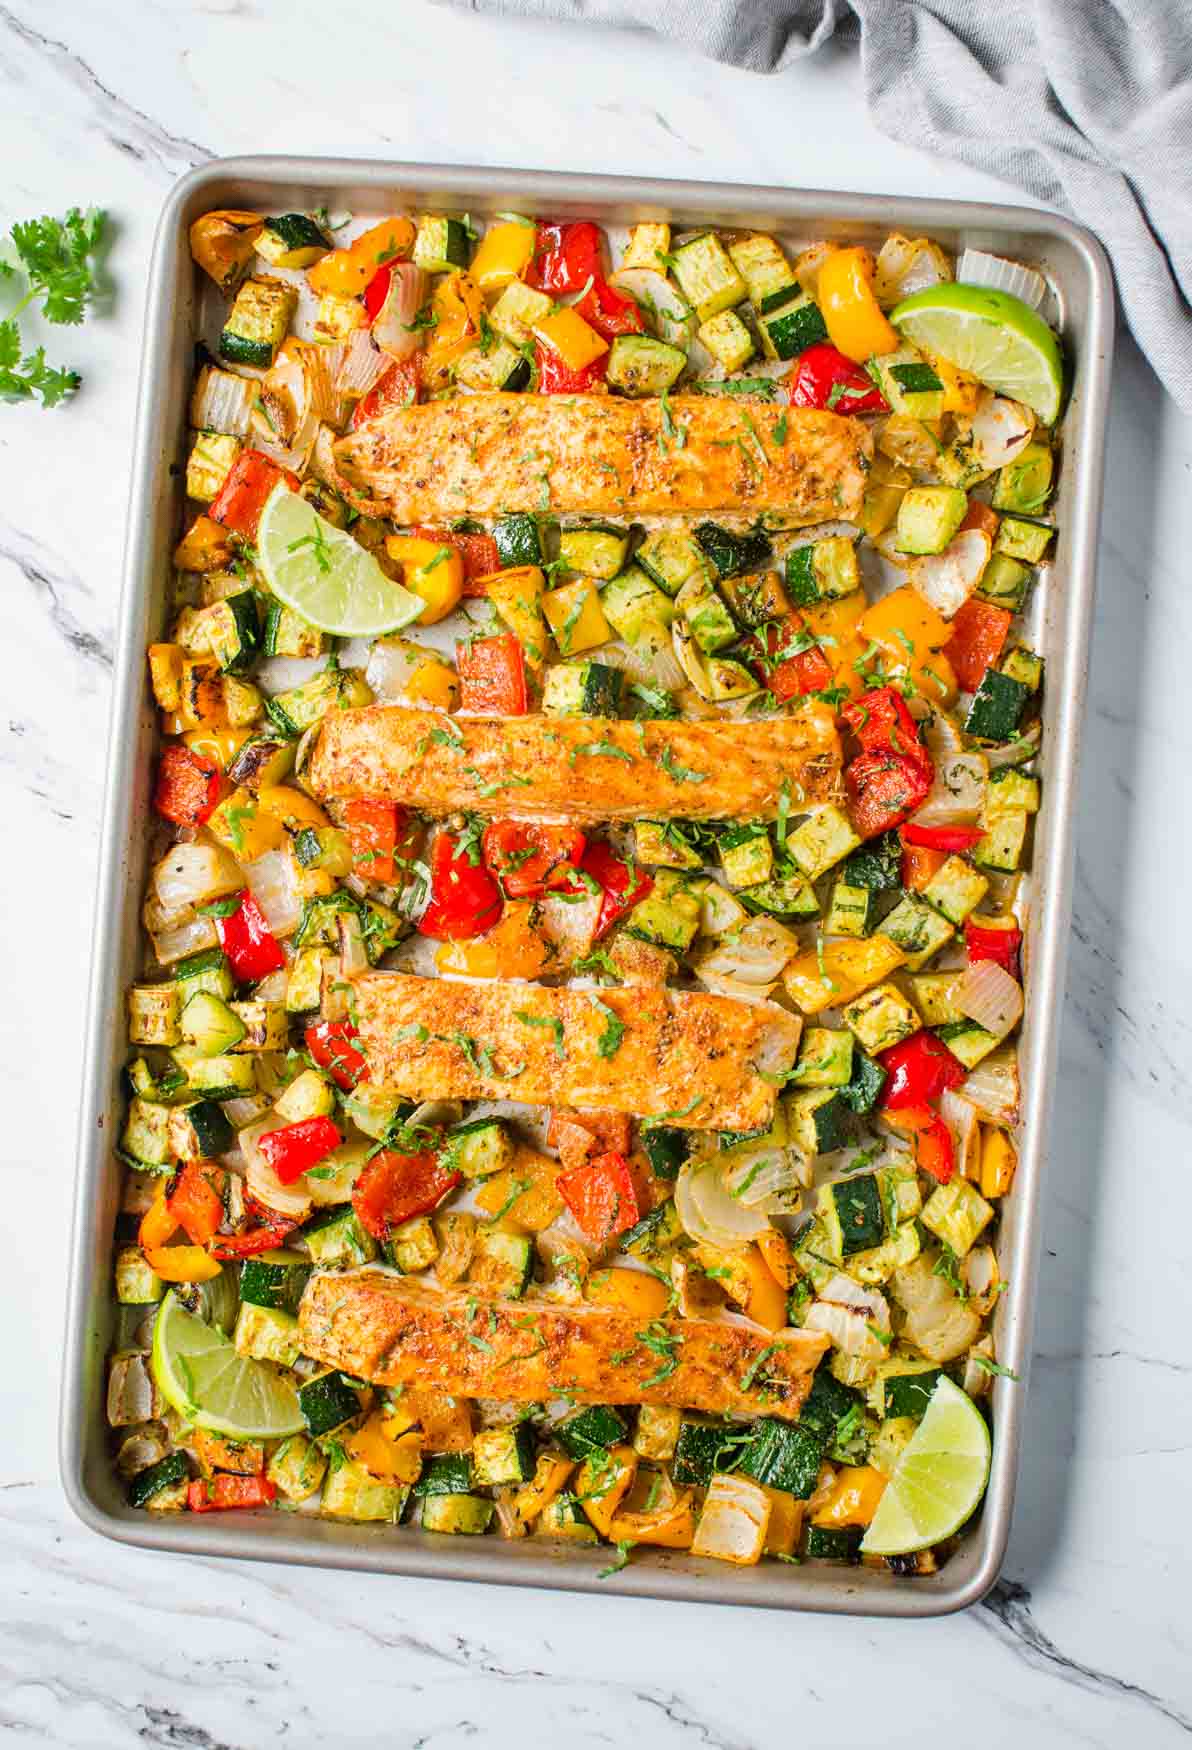
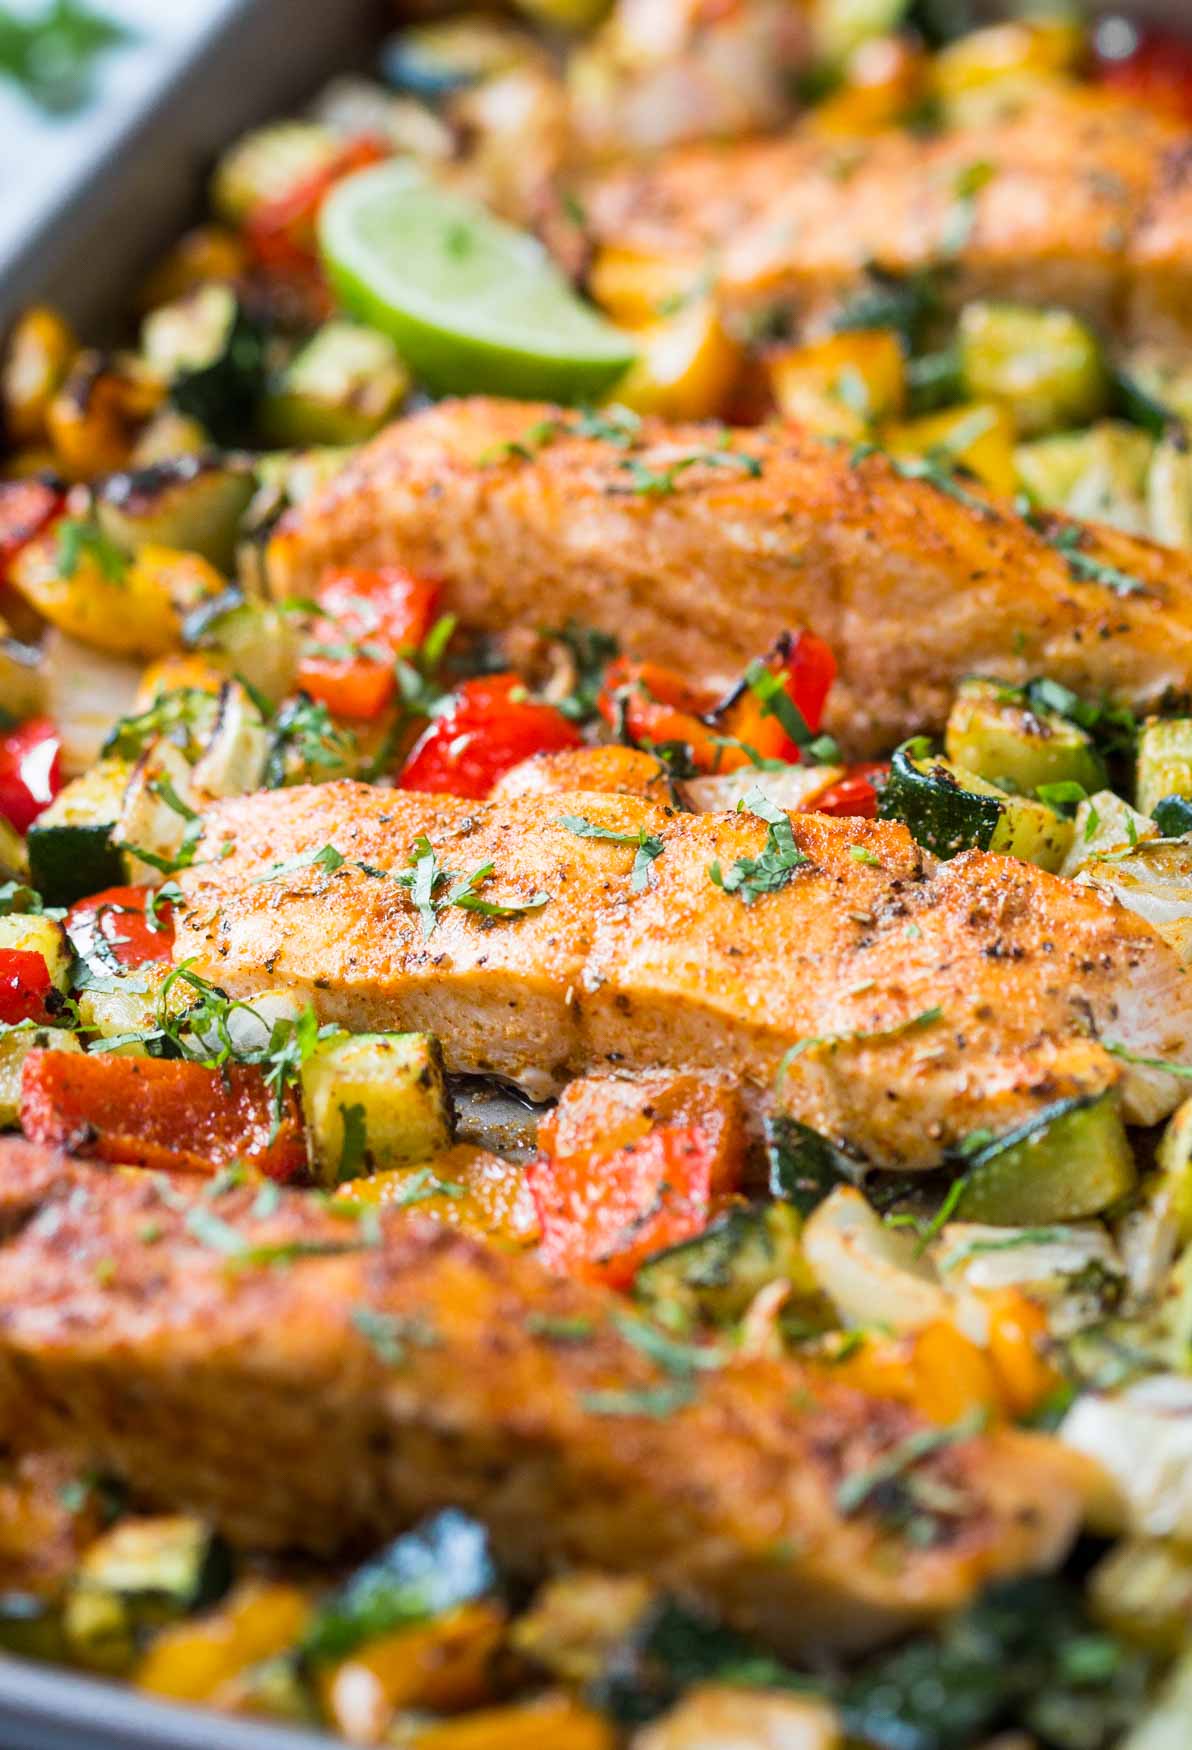
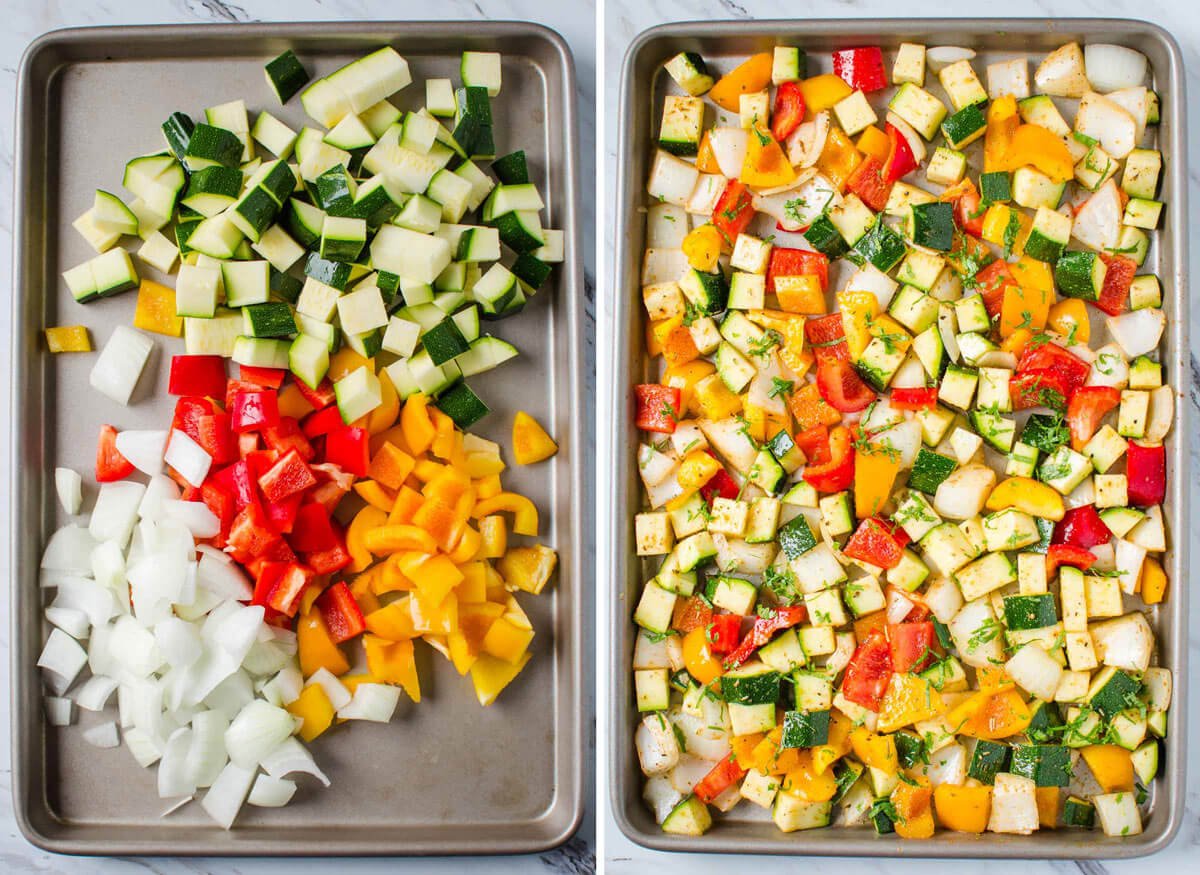
    • One Pan Baked Salmon And Vegetables
    • Salmon Burgers
    Salmon in Tomato Sauce - cook salmon in fresh garlic and tomato sauce. Serve on the side of pasta, grits or rice for complete healthy dinner or lunch. Quick and easy weeknight meal. #watchwhatueat #salmon #seafood #tomatosauce #healthyrecipes

    📖 Recipe

    Salmon in Tomato Sauce - cook salmon in fresh garlic and tomato sauce. Serve on the side of pasta, grits or rice for complete healthy dinner or lunch. Quick and easy weeknight meal. #watchwhatueat #salmon #seafood #tomatosauce #healthyrecipes
    Print Pin
    4.50 from 2 votes

    Quick and Easy Garlic Salmon in Tomato Sauce

    This super easy and quick garlic salmon in tomato sauce is perfect to pair with plain rice or grits or pasta. Your meal will be ready to serve in under 30 minutes.
    Course: Lunch / Dinner
    Cuisine: American Inspired,Italian Inspired
    Prep Time 5 minutes minutes
    Cook Time 15 minutes minutes
    Total Time 20 minutes minutes
    Servings :4
    Calories :175kcal
    Author:Swati Kadam Gulati

    Would you like to save this recipe?

    Email yourself a link to this post and come back to it later!

    Equipment

    • Large skillet or pan

    Ingredients

    • 12 oz salmon cut into fillets
    • 4 large Roma tomatoes diced
    • 2-3 garlic cloves minced
    • ½ teaspoon paprika optional
    • ½ tablespoon olive oil
    • ⅓ cup water
    • salt and pepper
    • 2 tablespoon chopped fresh parsle

    Instructions

    • Heat oil in a skillet on medium heat.
    • Add minced garlic and cook for a few seconds.
    • Then add tomato, paprika (optional) and cook 7-8 min. or until softens.
    • Add water and bring mixture to boil. Season with salt and pepper.
    • Place salmon fillets in the sauce and cook for about 2-3 min. Flip the salmon and cook for another 2-3 min.
    • Finally, garnish with chopped fresh parsley and serve warm.

    Notes

    1. In this recipe, I used frozen salmon. I thawed it naturally and then cut into total 4 small fillets.
    2. Mash tomatoes once soft and before adding salmon to get a nice and smooth consistency of the sauce. You can use the back of a wooden spatula for this job.
    3. Cook the sauce until you get desired consistency.

    Nutrition

    Calories: 175kcal | Carbohydrates: 7.8g | Protein: 26.4g | Fat: 5.1g | Saturated Fat: 0.9g | Cholesterol: 69mg | Potassium: 908mg | Fiber: 2.4g | Sugar: 4.9g
    Tried this recipe?Tag us on Instagram @watchwhatueat or tag #watchwhatueat! OR leave us a comment & rating below. Your feedback is very important to us.
     

    10 Comments

    Healthy Whole Wheat Dinner Rolls - use this recipe to make easy, soft & fluffy dinner rolls at home. Add fresh garlic and herbs to give them an absolute taste. The best part is no one will ever believe that these are made from 100% whole wheat flour. | #watchwhatueat #dinnerrolls #wholewheat #wholewheatrolls #healthythanksgiving

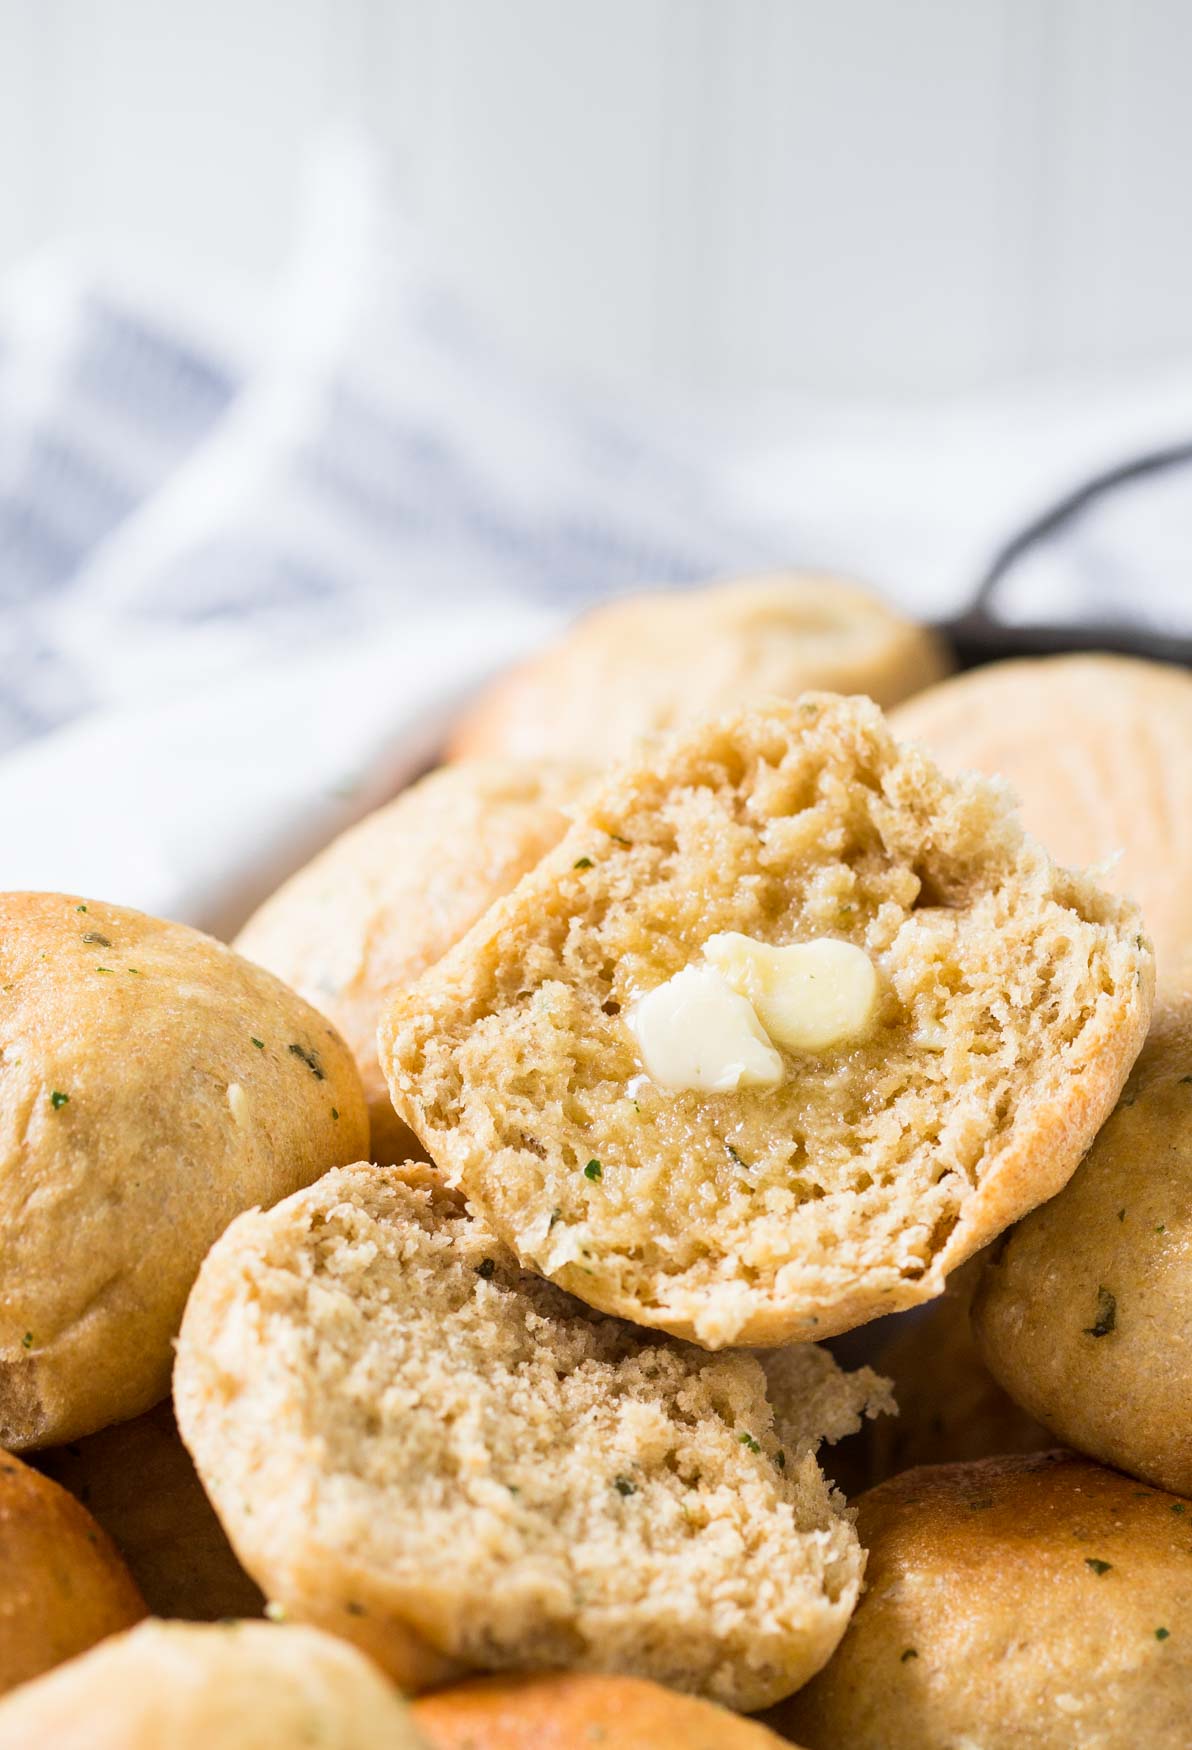
    You can make super soft and fluffy healthy whole wheat dinner rolls at home easily. No one will ever believe that these are made from 100% whole wheat flour. Fresh garlic and herbs make them even more tempting.

    Healthy Whole Wheat Dinner Rolls - use this recipe to make easy, soft & fluffy dinner rolls at home. Add fresh garlic and herbs to give them an absolute taste. The best part is no one will ever believe that these are made from 100% whole wheat flour. | #watchwhatueat #dinnerrolls #wholewheat #wholewheatrolls #healthythanksgiving

    For quite some time, I have been wanting to share a recipe for homemade rolls. And that is healthy with all-natural ingredients. The reason it took a little long to finalize this recipe is that I was trying to make it eggless and with 100% whole wheat flour. And all the time it came out dry and rough in texture.

    Having failed several times, I finally decided to use an egg and it finally helped to get that soft and fluffy texture with whole grain flour. If you are okay with using eggs (now I am, finally!) then I am sure you will love these healthy whole wheat dinner rolls. And using fresh garlic and herbs would make them even more delicious.

    [feast_advanced_jump_to]
    You can make super soft & fluffy healthy whole wheat dinner rolls at home easily. No one will believe that these are made from 100% whole wheat flour. | #watchwhatueat #dinnerrolls #wholewheat #wholewheatrolls #healthythanksgiving

    These are so good that you can just spread some butter on them and have it as is.

    How to make Homemade Whole Wheat Dinner Rolls

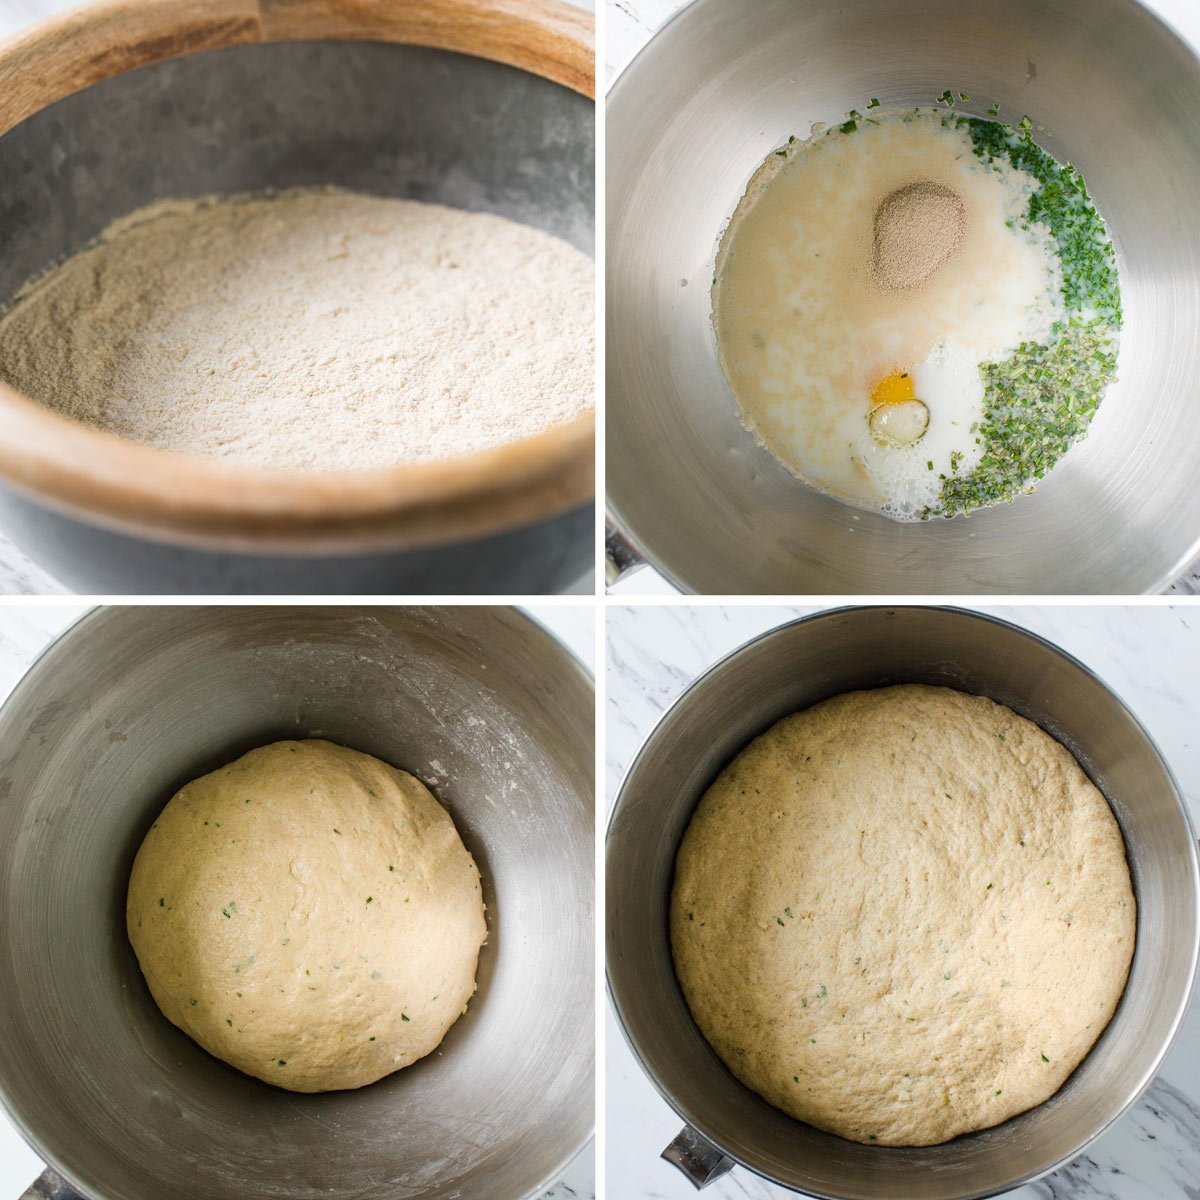
    In lukewarm water and milk add yeast, sugar, salt, finely chopped garlic, an egg, freshly chopped rosemary, and parsley. Mix everything to combine. Then slowly add flour and knead it into a soft supple dough. Cover the dough and let it rise until it is double in size.

    Preparing whole wheat dough for making healthy dinner rolls.

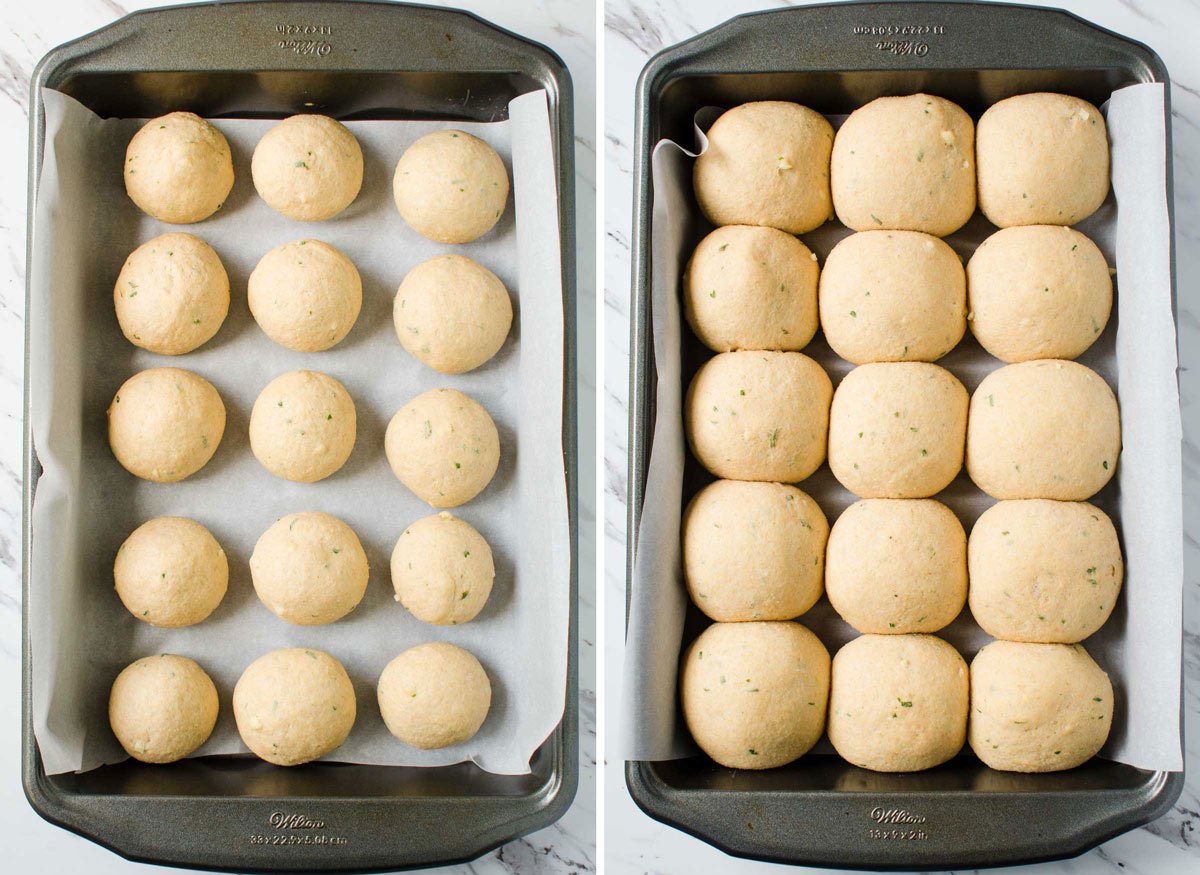
    Divide the dough into small balls and keep them on a baking tray leaving some gaps in between. Cover the tray with a clean cloth and let it rise for another 30 min or so. Bake the rolls in a preheated oven until well done. To get a nice color on the crust, apply oil using a brush as soon as the rolls are out of the oven and still hot.

    100% whole wheat dinner rolls before baking.

    Helpful Tips!

    • Use organic whole wheat flour. I really love using flour from Trader's Jo. I find using their whole wheat flour in baking very helpful.
    • You can knead the dough using your hands. Use a wooden spatula to mix the flour into the liquid. Mix until it forms a crumbly mixture. Then using hands knead the mixture on a flat surface or in the same bowl to form a dough. Or, make this work less messy by using a stand mixer with a dough hook attachment.
    • After kneading the dough, cover and keep it in the oven. DO NOT turn on the oven or preheat, yet. The closed oven will provide a perfect environment for raising the dough.
    • Line the baking tray with some parchment paper. It will help to not stick the rolls on the bottom of the tray. Or simply, just brush little oil on the tray. I forgot this key step in one of my initial trials. It not only ruins the rolls but makes an additional task for cleaning the tray later (which is not enjoyable at all, trust me!)
    • Store the leftover rolls in an airtight ziplock bag or container to avoid drying them out. I usually store them in the refrigerator.
    • To get the same fresh texture on the leftover whole wheat dinner rolls simply microwave them to warm them up before consuming them

    You can make super soft & fluffy healthy whole wheat dinner rolls at home easily. No one will believe that these are made from 100% whole wheat flour. | #watchwhatueat #dinnerrolls #wholewheat #wholewheatrolls #healthythanksgiving

    Try these other Whole Wheat Based Recipes

    • Whole Wheat Pita Bread
    • Whole Wheat Garlic Naan Bread
    • Homemade Whole Wheat Pizza Dough
    • Healthy Chocolate Banana Bread
    Healthy Whole Wheat Dinner Rolls - use this recipe to make easy, soft & fluffy dinner rolls at home. Add fresh garlic and herbs to give them an absolute taste. The best part is no one will ever believe that these are made from 100% whole wheat flour. | #watchwhatueat #dinnerrolls #wholewheat #wholewheatrolls #healthythanksgiving

    📖 Recipe

    Healthy Whole Wheat Dinner Rolls - use this recipe to make easy, soft & fluffy dinner rolls at home. Add fresh garlic and herbs to give them an absolute taste. The best part is no one will ever believe that these are made from 100% whole wheat flour. | #watchwhatueat #dinnerrolls #wholewheat #wholewheatrolls #healthythanksgiving
    Print Pin
    4.67 from 3 votes

    Soft And Fluffy Garlic Herb Whole Wheat Dinner Rolls

    These super soft and fluffy healthy dinner rolls are prepared using whole wheat flour. To make them even more delicious you can use fresh garlic and herbs like rosemary and parsley.
    Course: Bread,Side Dish
    Cuisine: Italian Inspired
    Prep Time 10 minutes minutes
    Cook Time 15 minutes minutes
    1 40 minutes minutes
    Total Time 25 minutes minutes
    Servings :15 Rolls
    Calories :45kcal
    Author:Swati Kadam Gulati

    Would you like to save this recipe?

    Email yourself a link to this post and come back to it later!

    Equipment

    • Kitchenaid Stand Mixer
    • Baking Pan

    Ingredients

    • 3 ½ cup whole wheat flour
    • 1 cup low-fat milk
    • ¼ cup water
    • 3-4 garlic cloves finely minced
    • 1 tablespoon finely chopped fresh rosemary (or 1 teaspoon dried)
    • 1 tablespoon parsley finely chopped
    • 2 teaspoon instant yeast
    • 1 teaspoon sugar
    • salt to taste
    • 1 egg at room temperature
    • ½ tablespoon olive oil

    Instructions

    • In a large mixing bowl take warm milk and water. Then add garlic, rosemary, parsley, yeast, sugar, and salt.
    • Add one egg and gently combine the mixture using a whisk.
    • Slowly add dry flour into the wet ingredients. Mix the flour until it absorbs all the moisture and forms a crumbly mixture. Cover the bowl with a clean kitchen towel and let it sit for 10-15 minutes. See notes on how to use a stand mixer.
    • Then on a flat surface knead the flour mixture until it forms a soft supple dough. Add oil while kneading the dough.
    • Transfer the dough to a mixing bowl and let it rise for about an hour or so or till it doubles in size.
    • Now divide the dough into 15 equal parts. Shape it into small round balls. Place the rolls on a baking or roasting pan leaving some space in between.
    • Again cover the tray with a clean towel and let the rolls rise for another 30-40 mins.
    • Meanwhile, preheat the oven to 375F.
    • Remove the cloth and transfer the tray to oven and bake the rolls for about 12-15 min.
    • To get a nice brown crust on the rolls you can apply oil using a brush as soon as rolls are out of the oven and still hot.

    Notes

    1. Kneading dough using a Stand Mixer - Follow the steps 1 and 2 above. Use a mixer bowl to combine the ingredients. Attach the dough hook. On the lowest speed slowly add dry flour into the liquid mixture. Once the liquid is absorbed by flour and forms a crumbly mixture turn off the machine. Cover the bowl with kitchen towel and let it sit for 10-15 mins (this helps to absorb all the water by the flour and kneading the dough becomes easier.).  Then again on the lowest speed knead the mixture for 5-6 min to form a soft dough.
    2. See helpful tips section for more useful information for making these best ever light and fluffy dinner rolls.

    Nutrition

    Calories: 45kcal | Carbohydrates: 7g | Protein: 2.1g | Fat: 1.1g | Saturated Fat: 1g | Cholesterol: 12mg | Fiber: 1.2g | Sugar: 1.3g
    Tried this recipe?Tag us on Instagram @watchwhatueat or tag #watchwhatueat! OR leave us a comment & rating below. Your feedback is very important to us.

    21 Comments

    Healthy Instant Pot Cauliflower - cook whole cauliflower head in the pressure cooker and serve with delicious creamy gravy to make it more flavorful. Perfect vegetarian and vegan recipe for the holiday dinner or weeknight healthy meal. | #watchwhatueat #veganthanksgiving #vegan #cauliflower

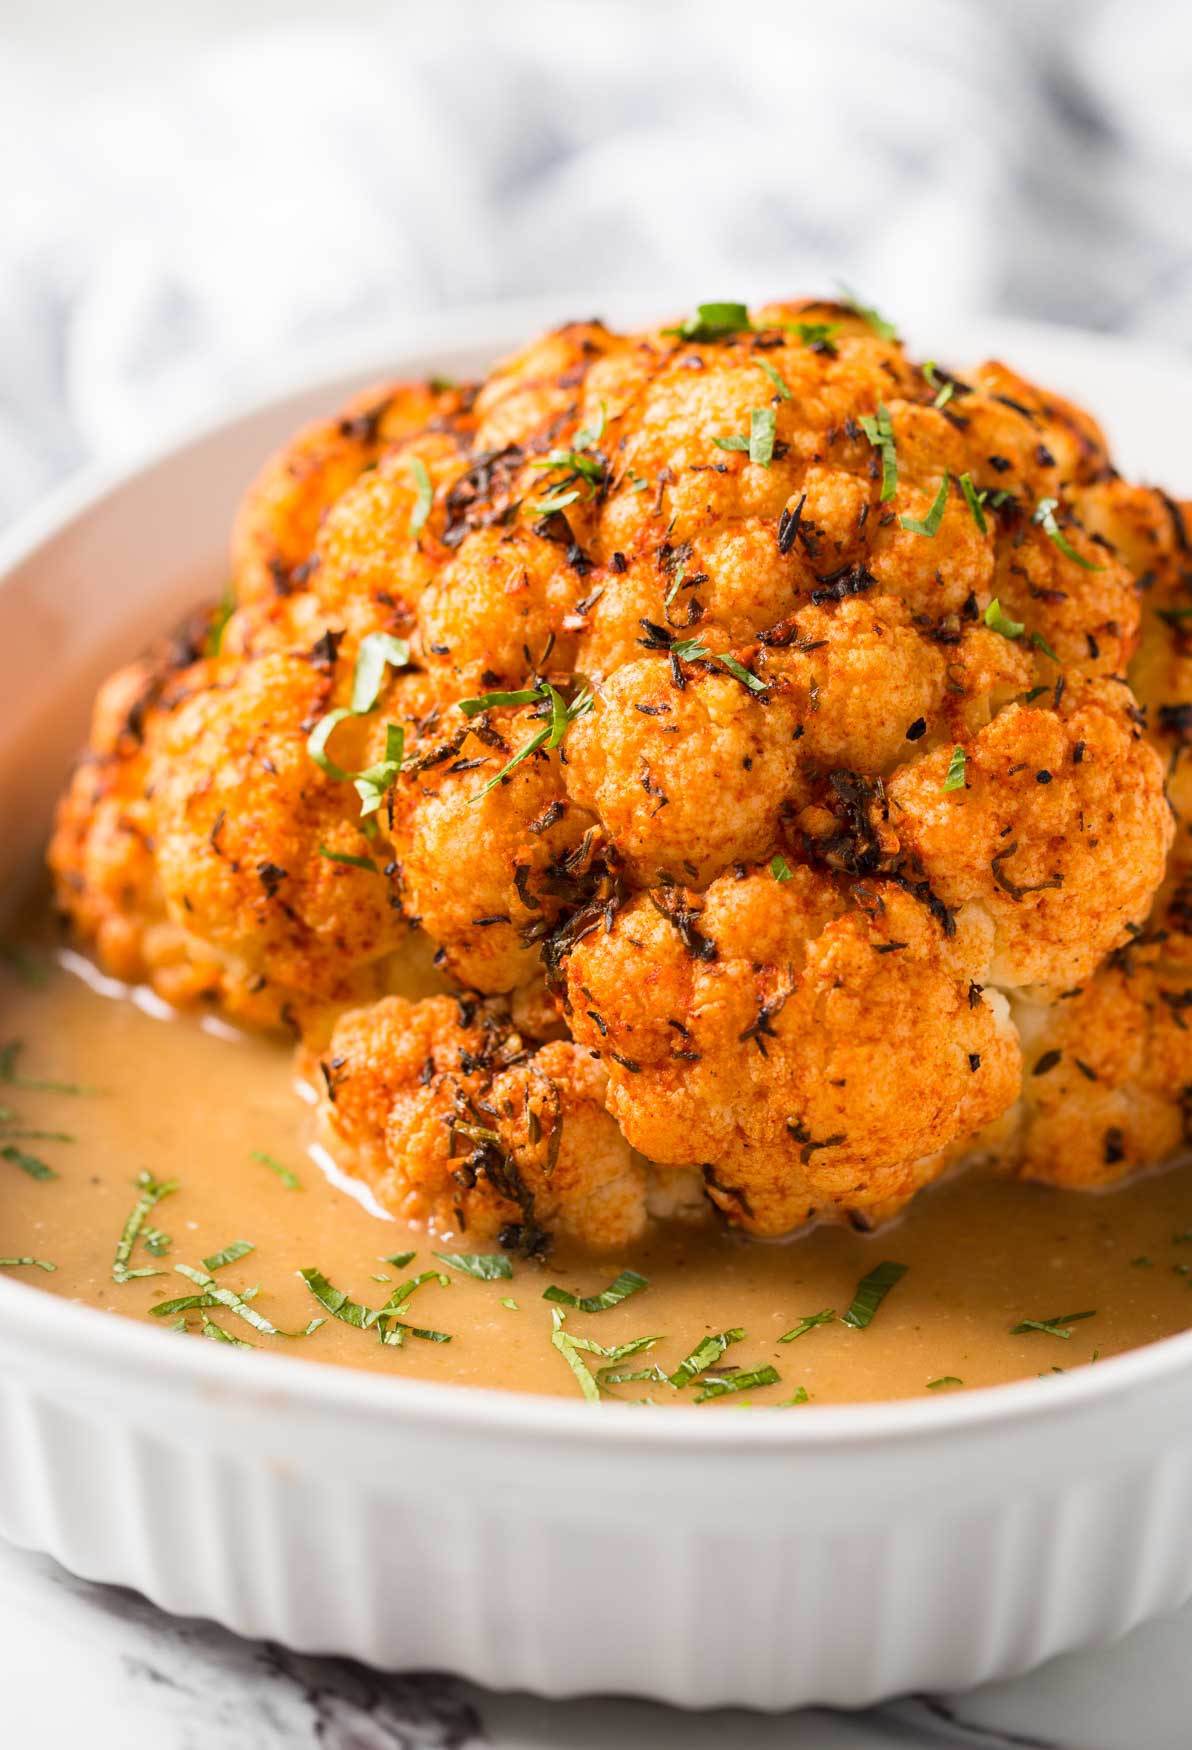
    Make this awesome healthy Instant Pot cauliflower with creamy gravy for any party night or weeknight dinner. This garlic and herb whole cauliflower will be a gorgeous addition to your dinner table.

    Healthy Instant Pot Cauliflower - cook whole cauliflower head in the pressure cooker and serve with delicious creamy gravy to make it more flavorful. Perfect vegetarian and vegan recipe for the holiday dinner or weeknight healthy meal. | #watchwhatueat #veganthanksgiving #vegan #cauliflower

    After cooking a whole chicken in the Instant Pot, it was time to try this delicate vegetable in it. To my surprise, it took only three minutes of high pressure to cook the whole cauliflower head in the pressure cooker. So, in less than 30 mins, you can bring this dish to the dinner table.

    As opposed to cooking whole cauliflower in the oven (which takes more than 45 min), an Instant Pot is an easy and super-fast tool to cook the whole cauliflower head. However, roasting in the oven has a whole lot of different flavors, tastes, and deliciousness.

    One reader says - "I’m new to Pressure Cooking and cooked this Cauliflower today. Very easy, and loved it. Definitely a keeper. Next time I’ll double up on the sauce!!! Thank You!"

    [feast_advanced_jump_to]

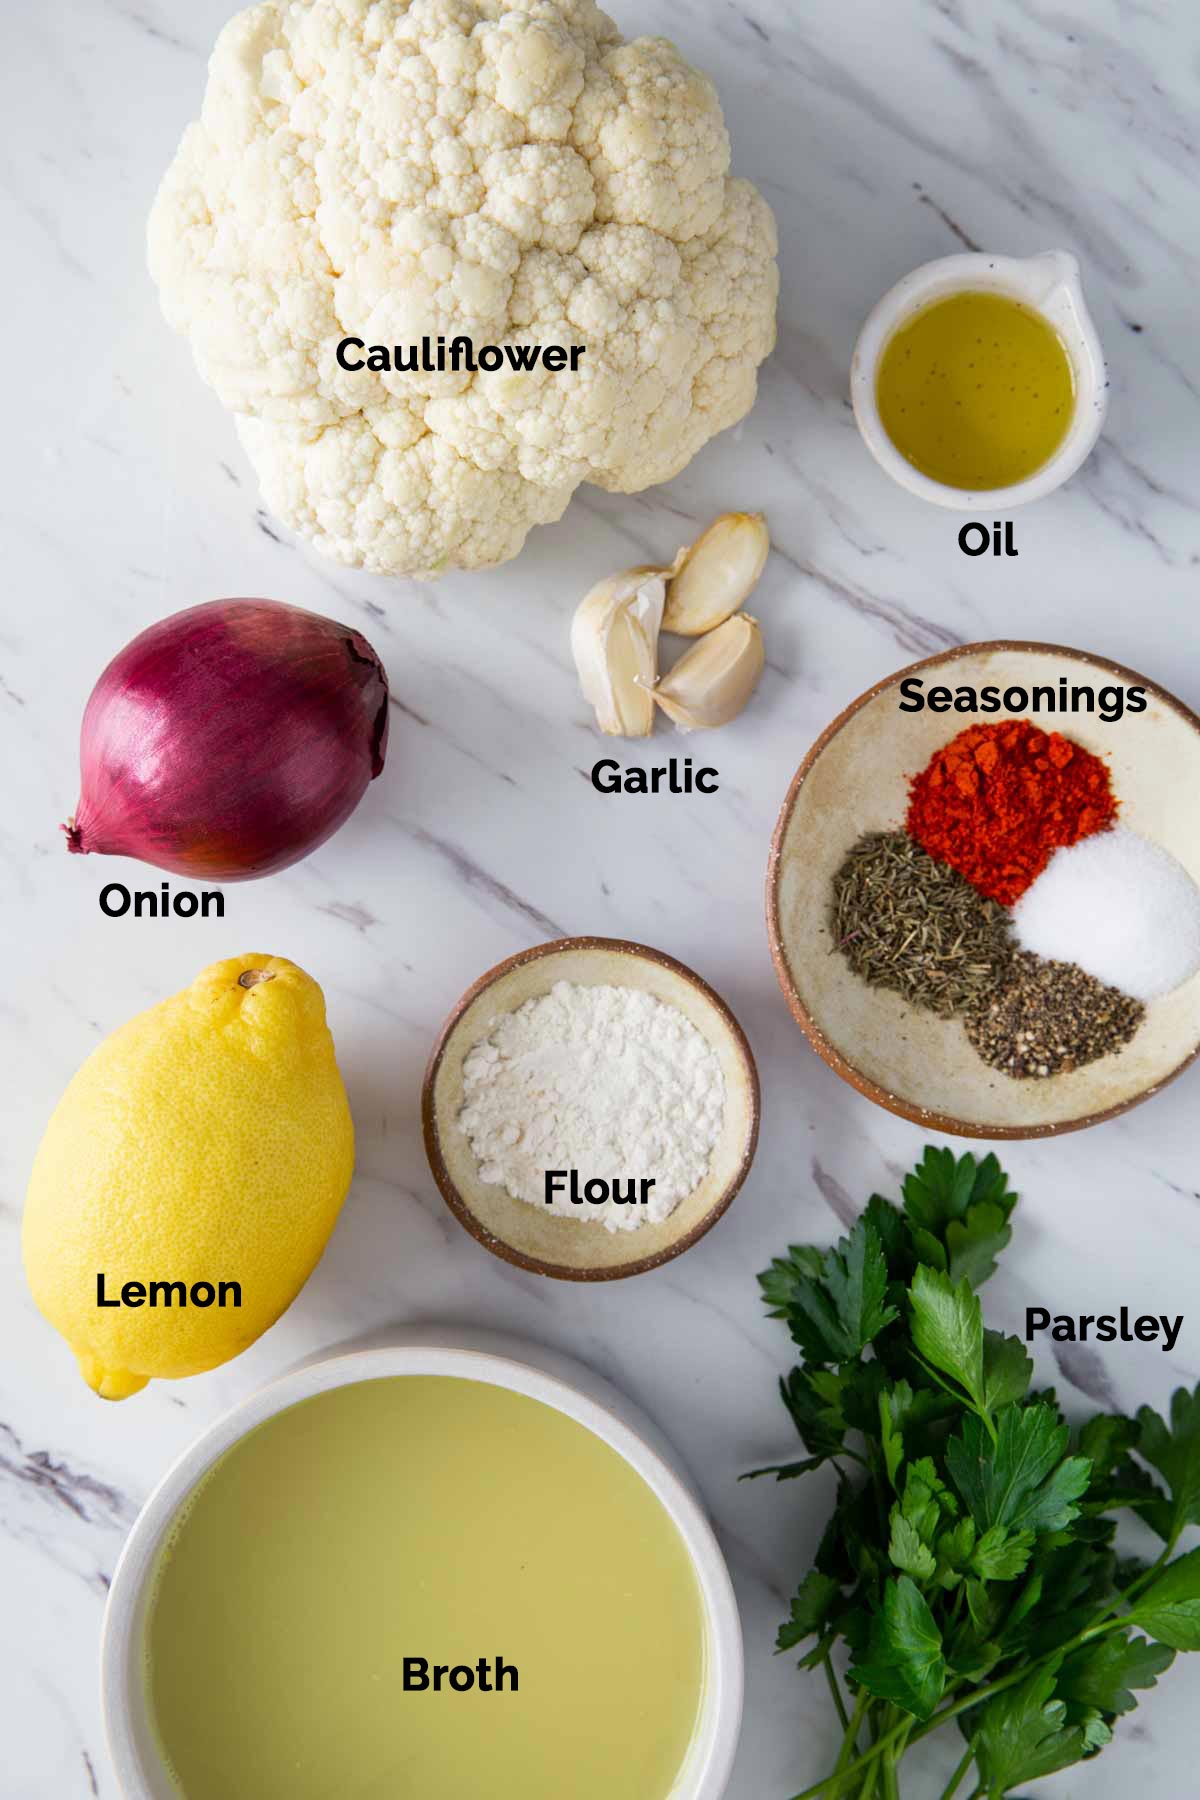
    Ingredients

    • Whole cauliflower - buy large, firm, and spotless whole cauliflower head. Whenever possible, buy organic cauliflower. Usually, veggies like cauliflower and broccoli are sprayed with more pesticides to get rid of bugs compared to other vegetables. So, I always prefer buying organic cauliflower.
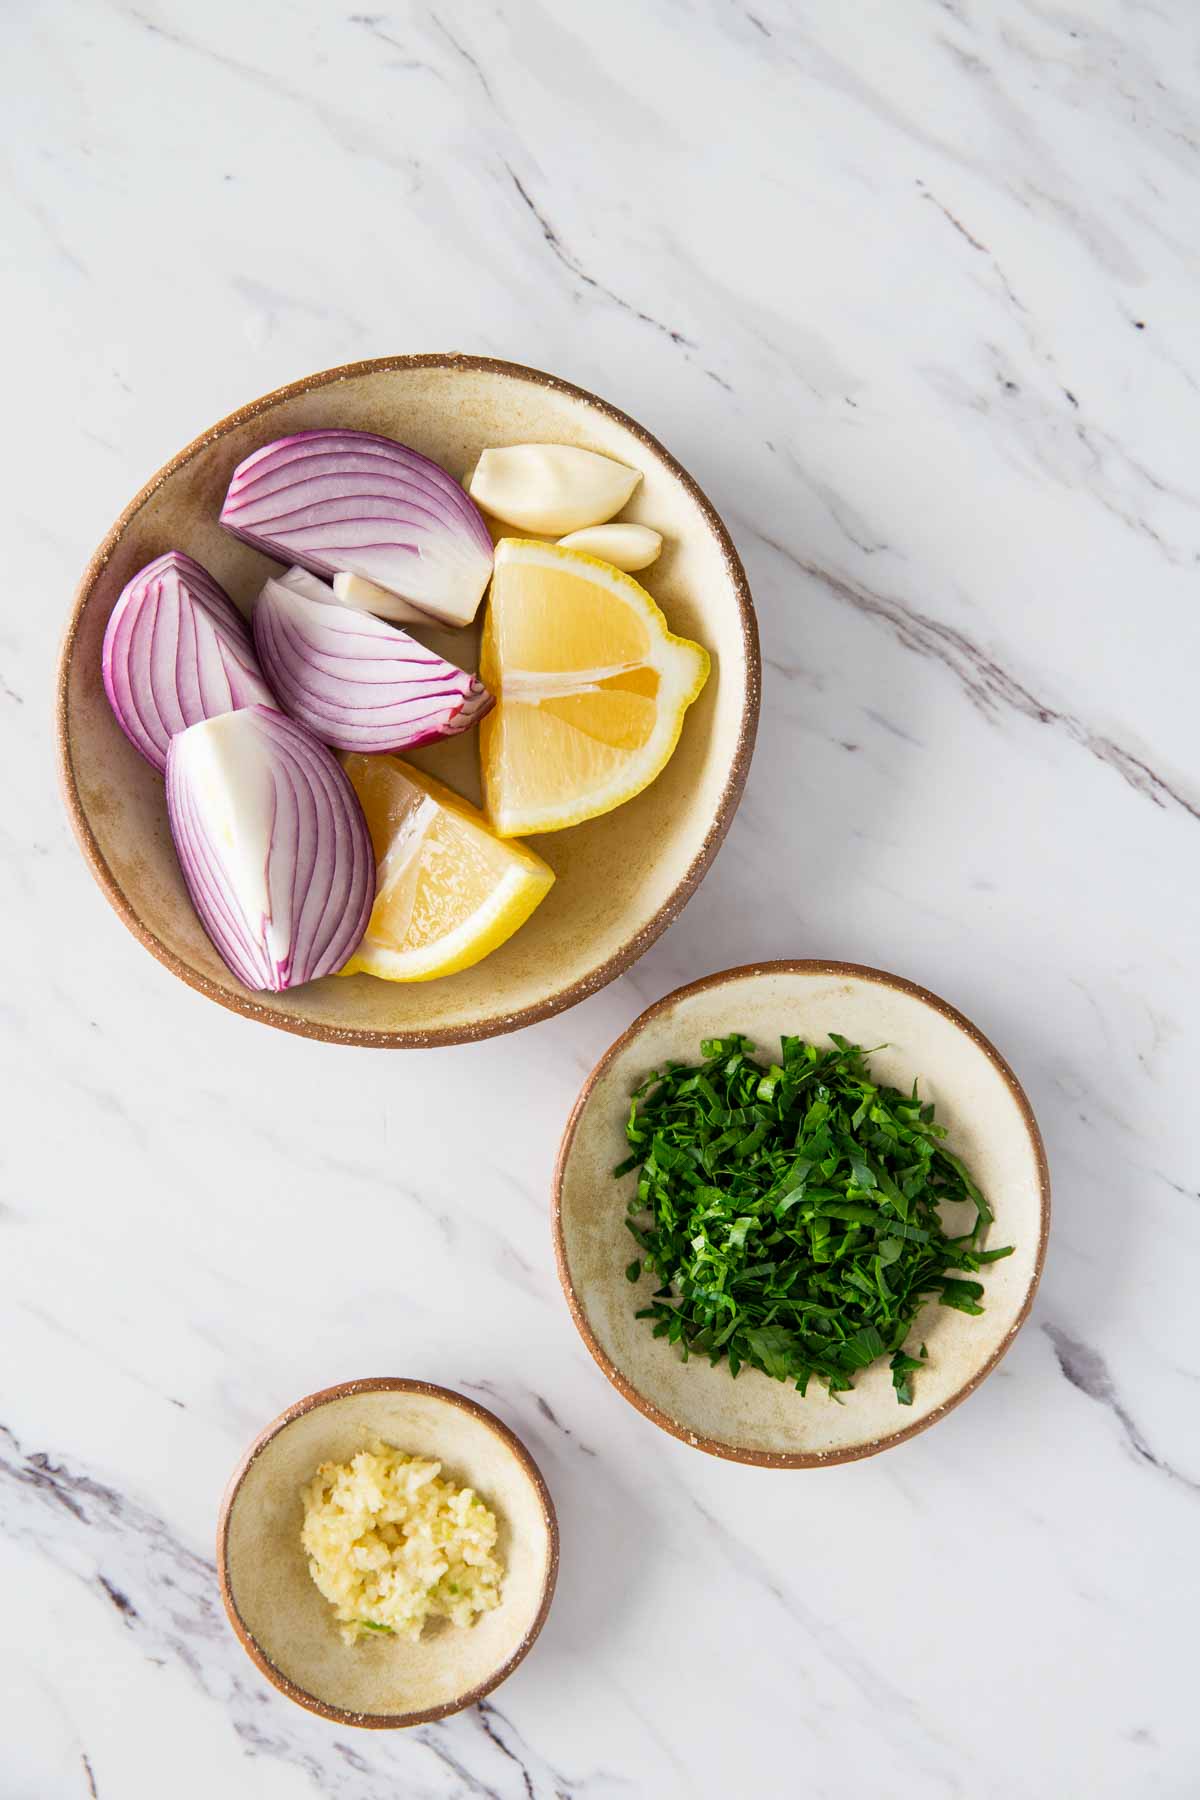
    • Garlic - I recommend using fresh garlic for delicious flavors. Try to avoid using processed or preserved garlic as it lacks flavors. Use finely chopped or minced garlic to prepare the spice mixture, and add whole peeled garlic gloves to the gravy base.
    • Herbs - use herbs like dried or fresh thyme and parsley leaves to flavor the cauliflower and gravy. Clean and finely chop fresh parsley to prepare the marinade and garnish the dish at the end.
    • Lemon - this adds nice tanginess and flavor to the dish. Use freshly squeezed lemon juice in the marinade and add large pieces of lemon to the gravy base before pressure cooking.
    • Onion - this will add texture and flavor to the gravy base. Just cut them into large pieces.
    • Flour - helps thicken the gravy and makes it smooth and creamy.
    • Broth - use good quality vegetable broth or stock to prepare the gravy. I don't have dietary restrictions, so I use low-sodium organic chicken broth or stock to prepare the gravy.

    Recipe substitutions/variations

    • Herbs - you can use your choice of herbs, like oregano, cilantro, etc., to marinate the cauliflower.
    • Butter - use good quality organic butter in moderate amounts instead of oil in the recipe for a little rich taste.
    • Instead of vegetable stock, use bullion with water to flavor the gravy base.
    • Bake it in the oven - you can marinate the cauliflower with the above ingredients and bake it in the oven instead of cooking it in an Instant Pot. Follow instructions from the oven-baked cauliflower head for details on the time and temperatures.

    How to clean and prepare whole cauliflower head for cooking?

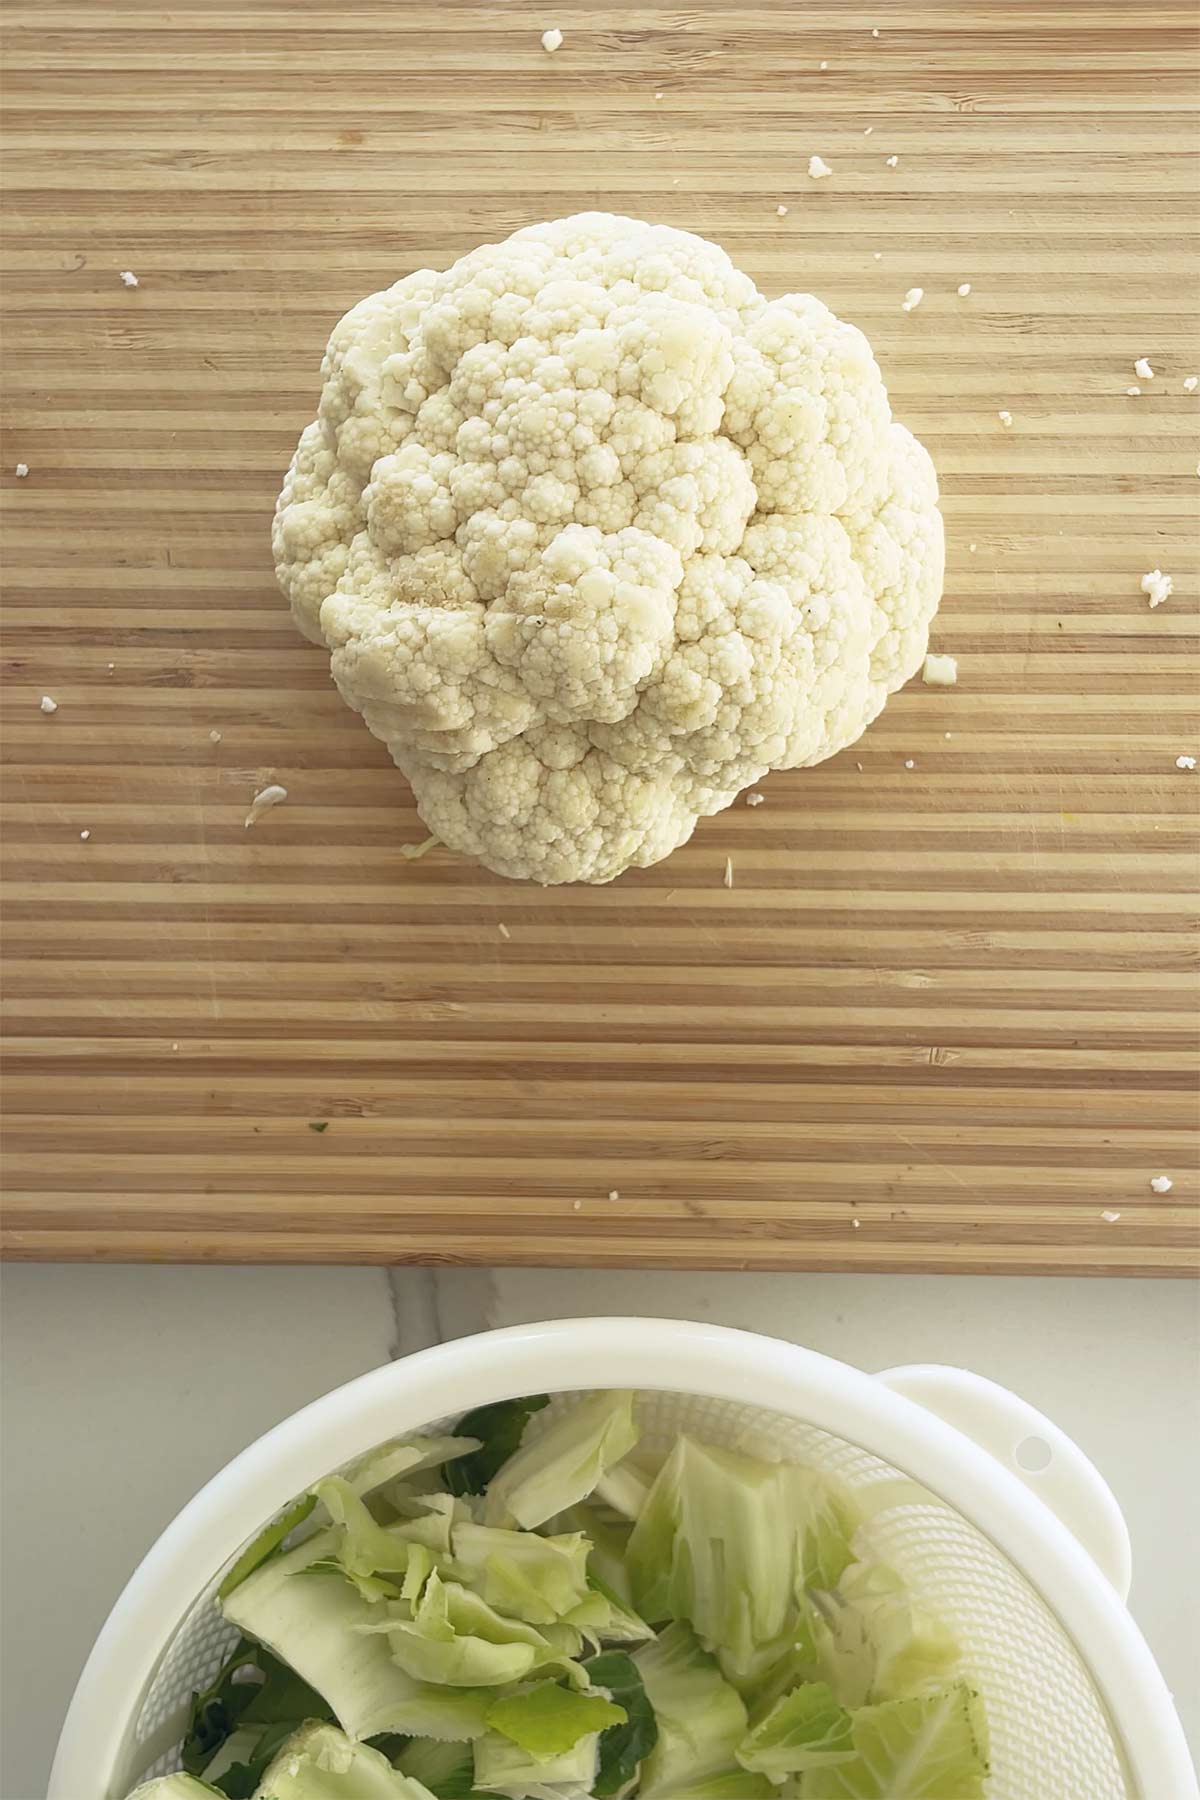
    Place cauliflower on the cutting board facing stem side up. Remove large leaves and trim the stem flush to the base of the florets so that it can sit flat on a trivet or flat surface.

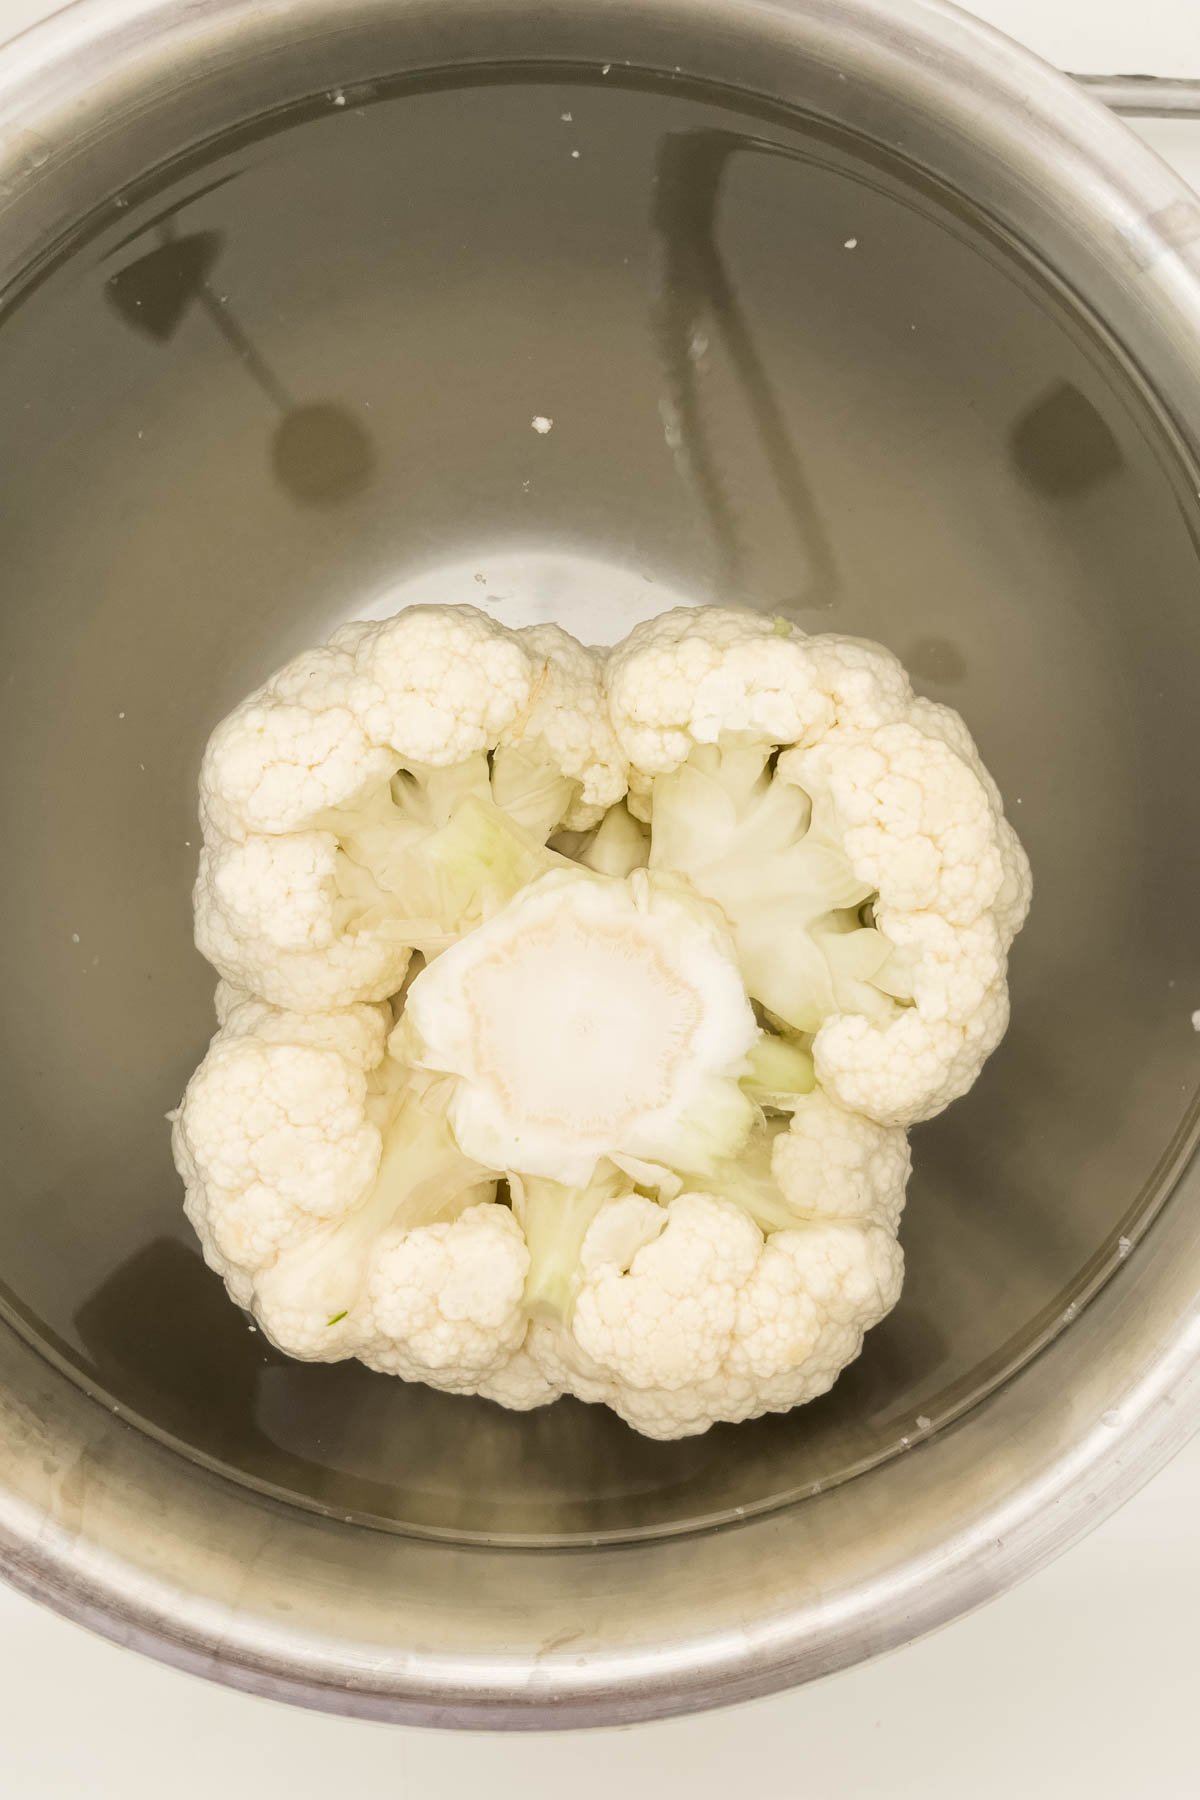
    Then immerse the trimmed cauliflower head in warm water with some salt. Let it sit for at least 10-15 min. This will help to clean the crevices in the florets while still intact on the cauliflower head. Then rinse thoroughly with fresh running water to remove the salt. Now the cauliflower head is ready for marination.

    How to make healthy Instant Pot cauliflower?

    Step 1 - Prepare cauliflower head

    Clean and prepare the cauliflower head for marination as described above.

    Step 2 - Prepare marinade

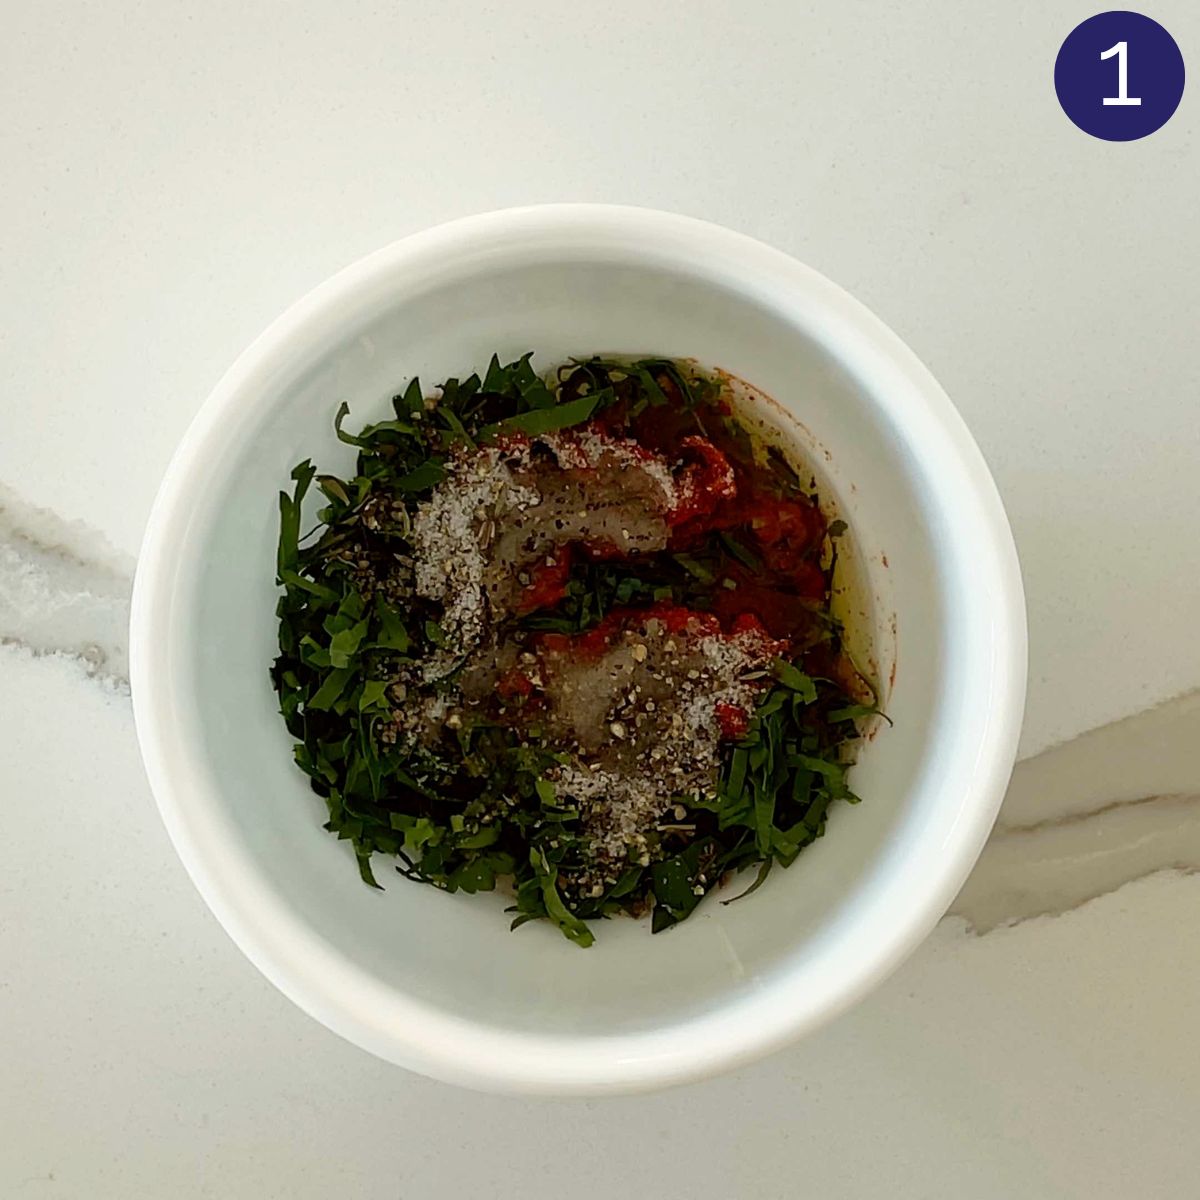
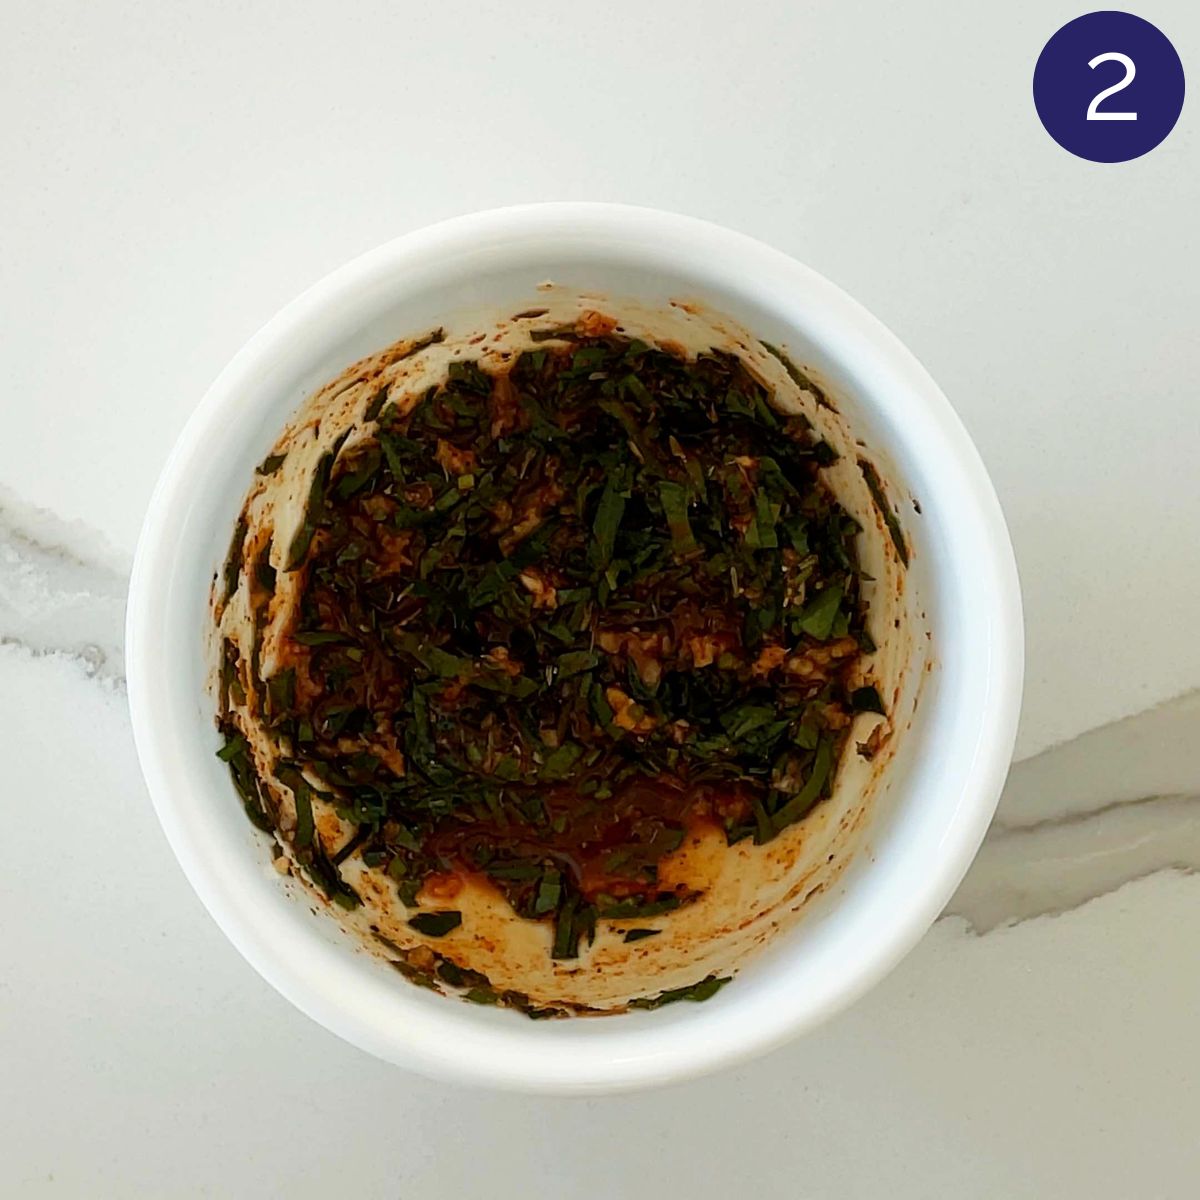
    In a small mixing bowl, combine finely chopped garlic, fresh or dried thyme, chopped fresh parsley leaves, oil, lemon juice, salt, and pepper. Mix everything well.

    Step 3 - Marinate whole cauliflower head

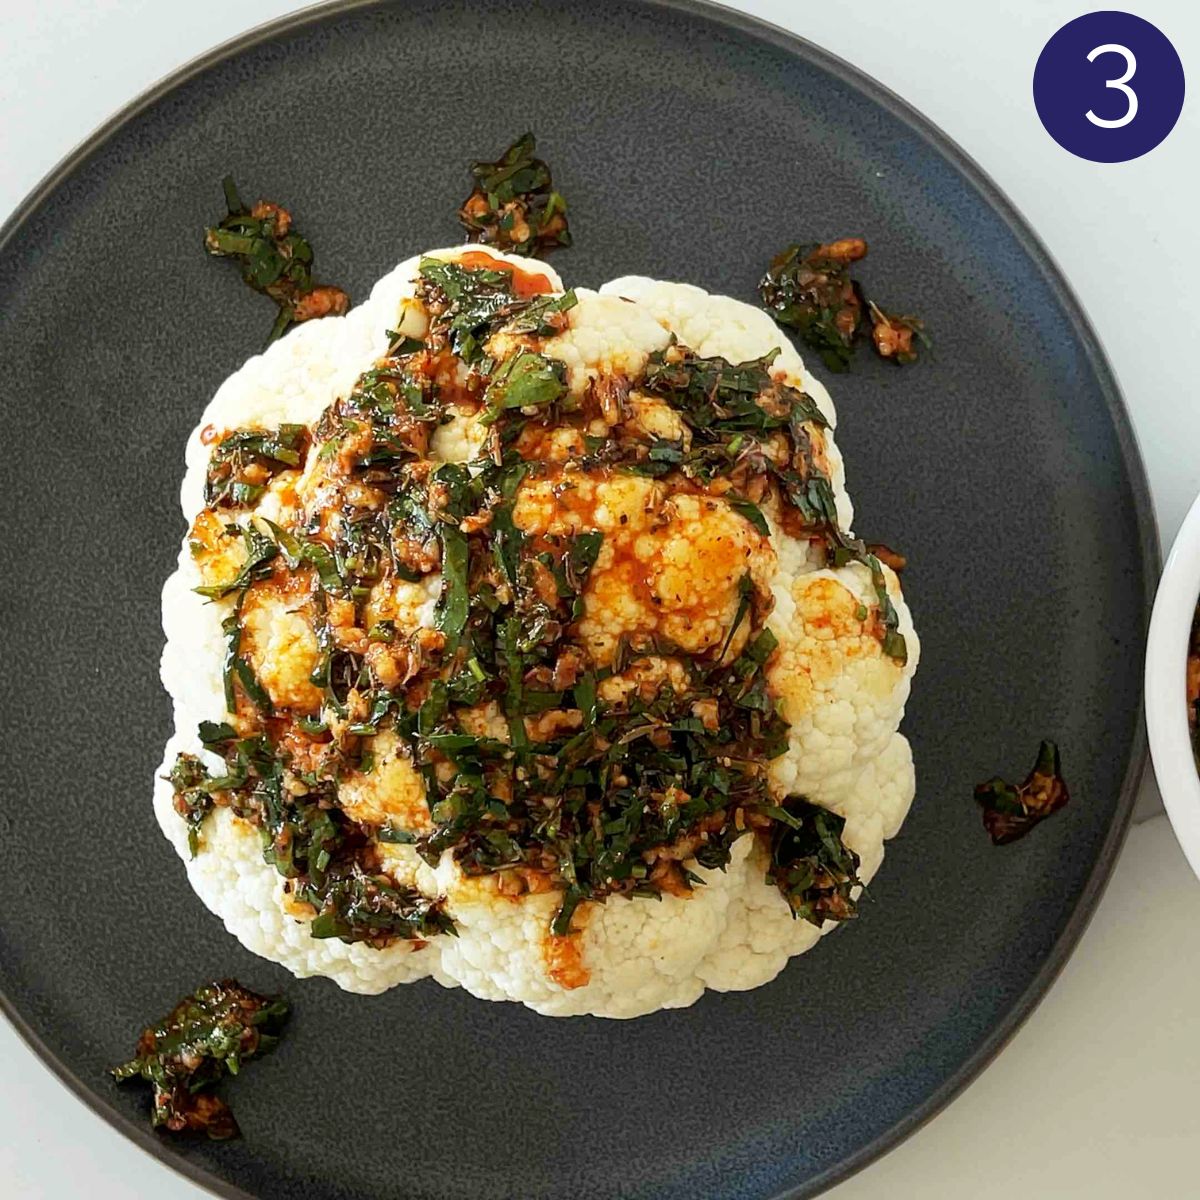
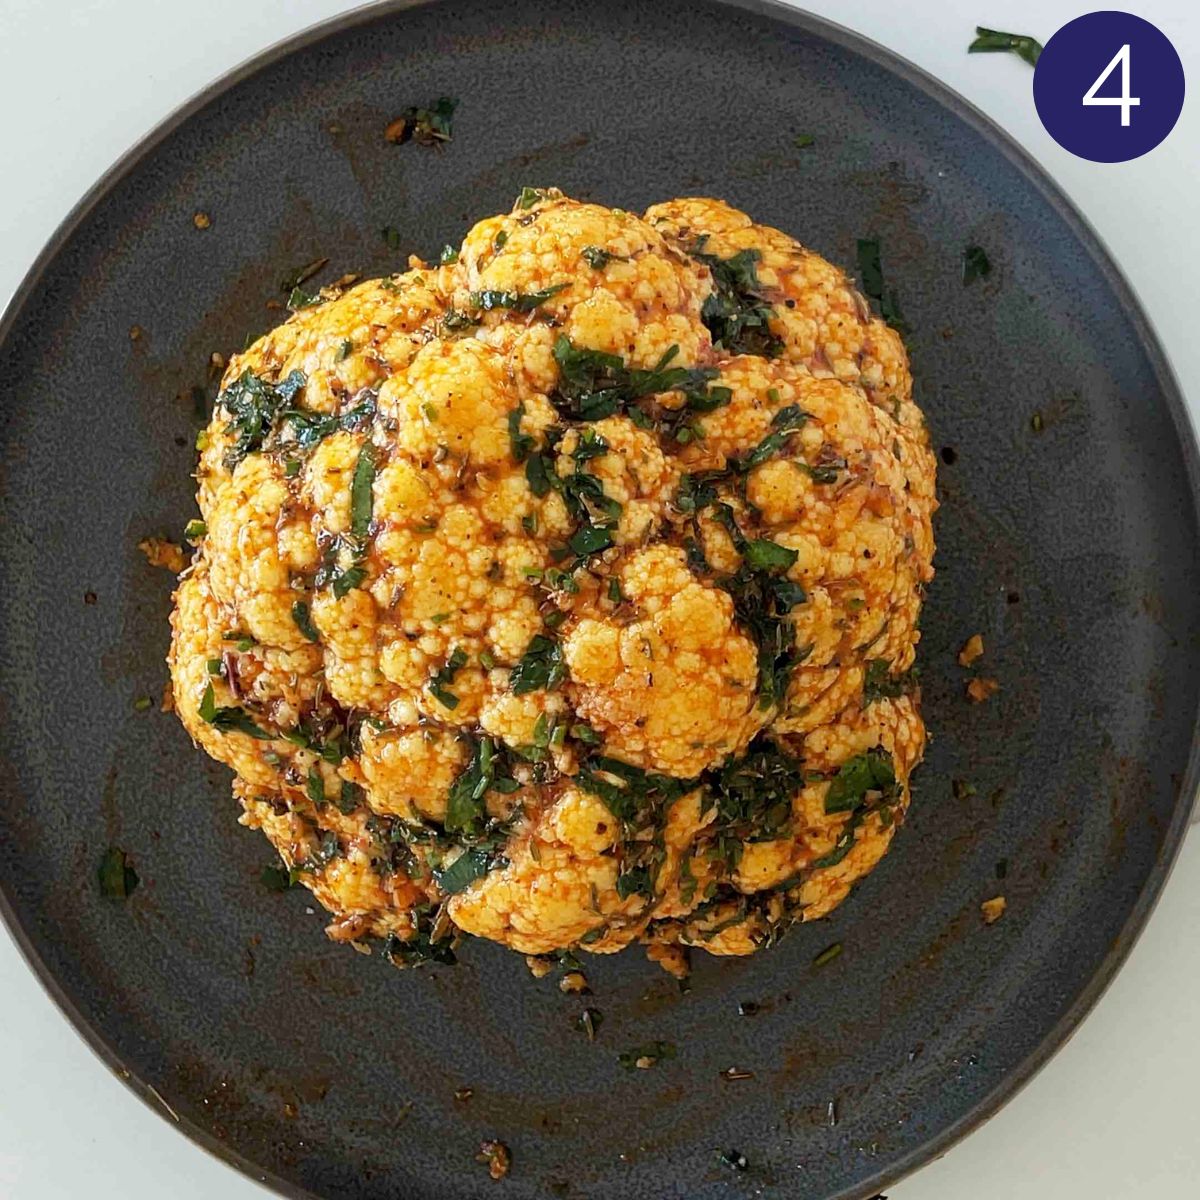
    Rub the prepared garlic-herbs mixture all over the cauliflower evenly. Do not forget the bottom side of it. If you have time, marinate the cauliflower for 30-60 min before cooking. Else you can directly proceed to the next step.

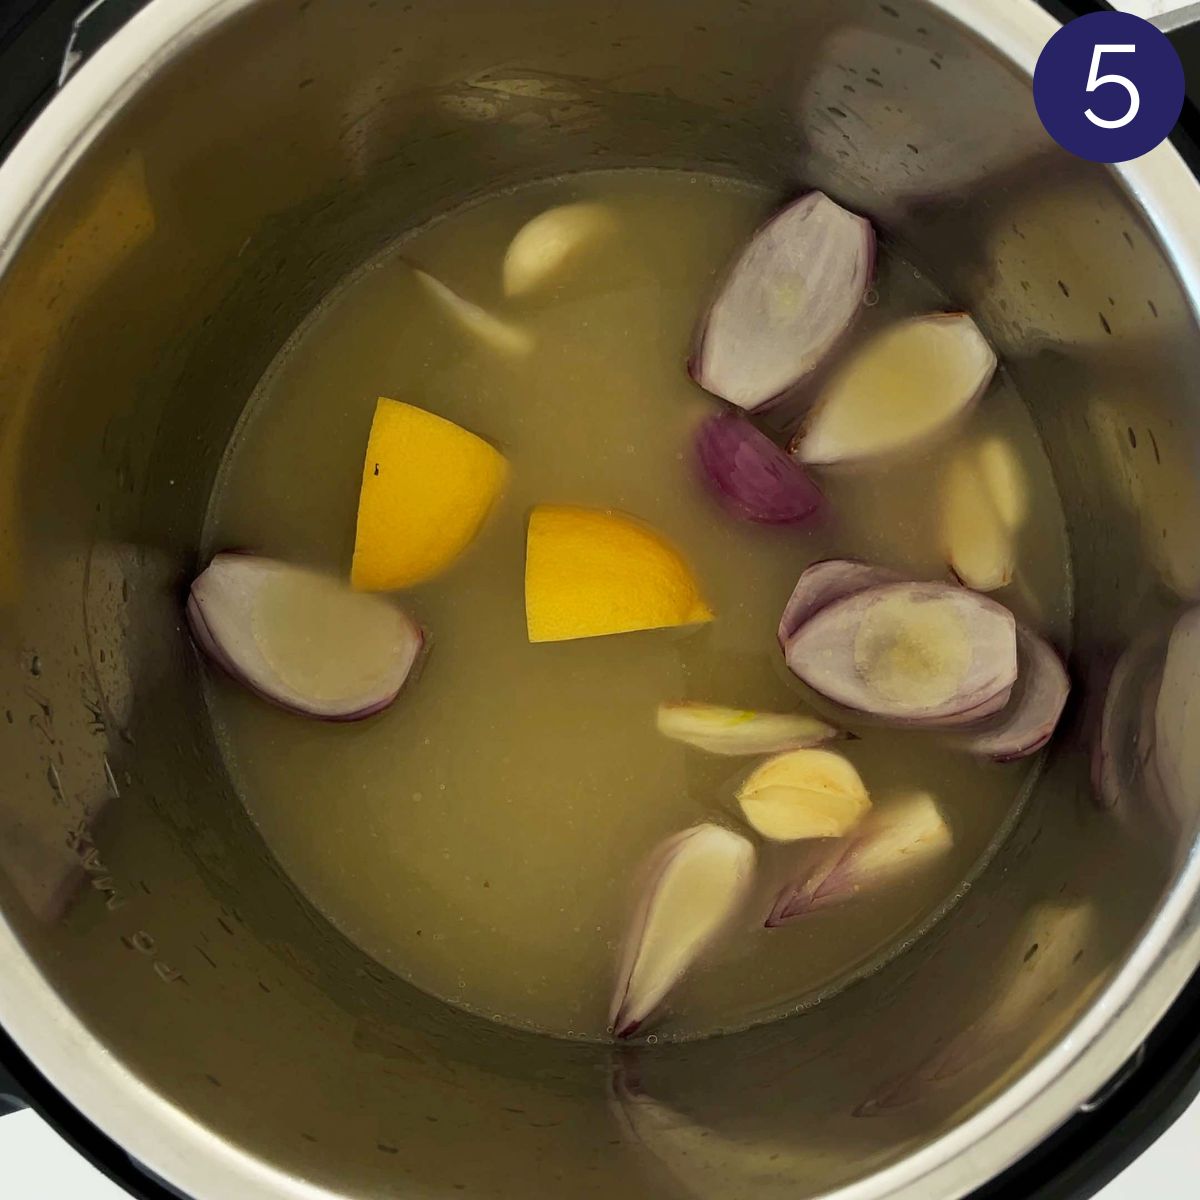
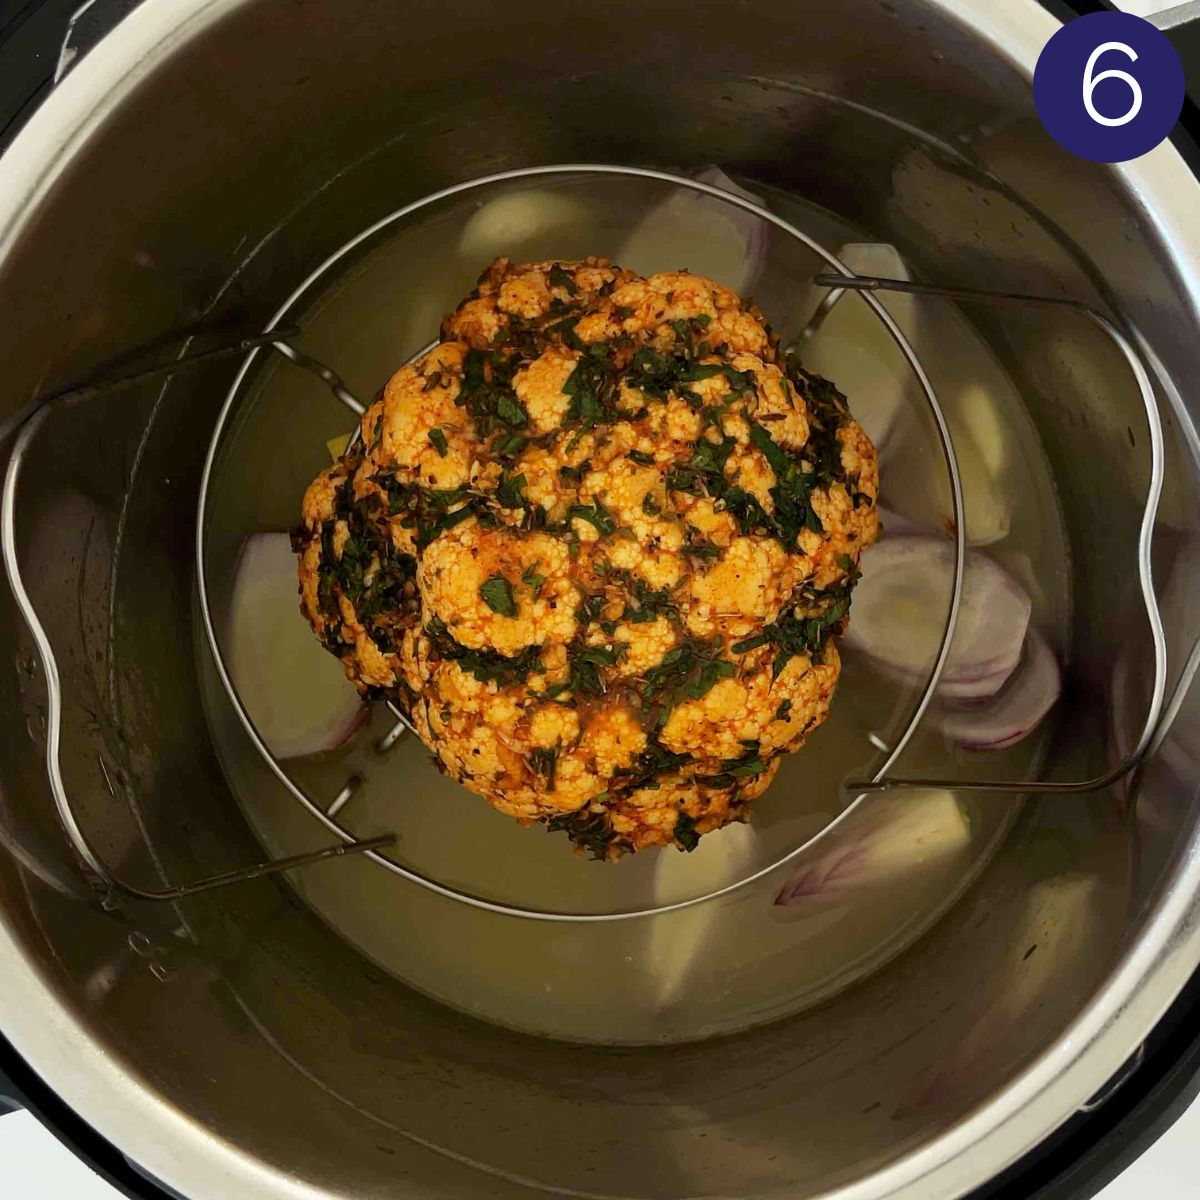
    Step 4 - Cooking whole cauliflower in Instant Pot

    Heat some oil in the Instant Pot on saute mode. Add onion pieces and whole garlic cloves and saute until translucent. Then add vegetable stock, herbs, and lemon. Now place the trivet and put the marinated whole cauliflower head on it.

    Turn off the Instant Pot and turn it back on to manual high-pressure mode. Set a timer to 3 min. Let the pressure release naturally for 5 min, and then open the vent to release the remaining pressure.

    Step 5 - Prepare gravy and serve

    Carefully remove the cooked cauliflower along with the trivet. Turn on low saute mode. Stir in some flour and blend the gravy base using a hand blender inside the pot itself. Season the gravy with some salt and pepper according to your taste. Cook it on low saute mode for a few min or until the raw taste of the flour disappears. Enjoy the cauliflower with warm gravy.

    Chef's Tip - To get the roasted crust on the cauliflower, after pressure cooking, broil it at the highest temperature in the oven for 2-3 mins or more as per your liking.

    Cook whole cauliflower head in the Instant Pot and serve with delicious creamy gravy. Perfect vegetarian and vegan recipe for the holiday dinner or weeknight healthy meal. | #watchwhatueat #veganthanksgiving #vegan #cauliflower

    Serving suggestions!

    • Cut the cauliflower into wedges and drizzle warm gravy while serving. Serve on the side plain soft rice.
    • Serve it as the main holiday dish, with creamy potato mash, roasted green beans and potatoes, homemade whole wheat dinner rolls, and cranberry mimosa.

    Helpful tips!

    • Buy a fresh and large cauliflower head for this recipe.
    • You can rub the spice mixture all over the cauliflower and marinate it well in advance before cooking it in the Instant Pot. It will make the cauliflower more flavorful. This step is entirely optional.
    • Carefully cut the leaves using a knife. Otherwise, you may end up cutting big florets that will ruin the look of the final dish. Also, carefully trim the stem flush. This will help the cauliflower head to sit flat on the serving dish without leaning on any side.
    Healthy Instant Pot Cauliflower - cook whole cauliflower head in the pressure cooker and serve with delicious creamy gravy to make it more flavorful. Perfect vegetarian and vegan recipe for the holiday dinner or weeknight healthy meal. | #watchwhatueat #veganthanksgiving #vegan #cauliflower

    FAQs

    How to store leftovers

    Let the cauliflower and gravy cool down completely. Then cut the cauliflower into wedges or large florets. You can store the cauliflower and gravy in an air-tight glass container for a couple of days in the refrigerator.

    How to reheat and serve leftovers

    Drizzle some water and microwave the leftovers for 1-2 min or until steamy hot just before serving the next time.

    Or, heat the leftovers in a small pan on the stovetop until steamy hot. Add 2-3 tablespoons of water and cover the pan before heating.

    More cauliflower recipes to try

    • Air fryer cauliflower wings with bbq sauce just after cooking is over
      Air Fryer Cauliflower BBQ Wings
    • Healthy Roasted Turmeric Cauliflower Soup - easy vegetarian or vegan recipe to prepare creamy cauliflower soup. Roasted garlic and potatoes along with cauliflower give amazing flavors to the soup. Perfect for winter nights. | #watchwhatueat #soup #cauliflowersoup #vegan #cauliflowerrecipe
      Healthy Roasted Turmeric Cauliflower Soup
    • Healthy Oven Roasted Whole Cauliflower with garlic and herb is the easiest and delicious way of preparing cauliflower for a meatless party or holiday dinner. | #cauliflower #vegan #veganthanksgiving #lowcarb
      Easy Oven Roasted Whole Cauliflower
    • 15 min healthy fried cauliflower rice.| watchwhatueat.com
      The Best Cauliflower Rice Stir Fry | V, GF & Low Carb

    More Instant Pot recipes you will love

    • Instant Pot Pumpkin risotto with wooden spatula.
      Instant Pot Pumpkin Risotto
    • Chicken drumsticks in Instant Pot coated with lemon garlic sauce and garnished with fresh parsley.
      Easy Instant Pot Chicken Drumsticks
    • Authentic Indian chicken biryani prepared in an Instant Pot.
      Instant Pot Chicken biryani
    • Instant Pot spinach brown rice after cooking
      Instant Pot Spinach Brown Rice

    Instant Pot Whole Cauliflower
    Save it for the future: Pin it to your Vegetarian/Holiday Recipes pinboard!
    And follow Watch What U Eat on Pinterest (We always pin Yummy recipes)

    Love this recipe? Please leave a 5-star ⭐⭐⭐⭐⭐ rating in the recipe card below & a review in the comments if you REALLY like this recipe. Thank You!

    📖 Recipe

    Healthy Instant Pot Cauliflower - cook whole cauliflower head in the pressure cooker and serve with delicious creamy gravy to make it more flavorful. Perfect vegetarian and vegan recipe for the holiday dinner or weeknight healthy meal. | #watchwhatueat #veganthanksgiving #vegan #cauliflower
    Print Pin
    4.60 from 20 votes

    Healthy Instant Pot Cauliflower With Gravy

    Whole cauliflower head flavored with fresh garlic and herbs and cooked in the pressure cooker. Also, learn to make delicious gravy that compliments this steamed whole cauliflower dish.
    Course: Lunch / Dinner,Main Course
    Cuisine: American Inspired
    Diet Low Fat,Vegan,Vegetarian
    Prep Time 10 minutes minutes
    Cook Time 15 minutes minutes
    Total Time 25 minutes minutes
    Servings :4
    Calories :99kcal
    Author:Swati Kadam Gulati

    Would you like to save this recipe?

    Email yourself a link to this post and come back to it later!

    Equipment

    • Instant Pot

    Ingredients

    • 1 large cauliflower head

    Marinade

    • 3-4 garlic cloves finely chopped
    • 1 tablespoon fresh thyme or 1 teaspoon dried
    • 1 tablespoon fresh parsley finely chopped
    • ½ tablespoon olive oil
    • 1 tablespoon lemon juice
    • 1 tsp  smoked paprika
    • salt and pepper

    For Gravy

    • 1 onion cut into large pieces
    • 1 teaspoon oil
    • 2-3 garlic cloves whole
    • 1 ½ cup vegetable stock
    • ½ tsp  thyme or more if fresh
    • ½ tablespoon lemon juice
    • 1 tablespoon whole wheat flour

    Instructions

    • In a small bowl combine all the ingredients listed under marinade.
    • Cut leaves from the bottom of the cauliflower head. Carefully trim the stem flush without cutting the florets. It will help the cauliflower to sit flat on the trivet.
    • Rub the prepared garlic-herb marinade on the cauliflower head evenly.
    • For the gravy heat oil in saute mode of the Instant Pot. Add onion and whole garlic cloves; cook until translucent.
    • Then add vegetable stock, thyme and lemon juice. Place the trivet into the Instant Pot.
    • Put the whole cauliflower head on the trivet. Cook for 3 min on manual high-pressure mode. Allow pressure to release naturally for 5 min and then quick release the remaining pressure.
    • Carefully transfer the cauliflower to an oven-safe dish or tray. Optionally, broil it 3-4 min in the oven to get a nice crust.
    • Turn on the saute mode in the Instant Pot. Add flour to the gravy base and blend everything using a hand blender until it gets to a smooth consistency. Add salt and pepper according to taste.
    • Cook the gravy for 3-4 min and serve warm with the cooked cauliflower.

    Notes

    1. Do not forget to open the lid after 5 min to naturally release the pressure and take the cauliflower out from the Instant Pot once it is opened. Else, the steam from the gravy base will keep on cooking the cauliflower.
    2. Gravy - you can increase the quantity of the gravy by adding more vegetable stock and flour before blending the gravy base.

    Nutrition

    Calories: 99kcal | Carbohydrates: 17.9g | Protein: 5.1g | Fat: 2.9g | Saturated Fat: 1g | Potassium: 720mg | Fiber: 6.4g | Sugar: 7.2g | Iron: 2mg
    Tried this recipe?Tag us on Instagram @watchwhatueat or tag #watchwhatueat! OR leave us a comment & rating below. Your feedback is very important to us.

    2 Comments

    A whole chicken with juicy and tender on the inside and a crispy crust on the outside which you can make in the Instant Pot. And this easy and healthy whole chicken recipe with delicious gravy is perfect for family gatherings or holiday dinner or party. #watchwhatueat #chicken #thanksgivingrecipe #healthythanksgiving #instantpotchicken

    You will love this fall-apart-from-the-bone Instant Pot whole chicken with creamy and delicious gravy. Only a few minutes for preparation and under 25 min pressure cooking is what you will need for this whole chicken to cook.

    A whole chicken with juicy and tender on the inside and a crispy crust on the outside which you can make in the Instant Pot. And this easy and healthy whole chicken recipe with delicious gravy is perfect for family gatherings or holiday dinner or party. #watchwhatueat #chicken #thanksgivingrecipe #healthythanksgiving #instantpotchicken
    Instant Pot Whole Chicken

    Are you a proud owner of Instant Pot?

    Why do I say 'proud owner'?!!!

    If you have an Instant Pot, then I am sure you will definitely understand why I said so. I feel it is an amazing invention among kitchen counter appliances. It really makes life easy when you are super busy and still want to cook at home.

    Moreover, you can cook raw beans (for example making black bean soup), and chickpeas in it even without soaking them. I completely stopped buying canned beans and chickpeas etc.

    Enough about praising Instant Pot for now. Let's talk about cooking a whole chicken in the pressure cooker.

    [feast_advanced_jump_to]
    Whole chicken and garlic herb mixture for cooking chicken in Instant Pot.

    How To Cook a Whole Chicken in the Instant Pot

    Heat the pot on medium saute mode. Then in little oil cook the whole chicken on both sides for a few minutes. It will help to develop a nice crust on the chicken surface. Take out the chicken on a large plate.

    Seared whole chicken in Instant Pot.

    In the same pot add onion, a few peeled garlic cloves, and saute for a couple of mins. Add chicken stock and place on a trivet. Brush the spice mixture evenly all over the chicken and then lay it on the trivet facing breast side up. Cook on manual high-pressure mode for 22 min.

    Garlic and herbs rubbed over the whole chicken

    Once done, allow releasing pressure naturally for 10 minutes and quick release the remaining pressure. Carefully remove the trivet and transfer the chicken to the serving tray. Make the gravy using the drippings from the chickens.

    Serve the chicken with delicious gravy on the side of roasted potatoes or mashed potatoes or roasted vegetables for a wholesome dinner. Even tastes amazing with creamy grits or polenta.

    How to get a crispy crust?

    You can get a brown crust either by broiling the chicken in the oven once it is cooked. Or, you can sear the chicken on saute mode of the pressure cooker before cooking.

    The only difficulty of searing a whole chicken in the Instant Pot, I feel, is flipping it in the deep pot. You can turn it carefully, but it gets difficult, especially when things are hot. Therefore, I use long tongs and a spatula to do this job.

    However, you cannot keep on flipping this whole chicken till you are satisfied with the desired color and texture of the crust. It may tear up the skin during the process and ruin the dish's look. If you have a larger Instant Pot, this step might be easier. Mine is a 6-quart size which holds a maximum of 4 lb whole chicken.

    My suggestion would be (based on experience), once pressure cooking is done, transfer the chicken to an oven-safe baking tray or dish facing breast side up. Cook it on broil mode in the oven for 3-4 min or until it reaches the desired color. This sounds easy, right?

    A whole chicken with juicy and tender on the inside and a crispy crust on the outside which you can make in the Instant Pot. And this easy and healthy whole chicken recipe with delicious gravy is perfect for family gatherings or holiday dinner or party. #watchwhatueat #chicken #thanksgivingrecipe #healthythanksgiving #instantpotchicken

    Helpful Tips!

    • Use organic whole chicken whenever possible. It is not loaded with antibiotics and hormones. And we can hope that they are raised as free birds.
    • I usually wash the chicken before using it to get rid of the smell coming from the packaging. You may skip it if you prefer not to wash it.
    A whole chicken with juicy and tender on the inside and a crispy crust on the outside which you can make in the Instant Pot. And this easy and healthy whole chicken recipe with delicious gravy is perfect for family gatherings or holiday dinner or party. #watchwhatueat #chicken #thanksgivingrecipe #healthythanksgiving #instantpotchicken

    Alternatives to Instant Pot Whole Chicken

    • Do not own an Instant Pot? Then follow this Oven Roasted Whole Chicken recipe to cook the whole chicken in the convection oven.
    • Want to go meatless? Then make this Whole Roast Cauliflower in the oven or cook the whole cauliflower head in the Instant Pot.

    Fall off the bone Instant Pot Whole Chicken with delicious gravy made in the same pot. Super easy with tons of flavors, a perfect chicken recipe for a holiday dinner or get-together meal. #watchwhatueat #chicken #thanksgivingrecipe #healthythanksgiving #instantpotchicken

    Instant Pot Whole Chicken
    Like this recipe? Pin it to your Chicken/Holiday Recipes pinboard!
    And follow Watch What U Eat on Pinterest (We always pin Yummy recipes)

    You Will Love These Instant Pot Recipes

    • Instant Pot Barley Soup
    • Instant Pot Black Bean Soup
    • Healthy Instant Pot Chicken Biryani
    • Instant Pot Whole Cauliflower
    • Easy Instant Pot Chicken Drumsticks
    • All Instant Pot Recipe

    📖 Recipe

    A whole chicken with juicy and tender on the inside and a crispy crust on the outside which you can make in the Instant Pot. And this easy and healthy whole chicken recipe with delicious gravy is perfect for family gatherings or holiday dinner or party. #watchwhatueat #chicken #thanksgivingrecipe #healthythanksgiving #instantpotchicken
    Print Pin
    5 from 1 vote

    Easy Instant Pot Whole Chicken With Delicious Gravy (in 30 mins)

    Fall off the bone Instant Pot Whole Chicken with delicious gravy made in the same pot. Super easy with tons of flavors, a perfect chicken recipe for a holiday dinner or get-together meal.
    Course: Lunch / Dinner,Main Course
    Cuisine: American Inspired
    Prep Time 10 minutes minutes
    Cook Time 30 minutes minutes
    Total Time 40 minutes minutes
    Servings :6 -8
    Calories :404kcal
    Author:Swati Kadam Gulati

    Would you like to save this recipe?

    Email yourself a link to this post and come back to it later!

    Equipment

    • Instant Pot
    • Sharp Knife (10% Code: WATCHWHATUEAT)
    • Baking Pan

    Ingredients

    For Chicken

    • 4 lb whole chicken
    • 1 medium onion cut in 8 pieces
    • 1 lemon cut into thick slices
    • 4-5 garlic cloves finely chopped
    • 1 tablespoon smoked paprika
    • 1 tablespoon fresh rosemary finely chopped
    • 2 tablespoon lemon juice
    • 1 ½ tablespoon olive oil divided
    • salt and pepper

    For Gravy

    • 2 tablespoon whole wheat flour or all-purpose flour
    • 1 ¼ cup chicken stock
    • few fresh rosemary leaves
    • 2-3 garlic cloves

    Instructions

    • In a small bowl combine chopped garlic, smoked paprika, chopped rosemary, lemon juice, 1 tablespoon olive oil, salt, and pepper. Keep it aside.
    • Rub some of the garlic mixture inside the chicken cavity. Then fill in the cavity with large pieces of onion (use remaining for the gravy), and lemon slices. Tie the legs together using a cotton twine.
    • Heat remaining oil on medium saute mode. Place whole chicken facing breast side down. Sear it for 3-4 min to get a nice golden color on the skin. Carefully turn it and sear for another 3-4 min. Remove the chicken and place it on a trivet.
    • Meanwhile, in the same pot add garlic cloves, onion, and cook until translucent. Then add some fresh rosemary and chicken stock.
    • Evenly spread remaining garlic-herb mixture over the chicken using a brush. Place the trivet with the chicken in the pot.
    • Cook the chicken on manual high pressure for 22 min. Once done release pressure naturally for 10 minutes and then quick release the remaining pressure.
    • Carefully transfer the chicken to an oven safe dish. Optionally, broil for 3-4 min in the oven for additional color, texture, and flavor.

    Making the Gravy

    • Turn on the saute mode. Add cooked onion and squeeze the lemon juice from the chicken cavity into the drippings inside the pot.
    • Then add flour and blend everything using a hand blender until it gets to a smooth consistency. Add salt and pepper, if necessary.
    • Cook the gravy for 4-5 min. Serve warm over carved chicken pieces.

    Notes

    1. Broil - You can skip the step no.3 and cook the chicken without initial searing in the oil. Broil the chicken in the oven once it is cooked to get a nice brown crust on the skin.
    2. Searing the chicken - After searing the chicken place it directly on a trivet with breast side facing up. Apply the garlic mixture and return the trivet to the pot. I do not apply spices before searing the chicken because it gets burnt from high heat and adds a burnt flavor to the dish. In earlier trials, I made this mistake.
    3. Cooking time - it depends on the size of the chicken. Adjust the cooking time by ±5 min for every 1 lb change in the size of the chicken.

    Nutrition

    Calories: 404kcal | Carbohydrates: 4.5g | Protein: 38.3g | Fat: 27.5g | Saturated Fat: 0.2g | Fiber: 1.2g | Sugar: 1.1g
    Tried this recipe?Tag us on Instagram @watchwhatueat or tag #watchwhatueat! OR leave us a comment & rating below. Your feedback is very important to us.

    39 Comments

    Air Fryer Eggplant Parmesan - Healthy and easy breaded eggplant slices fried in Air Fryer for the perfect crispy crust that exactly mimics the deep fried texture. Learn tips for perfect & mess free coating the eggplant. |#watchwhatueat #healthyrecipes #eggplant #eggplantparmesan #airfryer

    Crispy on the outside and super soft on the inside with toppings of marinara sauce and fresh mozzarella cheese. This Air Fryer eggplant parmesan will be a super hit in the family. Serve on the side of whole grain pasta for a perfect wholesome healthy meal.

    Air fried eggplant parmesan garnished with fresh basil in a air fryer basket.

    I love eating eggplant parmesan in the restaurants. And, the only thing I don't like about them is the amount of oil that goes into the breaded crust of eggplants. Did you ever notice it?

    I never tried making this Italian dish at home until now. But my recent investment in Air Fryer encouraged me to make a healthy version of breaded eggplants. And after trying a lot of recipes in it such as homemade french fries, crispy zucchini fritters in it to name a few, it was not a total surprise how well this eggplant parmesan came out.

    [feast_advanced_jump_to]

    How to bread eggplant?

    This is a three-step process. Start with cutting thick slices of a large eggplant.

    Eggplants cut into thick slices for making Air Fryer eggplant parmesan

    Then, in a deep round plate, prepare the bread crumb mixture. You can season and spice it for a delicious crust. In another shallow bowl beat eggs with some flour to make a batter for coating the eggplant slices.

    Batter and bread crumbs mixture for making Air Fryer breaded eggplants

    Thinly apply the egg batter on all sides of the eggplant slices. Then put these slices in the breadcrumb mixture and turn around a few times to completely cover them.

    Find detailed ingredients list and step-by-step instructions below for making these healthy breaded eggplant parmesan.

    Breaded Eggplant Parmesan

    How to make eggplant parmesan in the Air Fryer

    Using Air Fryer is very simple for any recipe. Preheat the Air Fryer before placing any food. It hardly takes a few minutes. My Philips XL Air Fryer takes only 3 mins to preheat.

    In the preheated Air Fryer place breaded eggplant slices. Lightly spray some olive oil to develop a nice golden brown crust. Once the crust is formed and the eggplant is almost cooked spread some marinara sauce and mozzarella cheese on the top of each slice. Cook further until the cheese melts. Or, simply serve crispy breaded eggplant as an appetizer with some marinara sauce as a dip on the side.

    You need to cook eggplant in 2-3 batches depending upon the size of the Air Fryer. Our XL size Phillips Air Fryer can cook four larger slices of the eggplant at a time.

    This delicious and healthy eggplant parmesan will make you feel proud about your investment in the Air Fryer!

    Healthy & easy Eggplant Parmesan fried in Air Fryer for the perfect crispy crust that exactly mimics the deep fried texture. Learn tips for perfect & mess free coating the eggplant slices with breadcrumbs. | #watchwhatueat #healthyrecipes #eggplant #eggplantparmesan #airfryer

    Helpful tips!

    • Buy organic eggplant if possible. It tastes much better than regular ones.
    • Use whole wheat bread crumbs to make this dish even more healthy.
    • To bread the eggplant use fork to hold the eggplant slices. This really makes applying the breadcrumb crust without getting your hands dirty. Insert a fork in the eggplant slice and hold it in one hand. Then using a small clean brush apply a thin layer of egg-flour batter evenly on all sides. Put the battered slice in breadcrumbs and turn it over to coat the breadcrumbs on the other side. Repeat it a few times to apply a nice and even coating.
    • Use fresh mozzarella cheese on the marinara sauce for a more fresh taste. You can easily find fresh mozzarella in local grocery stores.
    Healthy & easy Eggplant Parmesan fried in Air Fryer for the perfect crispy crust that exactly mimics the deep fried texture. Learn tips for perfect & mess free coating the eggplant slices with breadcrumbs. | #watchwhatueat #healthyrecipes #eggplant #eggplantparmesan #airfryer

    More Air Fryer recipes you will love to try

    • Chicken Parmesan In The Air Fryer
    • Air Fryer Whole Chicken
    • Air Fryer Corn On The Cob
    • Easy Air Fryer BBQ Chicken Wings
    • Air Fryer French Fries
    • Air Fryer Zucchini Corn Fritters
    Air Fryer Eggplant Parmesan - Healthy and easy breaded eggplant slices fried in Air Fryer for the perfect crispy crust that exactly mimics the deep fried texture. Learn tips for perfect & mess free coating the eggplant. |#watchwhatueat #healthyrecipes #eggplant #eggplantparmesan #airfryer

    Love this recipe? Please leave a 5-star ⭐⭐⭐⭐⭐ rating in the recipe card below & a review in the comments if you REALLY like this recipe. Thank You!

    📖 Recipe

    Air Fryer Eggplant Parmesan - Healthy and easy breaded eggplant slices fried in Air Fryer for the perfect crispy crust that exactly mimics the deep fried texture. Learn tips for perfect & mess free coating the eggplant. |#watchwhatueat #healthyrecipes #eggplant #eggplantparmesan #airfryer
    Print Pin
    4.71 from 34 votes

    Easy Air Fryer Eggplant Parmesan

    Eggplant parmesan fried in Air Fryer for the perfect crispy crust that exactly mimics the deep fried texture. Crusted eggplants topped with marinara sauce and fresh mozzarella cheese. Perfect side dish to try with pasta for a healthy lunch or dinner.
    Course: Appetizer,Lunch / Dinner
    Cuisine: Italian Inspired
    Diet Low Fat
    Prep Time 15 minutes minutes
    Cook Time 25 minutes minutes
    Total Time 40 minutes minutes
    Servings :4
    Calories :193kcal
    Author:Swati Kadam Gulati

    Would you like to save this recipe?

    Email yourself a link to this post and come back to it later!

    Equipment

    • Air Fryer

    Ingredients

    • 1 large eggplant mine was around 1.25 lb
    • ½ cup whole wheat bread crumbs
    • 3 tablespoon finely grated parmesan cheese
    • salt to taste
    • 1 tsp  Italian seasoning mix
    • 3 tablespoon whole wheat flour
    • 1 egg + 1 tablespoon water
    • olive oil spray
    • 1 cup marinara sauce
    • ¼ cup grated mozzarella cheese
    • fresh parsley or basil to garnish

    Instructions

    • Cut eggplant into roughly ½" slices. Rub some salt on both sides of the slices and leave it for at least 10-15 mins.
    • Meanwhile in a small bowl mix egg with water and flour to prepare the batter.
    • In a medium shallow plate combine bread crumbs, parmesan cheese, Italian seasoning blend, and some salt. Mix thoroughly.
    • Now apply the batter to each eggplant slice evenly. Dip the battered slices in the breadcrumb mix to coat it evenly on all sides. See the helpful tips section above to do this task perfectly.
    • Place breaded eggplant slices on a clean and dry flat plate and spray oil on them. See notes section for details.
    • Preheat the Air Fryer to 360F. Then put the eggplant slices on the wire mesh and cook for about 8 min.
    • Top the air fried slices with about 1 tablespoon of marinara sauce and lightly spread fresh mozzarella cheese on it. Cook the eggplant for another 1-2 min or until the cheese melts.
    • Serve warm on the side of your favorite pasta.

    Notes

    1. Rubbing some salt to eggplant slices ahead makes it leach out the water from the inner cells. This step makes eggplant soft when cooked.
    2. First, spray oil on the breaded eggplant slices when stored in the plate. Then put the oiled side down on the wire mesh of the Air Fryer. Now spray oil to cover the other side. This way both sides of the eggplant will have an even brown color when cooked.
    3. I cook the parmesan-crusted eggplants in two batches. Our Phillips XL Air Fryer holds 4 large slices at a time.
    4. If you prefer meat you will also love this Chicken Parmesan In the Air Fryer.
       

    Nutrition

    Calories: 193kcal
    Tried this recipe?Tag us on Instagram @watchwhatueat or tag #watchwhatueat! OR leave us a comment & rating below. Your feedback is very important to us.

    7 Comments

    One Pan Baked Salmon And Vegetables - Perfect easy, a healthy and quick recipe with tons of flavors for the weeknight dinner. | #watchwhatueat #salmon #onepan #healthydinner #healthyrecipes

    Quick and easy one-pan Oven Baked Salmon And Vegetables are perfect for busy weeknights. This colorful one-pan meal is nutritious and takes about only 25-30 minutes to prepare.

    Salmon and vegetables baked together in one pan for an easy, healthy and quick dinner. Get the grilled look on veggies and salmon in the oven. And for a gluten-free meal serve with brown rice or quinoa. | #watchwhatueat #salmon #onepan #healthydinner #healthyrecipes
    Oven-Baked Salmon And Vegetables

    If you are looking for a quick and easy recipe for a healthy and nutritious dinner, then this fresh salmon and veggie bake will be a perfect fit for you.

    One Pan Baked Salmon And Vegetables - Perfect easy, a healthy and quick recipe with tons of flavors for the weeknight dinner. | #watchwhatueat #salmon #onepan #healthydinner #healthyrecipes

    I am in love with one-pot or one-pan dishes.

    Reason?

    Simple!! There is to make tons of pots dirty and piled up in your kitchen sink for later to clean up. Cleaning dishes is my least favorite thing to do in the kitchen.

    I know no one can escape from it, especially when you love cooking. But one-pot wonders help to minimize the cleanup efforts. Additionally, these are the recipes you can make in less time.

    And this one-pan oven-baked salmon and veggies fall into this category!

    Fresh vegetables rubbed with spices and olive oil for making baked salmon and vegetables

    How to Cook Salmon and Vegetables in The Oven?

    In a small bowl or dish, prepare a spice mixture using garlic powder, Italian seasoning mix, paprika, some salt, and pepper. Dice fresh vegetables into ½-1" pieces. In this recipe, I used multicolored peppers, zucchini, and onion. Put all the cut vegetables on the baking sheet and add some prepared spice mix (reserve some for salmon) and olive oil. Then thoroughly mix vegetables to coat the spices and oil evenly. Cook these spiced vegetables halfway in the oven.

    Take out the pan from the oven and make space for salmon fillets. Rub the remaining spice mixture on these fillets, return the pan to the oven, and cook everything until well done. Detailed ingredients list and step-by-step instructions are given below.

    You can pair this salmon and veggies with homemade sweet potato gnocchi, cilantro lime brown rice, or quinoa for a complete meal.

    Salmon and vegetables baked together in one pan for an easy, healthy and quick dinner.

    Helpful Tips!

    • Use organic salmon whenever possible. And always buy seafood like salmons from sources that practice sustainable farming. It is very important to preserve the natural lives of Mother Earth. Our individual small steps can make a big difference when each of us on the Earth decides to take such small steps. Read this Huffington Post Australia's article on Everything You Should Know About Salmon Farming. 
    • Never thaw frozen fish quickly using warm/hot water. It significantly degrades the quality of the fish and makes it hard when cooked. Keep it at room temperature (i.e., over the counter) well in advance to thaw it naturally. Foolishly, I made this mistake when I first tried this recipe. I am a Food Engineer and still made this mistake. When you are in a hurry, you easily forget what you learned not to do.   
    • You can use a variety of vegetables to make the dish nutrient-rich. 
    • Partially cooking vegetables and then adding salmon fillets helps to bake salmon perfectly without overcooking and helps retain its soft texture. Overcooking the fish makes it hard and chewy.

    You will also love these one-pan recipes

    • One Pan Chicken And Veggies
    • Turkey Meatballs With Gravy
    • Shrimp And Zucchini
    • Mexican Chicken Rice
    Salmon and vegetables baked together in one pan for an easy, healthy and quick dinner. Get the grilled look on veggies and salmon in the oven. And for a gluten-free meal serve with brown rice or quinoa. | #watchwhatueat #salmon #onepan #healthydinner #healthyrecipes

    One Pan Baked Salmon And Vegetables
    Like this recipe? Pin it to your Easy Dinner pinboard!
    Follow Watch What U Eat on Pinterest (We always pin Yummy recipes)

    📖 Recipe

    One Pan Baked Salmon And Vegetables - Perfect easy, a healthy and quick recipe with tons of flavors for the weeknight dinner. | #watchwhatueat #salmon #onepan #healthydinner #healthyrecipes
    Print Pin
    4.16 from 13 votes

    One Pan Baked Salmon And Vegetables

    Salmon and vegetables baked together in one pan for an easy, healthy and quick dinner. Salmon fillets and fresh veggies rubbed with olive oil, herbs and spices and, baked to perfection.
    Course: Lunch / Dinner,Main or Side
    Cuisine: American Inspired
    Prep Time 10 minutes minutes
    Cook Time 18 minutes minutes
    Total Time 28 minutes minutes
    Servings :4
    Calories :160kcal
    Author:Swati Kadam Gulati

    Would you like to save this recipe?

    Email yourself a link to this post and come back to it later!

    Equipment

    • Large Baking Sheet
    • Sharp Knife (10% Code: WATCHWHATUEAT)

    Ingredients

    Salmon and Veggies

    • 12-16 oz salmon cut into 4 fillets see notes
    • 1 zucchini
    • 1 red and yellow pepper each
    • 1 medium onion

    Spices

    • 1 teaspoon Italian seasonings
    • 1 teaspoon paprika
    • 1 teaspoon garlic powder
    • salt and pepper

    Other

    • 1 tablespoon olive oil divided
    • 2-3 tablespoon fresh parsley finely chopped
    • 1 lemon cut into wedges or slices

    Instructions

    • Preheat oven to 400F.
    • In a small bowl mix Italian seasoning, paprika, garlic powder, salt, and pepper.
    • Cut zucchini, peppers, and onion into ½" cubes. Place all vegetables on the baking sheet.
    • Add half the spice mixture, ½ tablespoon olive oil (reserve remaining oil and spices for the salmon) and mix thoroughly to coat all the vegetables. Evenly spread the veggies on the baking sheet pan and cook the vegetables in the oven for 10 min.
    • Remove the pan and make space for the salmon fillets. Rub remaining spice mixture on the salmon fillets and place them in the gap among the vegetables. Drizzle remaining oil on the salmon.
    • Return the pan to oven and cook for 5-8 min or until salmon is well done.
    • Garnish with fresh parsley and lemon slices.

    Notes

    1. If you are using frozen salmon then make sure to thaw it at room temperature before using.
    2. You can serve this dish on the side of pasta or brown rice or quinoa.
    3. To get a nice brown crust on the salmon and vegetables, turn on broil mode for 2-3 min after baking timer is over. 

    Nutrition

    Calories: 160kcal | Carbohydrates: 8g | Protein: 26g | Fat: 3.5g | Saturated Fat: 0.7g | Cholesterol: 69mg | Potassium: 699mg | Fiber: 1.8g | Sugar: 3.8g
    Tried this recipe?Tag us on Instagram @watchwhatueat or tag #watchwhatueat! OR leave us a comment & rating below. Your feedback is very important to us.

    Leave a Comment

    Healthy Mexican Chicken Rice made in one pot with tons of flavors and deliciousness. A perfect easy dish for busy weeknight dinner. Full of colors with nutritious veggies you will want to make this Mexican rice again and again. #onepot #Mexican #chicken #rice #healthyrecipes #watchwhatueat

    Healthy Mexican Chicken Rice is made in one pot with tons of flavors and deliciousness. A perfect dish for a busy weeknight dinner. Colorful rice with nutritious veggies--you will want to make it again and again.

    Healthy Mexican Chicken Rice made in one pot with tons of flavors and deliciousness. A perfect easy dish for busy weeknight dinner. Full of colors with nutritious veggies you will want to make this Mexican rice again and again. #onepot #Mexican #chicken #rice #healthyrecipes #watchwhatueat
    Mexican Chicken Rice

    I am always happy and excited to make dishes with Mexican flavors. Because we both enjoy them and never say no to Mexican food. If you are someone like us, then I am sure you will love this Mexican chicken and rice.

    Preparing chicken thighs for making healthy Mexican chicken rice

    Healthy Mexican Chicken Rice Recipe

    Cooking Chicken Thighs

    In this recipe, I have used bone-in chicken thighs. To begin with, heat a little oil in a nonstick pan. Then place the chicken on the skin side while the pan is hot. Let the chicken cook for a few minutes on one side till it develops a nice brown crust. Then flip to cook the other side. It will take hardly 3-4 mins to cook each side on medium to high heat. Take out the chicken and keep it aside.

    Preparing Rice

    In the same pan, cook some garlic with some onions. Add diced colorful peppers, tomato, rice, and Mexican spices. Saute this mixture for a few mins. Finally, add liquid and salt (as per taste) and bring the mixture to a boil. Now place the roasted chicken thighs into the rice mixture, skin facing upwards. Cover the pan and cook the rice on low heat until well done. Serve warm with lemon wedges and fresh cilantro.

    This healthy Mexican chicken and rice is loaded with fresh vegetables and tons of flavors. Simple and easy one-pot recipe for busy weeknight dinner. #onepot #Mexican #chicken #rice #healthyrecipes #watchwhatueat

    Helpful Tips!

    • Use organic chicken whenever possible. We find differences in taste between the regular and organic chicken. Moreover, it is free from unwanted chemicals and artificial growth hormones. Organic chicken may cost a bit more, but I feel in the long run, health is more important. 
    • You can remove the skin from the chicken thighs completely. However, I do keep it to give a nice crust and color to the whole dish. I trim excess skin using a kitchen scissor whenever needed. Trimming the excess skin also reduces the unwanted fat coming from them. 
    • If possible, use homemade roasted cumin powder, which really makes the difference in the taste. I usually roast 1-2 teaspoons of cumin seeds in a small frying pan. I then crush them using my stone Molcajete. It's an additional step but trust me, you will love the flavor of freshly ground cumin in your dish. 

    Don’t miss these other Mexican inspired one-pot meals

    • Mexican Tomato Brown Rice
    • Cilantro Lime Brown Rice
    • Cilantro Lime Quinoa
    • Chicken Taco Rice Casserole Skillet

    This healthy Mexican chicken and rice is loaded with fresh vegetables and tons of flavors. Simple and easy one-pot recipe for busy weeknight dinner. #onepot #Mexican #chicken #rice #healthyrecipes #watchwhatueat

    Healthy Mexican Chicken Rice
    Like this recipe? Pin it to your Chicken / Mexican Recipe pinboard!
    Follow Watch What U Eat on Pinterest (We always pin Yummy recipes)

    📖 Recipe

    Healthy Mexican Chicken Rice made in one pot with tons of flavors and deliciousness. A perfect easy dish for busy weeknight dinner. Full of colors with nutritious veggies you will want to make this Mexican rice again and again. #onepot #Mexican #chicken #rice #healthyrecipes #watchwhatueat
    Print Pin
    5 from 1 vote

    One Pot Healthy Mexican Chicken Rice

    This healthy Mexican chicken and rice is loaded with fresh vegetables and tons of flavors. Simple and easy one-pot recipe for busy weeknight dinner.
    Course: Lunch / Dinner,Main Dish
    Cuisine: Mexican Inspired
    Prep Time 10 minutes minutes
    Cook Time 25 minutes minutes
    Total Time 35 minutes minutes
    Servings :4
    Calories :504kcal
    Author:Swati Kadam Gulati

    Would you like to save this recipe?

    Email yourself a link to this post and come back to it later!

    Equipment

    • Large skillet or pan
    • Sharp Knife (10% Code: WATCHWHATUEAT)

    Ingredients

    • 4 chicken thighs
    • 1 tablespoon lemon juice
    • ½ tablespoon avocado oil or other cooking oil
    • 1 ¼ cup white rice
    • 2 ½ cup chicken stock
    • 2-3 garlic cloves minced
    • 1 onion finely chopped
    • 2 medium tomatoes diced
    • 1 red pepper diced
    • Salt

    Spices

    • 2 teaspoon chipotle chili powder
    • 1 teaspoon dried oregano
    • ⅛ teaspoon cayenne pepper
    • 1 teaspoon roasted cumin powder

    Garnish

    • 2 tablespoon fresh cilantro finely chopped
    • 1 lime cut into wedges

    Instructions

    • In a small bowl mix, all the spices listed above and keep it aside.
    • Heat oil in a nonstick pan on medium heat.
    • Place chicken, add lemon juice, some salt, and sear for 3-4 min on each side. Once done take it out and keep it aside.
    • Now in the same pan add garlic and onion and cook until translucent.
    • Then add diced red pepper, tomato, rice and the spice mixture. Saute the mixture for 3-4 min.
    • Add chicken stock and bring the mixture to boil. Season with salt according to taste.
    • Place partially cooked chicken over rice and cook it on low heat for 15-18 min or until the rice is tender and chicken is well done. Make sure to place the lid on while cooking the rice.
    • Garnish with chopped fresh cilantro and serve warm.

    Notes

    1. For this recipe, generally, I use bone-in chicken thighs. Trim out the all loose and excess skin to reduce the fat coming from them.
    2. Adding lemon juice and little salt and pepper while searing the chicken enhances its taste.

    Nutrition

    Calories: 504kcal | Carbohydrates: 52.1g | Protein: 23.9g | Fat: 22.8g | Saturated Fat: 6.3g | Cholesterol: 95mg | Potassium: 253mg | Fiber: 4g | Sugar: 4.5g | Iron: 3mg
    Tried this recipe?Tag us on Instagram @watchwhatueat or tag #watchwhatueat! OR leave us a comment & rating below. Your feedback is very important to us.

    1 Comment

    Follow this easy and healthy recipe for making quick Instant pot black bean soup with dried beans. No soaking required. Full of flavors, vegan and gluten-free soup for lunch or dinner. #instantpot #pressurecooker #blackbeans #soup #vegan #glutenfree

    Instant pot black bean soup with dried beans - Follow this easy and healthy recipe for a quick one-pot dinner or lunch. Also, this soup is loaded with fresh vegetables. And perfect for gluten-free or vegan diets too.

    Follow this easy and healthy recipe for making quick Instant pot black bean soup with dried beans. No soaking required. Full of flavors, vegan and gluten-free soup for lunch or dinner. #instantpot #pressurecooker #blackbeans #soup #vegan #glutenfree

    Is anybody in love with their instant pot?

    I am absolutely in love with mine. It is an amazing invention among kitchen appliances.

    My husband gifted me an Instant Pot a few months back. Since then I have made tons of recipes in it. What I love most about it is that you can cook dry beans, lentils, black rice or brown rice, etc. in it. And there is no need to soak them. (Usually, these things take a long time to cook them perfectly on the gas or electric stove. And you have to babysit them while cooking.)

    Isn't it amazing?

    We have completely stopped purchasing canned beans and lentils now.

    Raw black beans for making black bean soup

    And this healthy black bean soup is made with dried beans in an Instant Pot. It will take about 30 min to get the soup ready without soaking the beans. Trust me it is much better than Panera's black bean soup.

    Diced red and green pepper, onion and tomato for making black bean soup

    Instant Pot Recipe for black bean soup

    On a saute mode cook onions with little garlic and oil. Then add diced peppers, tomato, and raw black beans. Add spices and salt to taste. Then add water and chicken or vegetable stock. Cover the pot with a lid and cook the mixture on high pressure for 20-25 mins. Once done add fresh cilantro and serve with tortilla chips and sliced avocado and lime wedges for additional flavors. Detailed instructions are given below.

    In my kitchen, I am using the 6 quart Instant Pot DUO Plus 60. I find the 6-quart size optimal for our use. I usually make recipes with at least 4 to 5 servings.

    Just to give an idea you can easily make 4 lb Instant Pot whole chicken in this 6-quart pressure cooker too.

    Instant Pot DUO Plus 60- Buy it from Amazon

    Instant pot black bean soup with dried beans - Follow this easy and healthy recipe for quick one pot dinner or lunch. #instantpot #pressurecooker #blackbeans #soup #vegan #glutenfree

    Instant Pot Black Bean Soup - Helpful Tips!

    • You can soak the black beans in advance. Soaking beans will reduce the cooking time of the soup. However, I never soak the beans and always use raw in this recipe.
    • Use Organic and Non-GMO black beans whenever possible.
    • Always double-check the pressure valve is in seal position while putting the lid on Instant Pot. Else it will keep releasing the steam and will lose the pressure.
    • After releasing the pressure check for the consistency of the soup. If it is too thin for you then either turn on saute mode and evaporate some water or take some soup and blend in the blender and add it back to the remaining soup. Or just use a hand blender to blend the beans partially. It will give a thick consistency to the soup. And if the soup is too thick then add some water or chicken stock and bring it to boil on saute mode.

    Try these some more soups from WWUE

    • Roasted Tomato Soup
    • Healthy Barley Soup
    • Healthy Creamy Broccoli Soup
    • All Soup Recipes Here
    Looking for an Instant Pot recipe? Then try this easy and healthy black bean soup recipe. You will love this no-soak method to prepare the soup from raw black beans. Full of flavors, vegan and gluten-free soup for lunch or dinner.#instantpot #pressurecooker #blackbeans #soup #vegan #glutenfree

    📖 Recipe

    Healthy Instant Pot Black Bean Soup
    Like this recipe? Pin it to your Soup/Chili/Stews pinboard!
    Follow Watch What U Eat on Pinterest (We always pin mouthwatering recipes)

    📖 Recipe

    Follow this easy and healthy recipe for making quick Instant pot black bean soup with dried beans. No soaking required. Full of flavors, vegan and gluten-free soup for lunch or dinner. #instantpot #pressurecooker #blackbeans #soup #vegan #glutenfree
    Print Pin
    5 from 1 vote

    Easy and Healthy Instant Pot Black Bean Soup

    This healthy black bean soup is prepared in Instant Pot using raw beans. No need to soak the beans prior to cooking.
    Course: Lunch / Dinner,Main Dish
    Cuisine: Mexican Inspired
    Prep Time 10 minutes minutes
    Cook Time 25 minutes minutes
    Total Time 35 minutes minutes
    Servings :5
    Calories :247kcal
    Author:Swati Kadam Gulati

    Would you like to save this recipe?

    Email yourself a link to this post and come back to it later!

    Equipment

    • Instant Pot

    Ingredients

    • 1 ½ cup raw black beans
    • ½ red and green pepper each diced
    • 1 onion diced
    • 2 small tomatoes diced
    • 2-3 garlic cloves finely chopped
    • ¼ cup cilantro finely chopped
    • 2 cup vegetable stock or chicken stock + 2 ½ cup water
    • 2 tsp  cooking oil

    Seasonings/Spice Mix

    • 1 tsp  roasted cumin powder
    • ½ tablespoon chipotle chili powder
    • 1 tsp  dried oregano
    • 1 tsp  smoked paprika
    • salt and pepper

    For Serving

    • low-fat tortilla chips
    • 1 avocado
    • 1 lime cut into wedges or slices

    Instructions

    • Heat oil in a saute mode in the Instant Pot. Add garlic and onion and cook until translucent.
    • Then add diced pepper, tomato, raw black beans and all the spices mentioned under seasoning mix. Saute the mixture for 2-3 mins.
    • Add chicken stock and water.
    • Cover the instant pot with its lid. Cancel the saute mode and manually set high pressure for 25 min*.
    • Once the timer is off let pressure release for about 10 min on its own. Then turn the valve to the venting position and release the remaining pressure.
    • Remove the lid and add finely chopped cilantro.
    • Serve warm with avocado slices, tortilla chips to make this soup tastier and filling.

    Notes

    1. *It will take some time to reach the pressure and then the timer will start.
    2. You can roughly mash the cooked beans using a wooden spatula or use a hand blender to partially blend the beans. It will give a thick consistency to the soup.

    Nutrition

    Calories: 247kcal | Carbohydrates: 44.2g | Protein: 13.9g | Fat: 3.5g | Saturated Fat: 1.2g | Potassium: 1120mg | Fiber: 10.9g | Sugar: 5.4g | Iron: 4mg
    Tried this recipe?Tag us on Instagram @watchwhatueat or tag #watchwhatueat! OR leave us a comment & rating below. Your feedback is very important to us.

    This page may include affiliate links that help us to deliver free recipes and maintain this blog.

    9 Comments

    One Pot Easy Palak Paneer Rice or Healthy Spinach Rice | Indian palak paneer turned into one pot rice dish. #spinach #palakpaneer #healthyrecipes

    Turn authentic Indian Palak Paneer curry into a complete meal with this delicious one pot Easy Palak Paneer Rice recipe. You will love the twist on traditional palak paneer. A perfect recipe for a quick weekday lunch or dinner.

    Palak paneer rice in a metal dutch over.

    Have you ever had 'palak paneer' curry in an Indian restaurant? And, did you like it?

    Then you will definitely love all the flavors in this one pot palak paneer rice. Greens, proteins, and carbohydrates all in one dish. What else do we need for an easy weeknight dinner? That is what this easy rice recipe offers.

    Since the last few months, we have been making it almost every week. We both love palak paneer curry. However, the thought of adding rice to it really made us excited to give this one pot spinach rice a try.

    [feast_advanced_jump_to]
    Palak paneer rice in a bowl with metal fork.

    How to make Easy Palak Paneer Rice?

    First, we need to puree the spinach. To do this heat a medium pot or dutch oven over medium heat. Then add fresh spinach leaves and cover with a lid for 2-3 min or until the leaves wilt down. Then remove the wilted spinach into a blender jar or food processor. Also, add in some fresh cilantro and pulse until it forms into a puree.

    Now in the same pot heat some oil. Add some cumin seeds and let them fry until fragrant for a few seconds. Add finely chopped fresh garlic, ginger, and finely chopped onions and cook for a few minutes. Then add raw white rice, some cumin powder, and coriander powder and saute for another few minutes. Add water (vegetable stock) and season with salt and some garam masala. Cook the rice on low heat with the lid on for a few minutes. After 7-8 minutes of cooking rice add the spinach puree, paneer and gently mix. Return the lid and cook the rice-spinach mixture until well done. Detailed instructions are given below.

    Fresh paneer or Indian cheese or Indian cottage cheese for making palak paneer rice
    Fresh baby spinach leaves.
    Spinach puree in a white ceramic bowl for making palak paneer rice.

    Helpful Tips!

    • Use fresh baby spinach leaves for a fresher taste
    • Use reduced fat paneer for making this recipe to cut down on saturated fats. I usually make paneer at home using reduced-fat milk. And freshly made paneer really makes a ton of difference in the taste. However, you can use good quality paneer from Indian grocery stores.
    • Also, freshly roasted and ground cumin and coriander powder add wonderful flavor to this rice. Just roast some cumin seeds and coriander seeds together in a small frying pan for few minutes. Once they cool down, make them into powder using a spice grinder or molcajete.
    Sauteing rice with spices in the process of making palak paneer rice

    More Spinach Recipes You'll Love

    • Instant Pot spinach brown rice after cooking
      Instant Pot Spinach Brown Rice
    • Artichoke Spinach Pinwheels Christmas Tree
    • Spinach Avocado Green Smoothie
    • Spinach rice
      Easy Healthy One Pot Spinach Rice
    Palak paneer rice in a bowl with a metal fork.

    Love this recipe? Please leave a 5-star ⭐⭐⭐⭐⭐ rating in the recipe card below & a review in the comments if you REALLY like this recipe. Thank You!
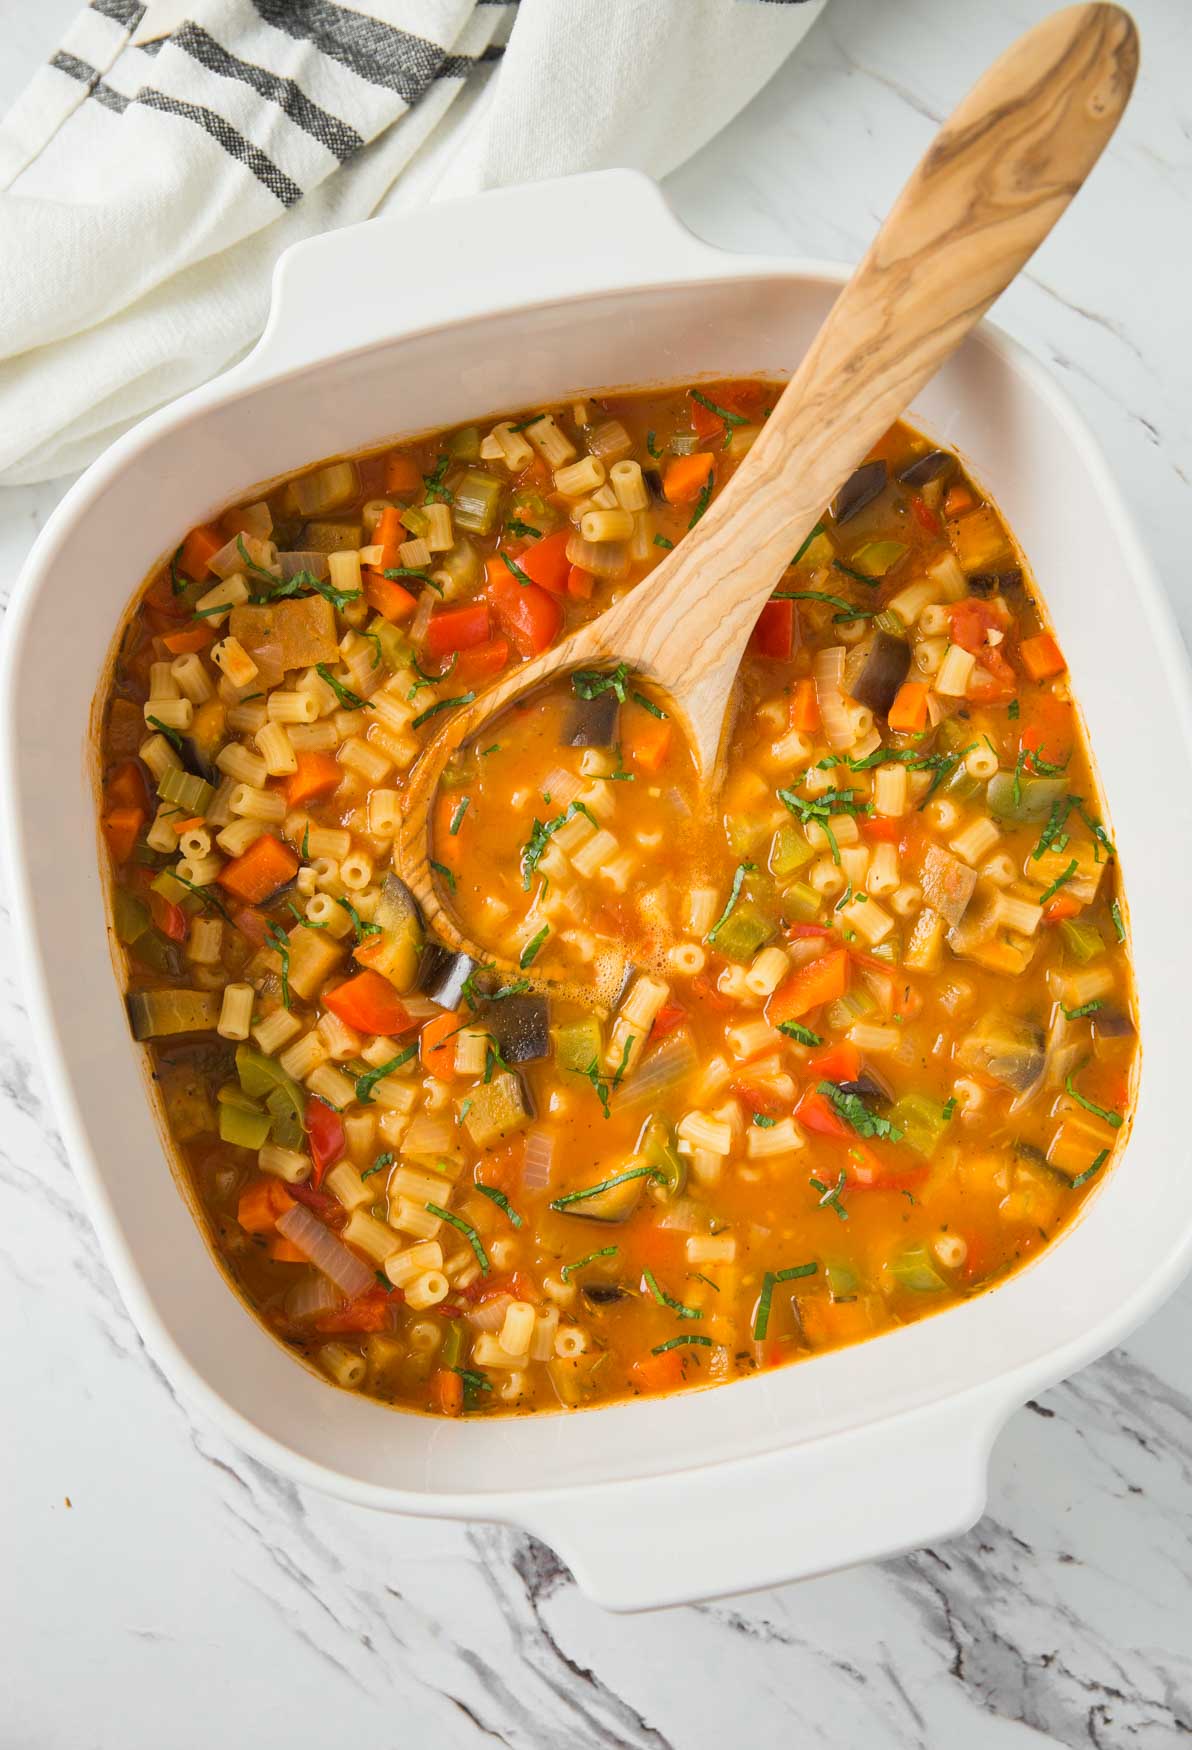
    📖 Recipe

    One Pot Easy Palak Paneer Rice or Healthy Spinach Rice | Indian palak paneer turned into one pot rice dish. #spinach #palakpaneer #healthyrecipes
    Print Pin
    5 from 4 votes

    One Pot Easy Palak Paneer Rice

    Turn authentic Indian palak paneer curry into a complete meal with this delicious one pot Easy Palak Paneer Rice recipe.
    Course: Lunch / Dinner
    Cuisine: Indian Inspired
    Prep Time 15 minutes minutes
    Cook Time 25 minutes minutes
    Total Time 40 minutes minutes
    Servings :4
    Calories :428kcal
    Author:Swati Kadam Gulati

    Would you like to save this recipe?

    Email yourself a link to this post and come back to it later!

    Ingredients

    • 1 ½ cup white rice
    • 6-8 oz baby spinach
    • 4-6 oz paneer (Indian cottage cheese) reduced fat
    • ½ teaspoon cumin seeds
    • 1 onion finely chopped
    • 1 tomato roughly chopped
    • 3 cup vegetable stock (or water)
    • 1 teaspoon garam masala
    • ¼ teaspoon turmeric powder
    • 1 jalapeno seeded optional
    • 2-3 whole garlic cloves minced
    • ½ ” ginger minced
    • 1 teaspoon cumin powder
    • 1 teaspoon coriander powder
    • ¼ cup fresh cilantro reserve some for garnishing

    Instructions

    • Heat a non-stick pot or dutch oven over medium heat. Add spinach and cover the pot for 1-2 minutes. It will help to soften or wilt down the spinach leaves. Take out wilted spinach in a processor or blender jar and set it aside.
    • In the same pan heat oil. Add some cumin seeds and fry them until fragrant for a few seconds.
    • Add onion, ginger, garlic and saute until golden brown.
    • Then add rice, cumin powder, coriander powder, and turmeric powder. Mix everything and saute for a 2-3 minute.
    • Now add vegetable stock (or water) and bring mixture to boil. Add tomato, garam masala, and salt to taste. Cover and simmer the rice for 7-8 minutes.
    • Meanwhile, add jalapeno and some fresh cilantro to the wilted spinach. Pulse the mixture to form a puree and keep it aside. Do not over blend.
    • Add this spinach mixture to partially cooked rice and gently mix them.
    • Then add paneer pieces and mix slightly.
    • Cover and continue cooking the rice for another 7-8 minutes or until well done.
    • Serve warm.

    Notes

    1. Do not cook the spinach for long else it will start to stick to the pot.
    2. Adding spinach after halfway cooking of rice will help to retain the green color.
    Smart Points: 13

    Nutrition

    Calories: 428kcal
    Tried this recipe?Tag us on Instagram @watchwhatueat or tag #watchwhatueat! OR leave us a comment & rating below. Your feedback is very important to us.

    7 Comments

    Extremely flavorful, Asian chili garlic tofu stir-fry in just 30 minutes! A perfect meatless dish you can prepare for lunch or dinner. #tofu #vegan #meatless #asian

    This finger-licking healthy Asian Chili Garlic Tofu is a perfect meatless dish that you can prepare for lunch or dinner. Serve it with warm plain rice for a complete meal. You will become a tofu fan once you try it.

    Asian chili garlic tofu garnished with fresh spring onions in a black cast iron pan.

    I love making tofu Asian style. Personally, I have found that tofu simply goes well with all Asian spices and flavors.

    What is your favorite way of cooking tofu?

    Today I am going to share with you our favorite chili garlic tofu in finger-licking Asian-inspired sauce.

    Let's get started.

    Cutting tofu into bite-size pieces for making Asian chili garlic tofu.

    How to make Asian chili garlic tofu stir-fry?

    This recipe involves two steps: to prepare the tofu and then the sauce to go with it.

    1. Preparing tofu:

    First, evenly coat bite-sized pieces of tofu with a mixture of flour and cornstarch. Then in a medium skillet cook the coated tofu in some oil to form a crust over them. Take out the tofu and in the same pan prepare the chili garlic sauce.

    Cooking tofu in a cast iron skillet to form a crust.

    2. Making chili garlic sauce:

    For the sauce, in sesame oil saute some fresh garlic, chili flakes, and tomato ketchup, and then some sliced shallots. Add soy sauce, vinegar, and little honey to balance the hotness of the chili. Add water and bring the mixture to a boil. In order to thicken the sauce a bit add some cornstarch. Once the sauce is done, add cooked tofu and mix to coat the tofu well. Garnish with green onions and serve warm.

    You can serve this chili garlic tofu with white plain cooked rice for a complete meal.

    Tofu with chili garlic sauce served over bed of steamed rice in a serving bowl with wooden chopsticks.

    Helpful Tips!

    • Use extra-firm tofu for better results.
    • To remove excess water from the tofu, wrap the tofu block in a few layers of tissue paper and put some weight on it to squeeze the water out. Or simply use Tofu Press to get this work done without any mess. (However, I find extra firm tofu from Trader Joe's perfect for these types of recipes. It does not require removing excess moisture from them.)
    Tofu with chili garlic sauce served over bed of steamed rice in a serving bowl with wooden chopsticks.

    More Asian recipes you will love to try

    • Soba Noodle Soup
    • Meatless Spring Rolls
    • Shrimp Spring Rolls
    • Summer Rolls Salad Bowl

    📖 Recipe

    Asian chili garlic tofu recipe - a quick, easy and simple meatless dish you can prepare for lunch or dinner. #tofu #vegan #meatless #asian
    Print Pin
    4.29 from 7 votes

    30 min Healthy Asian chili garlic tofu stir-fry

    Extremely flavorful, Asian chili garlic tofu stir-fry in just 30 minutes! A perfect meatless dish you can prepare for lunch or dinner.
    Course: Lunch / Dinner
    Cuisine: Asian Inspired
    Prep Time 10 minutes minutes
    Cook Time 15 minutes minutes
    Total Time 25 minutes minutes
    Servings :4
    Calories :184kcal
    Author:Swati Kadam Gulati

    Would you like to save this recipe?

    Email yourself a link to this post and come back to it later!

    Equipment

    • Sharp Knife (10% Code: WATCHWHATUEAT)

    Ingredients

    Preparing Tofu

    • 14 oz tofu cut into bite-size pieces
    • 2 tablespoon wheat flour
    • 1 tablespoon cornstarch
    • 1 tablespoon cooking oil

    Chili Garlic Sauce

    • 2-3 garlic finely chopped
    • ½" ginger finely chopped
    • 1 teaspoon red chili flakes more or less as per taste
    • 1 ½ tablespoon ketchup
    • ½ tablespoon sesame oil
    • 1 shallot thinly sliced
    • 1 teaspoon honey
    • 2 tablespoon soy sauce reduced sodium
    • 1 tablespoon rice vinegar
    • 1 ¼ cup vegetable broth
    • 2-3 teaspoon cornstarch mix with a tablespoon of water
    • few springs of green onion

    Instructions

    • Gently mix tofu with flour and cornstarch to coat evenly.
    • Heat oil in a large non-stick or cast iron skillet. Add tofu and cook for a few minutes to form a crust on each side turning frequently. Take out the cooked tofu and set it aside.
    • In the same skillet heat sesame oil over medium heat. Add garlic, ginger and chili flakes and cook for about one minute or until fragrant.
    • Then add sliced shallots and fry until translucent for about 1-2 min.
    • Now add ketchup, soy sauce, vinegar, and honey. Cook the mixture for 2-3 minutes.
    • Add broth and bring mixture to boil.
    • Add cornstarch mixed with water to thicken the sauce and cook the sauce further for 3-4 min.
    • Finally, add tofu and gently mix to combine.
    • Garnish with green onions, sesame seeds (optional) and serve warm.

    Notes

    Smart Points: 6

    Nutrition

    Calories: 184kcal
    Tried this recipe?Tag us on Instagram @watchwhatueat or tag #watchwhatueat! OR leave us a comment & rating below. Your feedback is very important to us.

    Leave a Comment

    Easy Chicken Barley Soup | watchwhatueat.com

    This chicken and barley soup is delicious, wholesome, and a comforting meal to stay warm during cold weather. Surprise yourself with this healthy and nutrient-packed bowl of warm soup.

    Easy chicken and barley soup recipe -- One pot, healthy, wholesome & nutrient packed soup perfect for lunch or dinner. | watchwhatueat.com

    I love eating soups. Especially during the winter months, when the weather outside is always planning on taking revenge on us, a bowl of warm soup is the real comforter. You will agree with me if you live in areas that experience snowfalls.

    And my love for soups inspires me to try out different recipes in my kitchen. I have shared some successful recipes in the past here for you all to enjoy. In particular, the healthy vegetarian barley soup is one of the most popular soup recipes on our blog to date. It has been shared more than 200,000 times on Pinterest. Your response and love motivate us to keep going on!

    One pot, healthy, wholesome & nutrient packed chicken and barley soup recipe. | watchwhatueat.com

    How to make chicken barley soup?

    Eager to know about this hearty chicken and barley soup recipe?

    As its name suggests, it is made using whole grain barley and chicken. I also used some celery stalks to further boost its fiber content.  And I feel onion, garlic, ginger, and some fresh herbs (I used thyme) are a must to enhance the flavors.

    Stir-fry bite-sized chicken pieces in a stockpot with some seasonings like salt, pepper, and smoked paprika to make this soup. We enjoyed the flavors of smoked paprika in this soup. Take out the chicken once done, and then cook the remaining ingredients (onion, tomato, celery, etc. ) with chicken stock and water until the barley is nice and tender. Step-by-step instructions are given below.

    Easy Chicken Barley Soup | watchwhatueat.com
    Easy Chicken Barley Soup | watchwhatueat.com

    How this chicken and barley soup is healthy?

    This homemade barley soup is healthy due to all the clean ingredients used in making it.

    • Whole grain barley is a rich source of essential nutrients such as dietary fiber, protein, and vitamin B. It is also rich in dietary minerals like manganese and phosphorous. 
    • Chicken is one of the leaner meat. It is a very good source of protein, vitamin B, and niacin.
    • Celery provides low-calorie dietary fiber that helps to lose weight. 
    Healthy, wholesome & nutrient packed chicken barley soup to keep you warm during winter. | watchwhatueat.com

    Try these more healthy soups

    1. Detox Broccoli Soup
    2. Creamy Roasted Tomato Soup
    3. Roasted Turmeric Cauliflower Soup
    4. Vegetable Pasta Soup
    5. Healthy Vegetarian Barley Soup
    6. Browse all HEALTHY SOUPS

    📖 Recipe

    Easy Chicken Barley Soup | watchwhatueat.com
    Print Pin
    5 from 1 vote

    Hearty Chicken and Barley Soup

    This hearty chicken and barley soup is prepared using whole grain barley, fresh herbs such as thyme, celery, and lean chicken meat. It is a delicious, healthy, nutrient-packed bowl of soup to keep you warm during winter nights.
    Course: Main or Side
    Cuisine: American Inspired,International
    Prep Time 15 minutes minutes
    Cook Time 45 minutes minutes
    Total Time 1 hour hour
    Servings :4
    Calories :385kcal
    Author:Swati Kadam Gulati

    Would you like to save this recipe?

    Email yourself a link to this post and come back to it later!

    Equipment

    • Sharp Knife (10% Code: WATCHWHATUEAT)

    Ingredients

    • ¾ cup barley raw
    • 1 lb boneless skinless chicken cut into bite size pieces
    • 2 celery stalks finely chopped
    • 2 medium tomato chopped
    • 1 onion finely diced
    • 2-3 springs of fresh thyme (or 1 teaspoon dried thyme)
    • 2-3 cloves garlic minced
    • ½" ginger finely julienned
    • 1 teaspoon smoked paprika divided
    • 3 cup organic chicken stock low sodium
    • 3 cup water
    • 1 tablespoon avocado oil
    • salt and pepper

    Instructions

    • Heat oil in a stock pot on medium to high heat. Add chicken, salt, pepper and ½ teaspoon smoked paprika. Sauté chicken for about 5-6 min or until tender and all the water has evaporated. Take out the chicken and keep aside
    • In the same pot, add minced garlic and ginger and cook until fragrant for about 30 sec. Then add onion and sauté until translucent
    • Add chopped tomatoes and cook for about 2-3 min.
    • Add celery, barley, chicken stock and water. Bring the mixture to a boil.
    • Then add fresh thyme, salt, pepper, and the remaining smoked paprika. Simmer the mixture on low heat for about 25 to 30 min.
    • Add cooked chicken, adjust seasonings, if necessary and simmer for about 5 min.

    Notes

    1. You can cook chicken breast or thigh first and then cut them into bite size pieces. However, make sure that the chicken is well done
    2. If you don't like ginger, you can skip it altogether
    3. You can also add vegetables like carrot, spinach, peppers etc. to make it even more healthy (and colorful!).
    4. Looking for meatless version? Follow this recipe to make Vegetable Barley Soup

    Nutrition

    Calories: 385kcal
    Tried this recipe?Tag us on Instagram @watchwhatueat or tag #watchwhatueat! OR leave us a comment & rating below. Your feedback is very important to us.

    2 Comments

    Ready to serve Indian salmon curry with coconut in cast iron skillet

    This salmon curry recipe is developed in partnership with PrimeWaters Seafood. All opinions expressed here are 100% mine.

    This delicious and healthy Indian salmon curry with coconut is perfect for busy weeknights. Make this quick and easy Indian fish curry in less than 30 min.

    Ready to serve Indian salmon curry with coconut in cast iron skillet
    Salmon Coconut Curry

    Seafood recipes with a coconut base are not new to me. I grew up eating this combination when I was in India. Recipes like shrimp coconut curry, chickpea curry, etc., inspired by the coconut flavor, make me nostalgic.

    Here I am sharing with you coconut fish curry from the archives of my childhood favorites.

    Let's get started!

    What you will need?

    • Salmon fillets - get portioned fillets for making this curry
    • Onion - peel, and dice into small pieces
    • Tomato - clean and cut into large pieces
    • Ginger and garlic - use to flavor the dish
    • Jalapeno - it's optional. Use it if you are okay with hot curries.
    • Coconut milk - either use regular or reduced-fat coconut milk
    • Seasonings - garam masala makes the curry aromatic and flavorful
    • Oil - I always use cooking olive oil in my kitchen.
    • raw salmon fillets are spread over ice cubes in a tray
    • Ingredients like onion, tomato, coconut milk etc gathered on a flat surface for making salmon coconut curry

    Sourcing Salmon

    For making this fish curry, I am using PrimeWaters® Norwegian Atlantic Salmon Portioned fillets.

    Why I like using them? Because --

    • Quality - their salmons are raised without antibiotics.
    • Traceable - you can trace back your fish sourced from carefully selected locations for sustainability.
    • Sustainability - salmons are farm-raised, meet rigorous standards, and have stringent sustainability requirements.
    • Shipping - you can get the salmon at your doorstep. They ship them frozen in perfect condition without losing quality and freshness.

    How to make Indian Salmon Curry with Coconut?

    In a mini blender jar, combine roughly chopped tomatoes, garlic cloves, ginger, and jalapeño. Blend everything well to get a fine tomato mixture.

    • chopped tomatoes, jalapeno, ginger and garlic in a medium size bowl.
    • tomato puree in a medium bowl for making salmon coconut curry

    In a large frying pan or skillet, heat some oil. Place salmon fillets and cook them on both sides. Carefully remove and keep them aside.

    process of searing salmon fillets in a large cast iron skillets with stainless steel spatula.

    In the same pan with leftover oil, saute some finely chopped onions. Then add the pureed tomato mixture and cook until the sauce thickens to a paste-like consistency. Now add coconut milk, water, and mix well. Bring the mixture to boil and season with salt and garam masala. Cook the curry for a few more minutes, and then add cooked salmon fillets. Garnish with fresh cilantro leaves and serve warm.

    Ready to serve Indian salmon curry with coconut in cast iron skillet

    Serving Suggestion!

    • This salmon curry with coconut goes very well with plain steamed white rice.
    • You can also serve homemade flatbreads like these garlic naan bread with this Indian fish curry.

    Helpful Tips!

    • Always use antibiotic-free and sustainably grown seafood or salmon whenever possible.
    • If you are using frozen fillets then make sure to thaw them well in advance before cooking.
    • For a creamy gravy or curry base, chop onions finely and use tomato puree instead of diced tomatoes.
    • Seafood takes very little time to cook compared to other types of animal proteins. Therefore, closely monitor the salmon while cooking to avoid overcooking or burning the fish.

    Recipe Variations

    • Make this coconut shrimp curry using a similar recipe.
    • Use chicken in place of salmon - cut boneless skinless chicken thighs or breast into bite-size pieces. Cook them in a skillet with some oil until well done before adding them into the curry.
    • For vegetarians or vegan diets, try this chickpea curry prepared using coconut milk.
    Indian salmon curry with coconut served in a deep plate with white rice and lemon wedges on the side.

    You will also love these Indian Curry Recipes

    • Red Lentil Curry
    • Healthy Palak Paneer Curry (Spinach Curry)
    • Chicken Tikka Masala
    • Chickpea Tikka Masala

    📖 Recipe

    Ready to serve Indian salmon curry with coconut in cast iron skillet
    Print Pin
    5 from 3 votes

    Indian Salmon Curry With Coconut

    Pan sear salmon fillets and dunk them in a coconut-tomato gravy to make this Indian salmon curry. And for a satisfying, wholesome meal, serve it with steamed white rice or flatbread or naan bread.
    Course: Lunch / Dinner,Main
    Cuisine: Indian Inspired
    Prep Time 10 minutes minutes
    Cook Time 20 minutes minutes
    Total Time 30 minutes minutes
    Servings :1
    Calories :322kcal
    Author:Swati Kadam Gulati

    Would you like to save this recipe?

    Email yourself a link to this post and come back to it later!

    Equipment

    • Large skillet or pan

    Ingredients

    • 4 salmon fillets
    • 1 medium onion finely diced
    • 2 red tomatoes cut into large pieces
    • ½ jalapeno optional
    • 2-3 garlic cloves
    • ½″ ginger peeled
    • ½ cup coconut milk
    • 1 ½ cup water
    • ½ tablespoon cooking oil
    • 1 teaspoon garam masala
    • salt and pepper
    • ¼ cup fresh cilantro finely chopped

    Instructions

    • Combine tomato pieces with garlic, ginger, and jalapeno in a blender or food processor. Keep it aside.
    • Heat some cooking oil in a large skillet over medium heat.
    • Then add salmon fillets to the skillet and sear them for 2-3 minutes on each side. Take them out and keep aside.
    • In the same pan, with leftover oil, sauté onions until golden brown.
    • Add the tomato-garlic mixture and cook until it thickens to a paste-like consistency for about 6-8 min.
    • Add coconut milk and water. Mix well and bring the mixture to a boil
    • Season the curry base with some salt and garam masala. Cover and cook the curry for 5 min.
    • Add pan-seared salmon fillets, gently coat them with the coconut-tomato curry. Cover and turn off the heat.
    • Finally, garnish with finely chopped cilantro and serve warm.

    Notes

    1. Do not rinse or clean the skillet after searing salmon fillets. Use pan drippings and oil from salmon to cook the onions and curry in the same pan. It will add more flavor to the dish.
    2. Thaw frozen fish before cooking. It will reduce the cooking time and also preserve the texture of the salmon.
    3. Include fresh lime wedges while serving this Indian salmon curry with rice for added deliciousness.

    Nutrition

    Calories: 322kcal
    Tried this recipe?Tag us on Instagram @watchwhatueat or tag #watchwhatueat! OR leave us a comment & rating below. Your feedback is very important to us.

    11 Comments

    One pan quick and easy Coconut Shrimp Curry - Delicious shrimp cooked in coconut milk and tomato gravy. Perfect healthy recipe for lunch or busy weeknight dinner. | #shrimp #coconutcurry #curry #onepan

    This flavorful, creamy coconut shrimp curry is simple, easy, and quick to prepare. Grab some fresh tomatoes, coconut milk, seasonings, and fresh or frozen shrimp, and you will have this Indian-inspired curry ready in no time.

    Image with fully cooked Indian coconut shrimp curry in a skillet.

    This shrimp curry is prepared with coconut milk and has more of a touch of Indian flavors. Like Thai cuisine, coconut is also an integral part of coastal cooking in India. That's where I spent a few years of my life. I enjoy dishes prepared using fresh coconut and coconut milk. So, let's get to this super easy yet delicious recipe.

    [feast_advanced_jump_to]

    Ingredients

    • Shrimp - use fresh or frozen raw shrimp or prawns. If you have frozen shrimp, then thaw them before. Shrimp with shells need to be cleaned and deveined.
    • Onion - finely chopped and lightly caramelized onion creates a delicious curry base. You can either use red or yellow onion for this recipe.
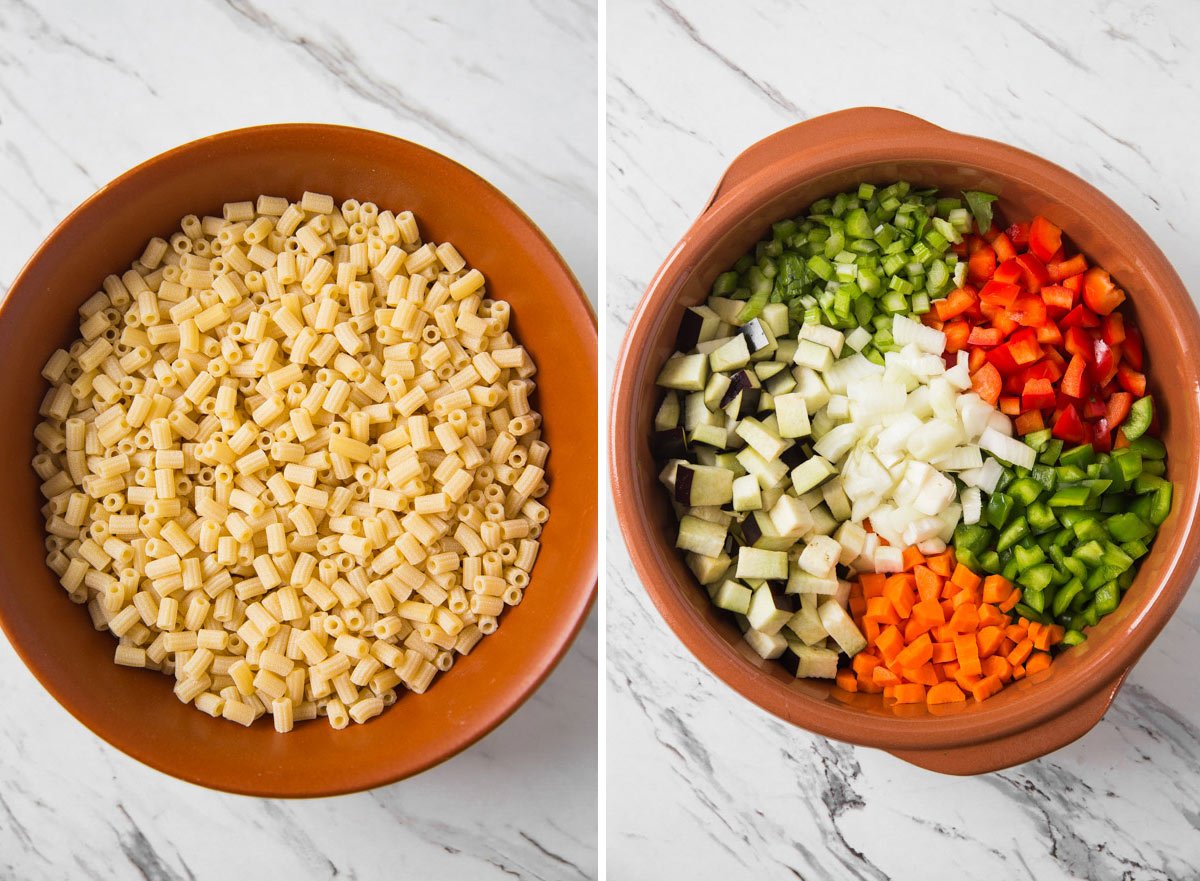
    • Tomato - like onion, tomato is also a key ingredient for the curry base. It also gives a nice color and thickness to the curry.
    • Coconut milk - gives a pleasant, nutty taste, color, and creamy texture to the curry. Use regular or reduced-fat coconut milk as per your liking.
    • Ginger and garlic - both are necessary to add flavors to almost all Indian savory dishes.
    • Garam masala - this is a blend of key aromatic Indian spices. It adds authentic Indian flavors to the curry.
    • Cooking oil - I use avocado or olive oil for sautéing and grilling.

    Recipe variations/substitutions

    • Salmon - use salmon instead of shrimp or prawns. You may need to cook them a little longer until they are well done in the curry. Or, follow this Indian salmon curry recipe for detailed instructions.
    • Chicken - add cooked chicken pieces towards the end of cooking if you do not want to use seafood.
    • Chickpeas - use them instead to prepare a meatless curry. Or, follow this chickpea coconut curry recipe for more details. This is perfect for a vegan or vegetarian meal.
    • Curry powder - use curry powder instead of garam masala. Both work well in this recipe.
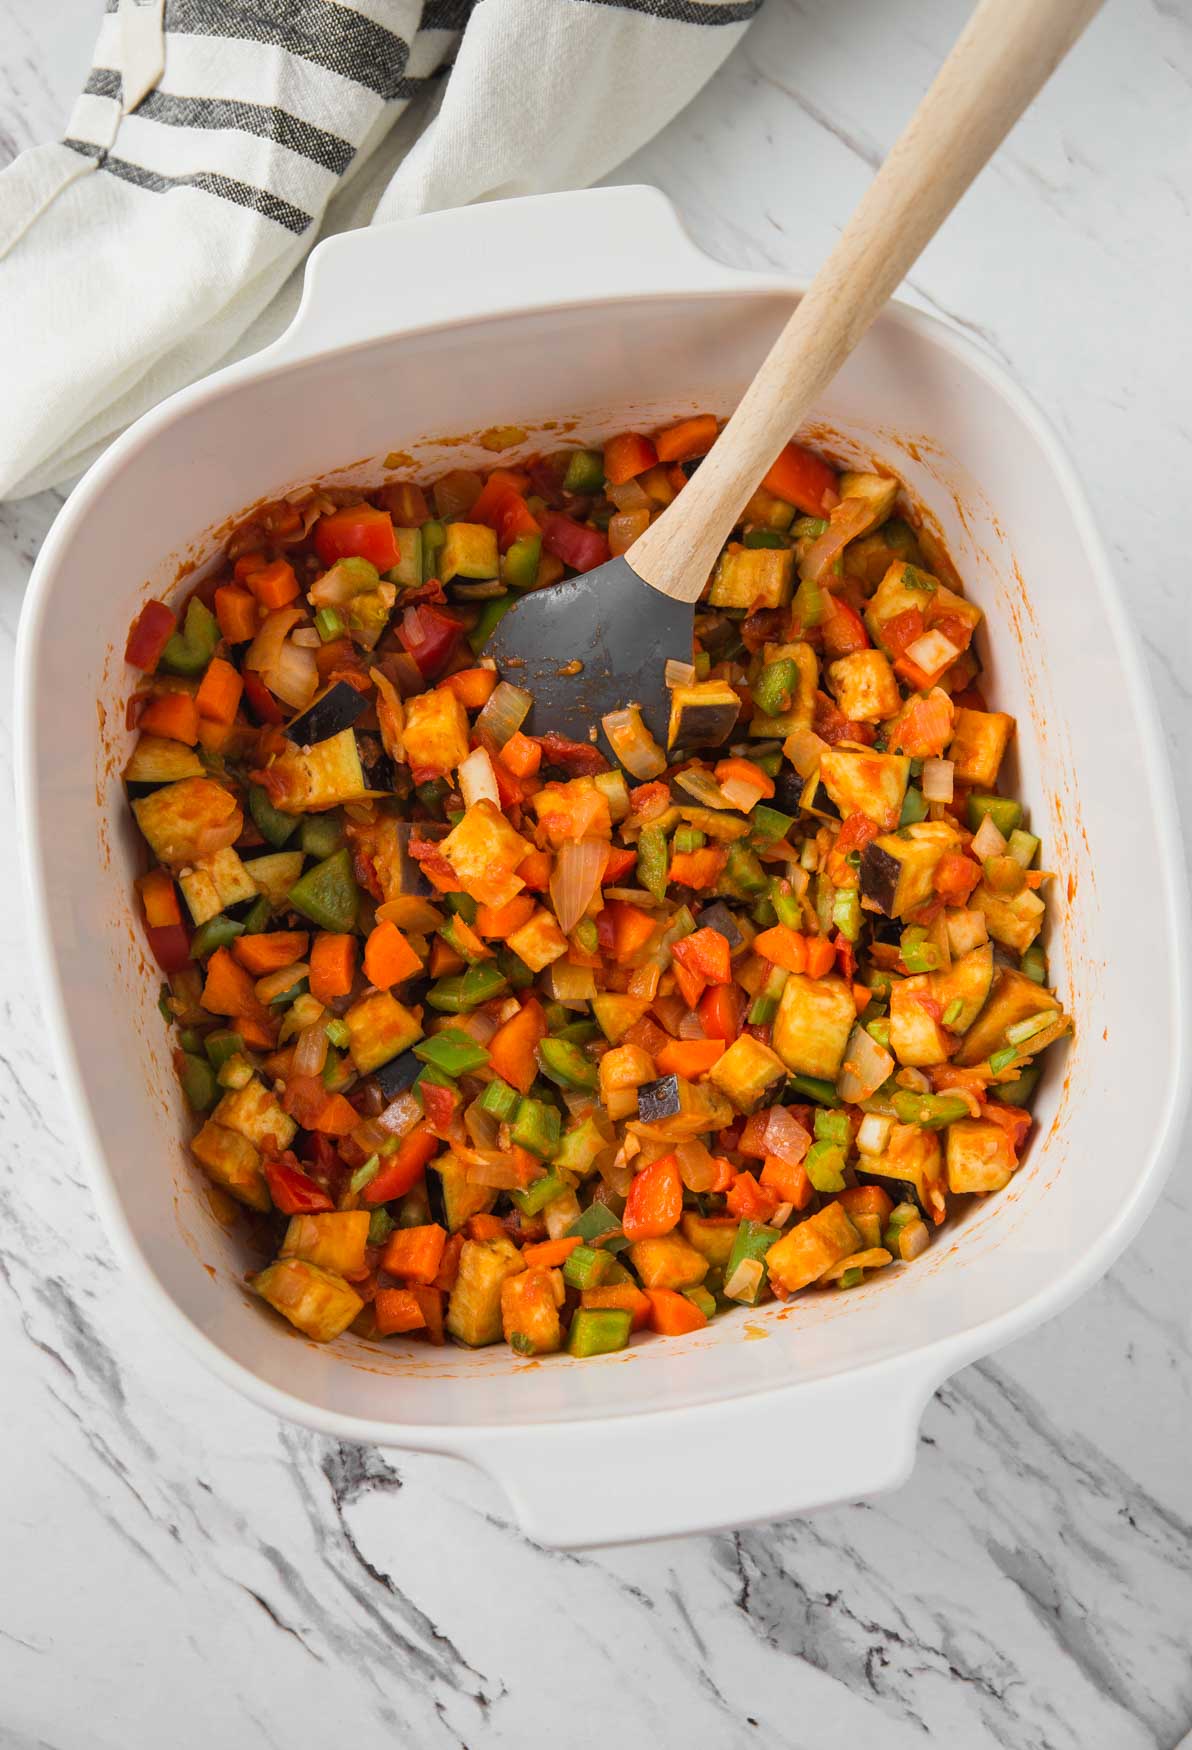
    Coconut shrimp curry served over rice and lime wedges on the side in a serving bowl.

    Are shrimp and prawns the same?

    Shrimp and prawns are different crustaceans. However, both look very similar, and you have to inspect them closely to notice any difference, that too when they are not peeled. Shrimp are found in salt water, whereas prawns live in fresh and somewhat salty water. Shrimps are slightly curved, while prawns are straight and typically larger in size.

    Culinary-wise, both are interchangeable. The taste and texture after cooking are similar. However, prawns taste slightly sweeter.

    You can very well turn this recipe into coconut prawn curry instead of shrimp.

    What makes a good Indian curry?

    Essential to delicious flavors in the Indian curry are the lightly caramelized onion, slight tanginess from the tomato, fresh garlic and ginger, and a blend of aromatic spices. Using fresh garlic and fresh ginger really makes a difference. Also, seering the onion-tomato mixture on low heat for longer times develops a rich taste in the curry.

    Adding spices like garam masala at the right time matters. Adding them at the beginning can burn or lose flavor at high heat while adding them at the very end can give the curry a raw taste.

    Preparing shrimp coconut curry base with onion and crushed tomatoes in a large skillet.

    How to tell if shrimp is cooked and how to avoid overcooking?

    Raw shrimp or prawn is translucent gray in color and turns into light pink-orange-white upon cooking. Also, it loses its translucency, and it curls up towards the center.

    Shrimp can overcook quickly therefore, do not let them cook in this coconut curry or sauce for an extended period of time. Also, remember that the hot curry will continue to cook them further even after turning off the heat.

    How to make Coconut Shrimp Curry?

    Step 1 - Pulse fresh tomatoes with fresh ginger, garlic, and jalapeno or green chili (optional) in a food processor.

    One red tomato, garlic cloves and ginger pieces in a mixing cup.
    Pureed tomato-ginger-garlic mixture for making coconut shrimp curry.

    Step 2 - Heat some oil in a skillet over medium heat. Add finely diced onion and lightly caramelize them. Add pureed tomato and cook the mixture until most of the water evaporates.

    Sautéing diced onion in oil in a large skillet for making shrimp curry.
    Sautéd onion in a large skillet for making shrimp curry.
    Sautéing diced onion and tomato puree in oil in a large skillet for making shrimp curry.
    Cooked onion and tomato mixture in a skillet.

    Step 3 - Add the coconut milk, seasonings, and some water and bring the mixture to a boil.

    Preparing shrimp curry base with coconut milk, onion, and tomato in a skillet.
    Cooked shrimp curry base with coconut milk, onion, and tomato in a skillet.

    Step 4 - Add and cook shrimp/prawns until well done. Turn off the heat and remove the pan from the hot stove to avoid overcooking the shrimp. See the recipe variation section above for more ways and options to prepare healthy coconut curry.

    Raw shrimp added to the cooked curry base in a skillet.
    Fully cooked shrimp curry with coconut milk in a skillet is ready to serve.

    Serving suggestions!

    • Garnish with fresh cilantro leaves (and lime wedges), and serve this creamy prawn curry with plain garlic naan or whole wheat flatbread. Or, serve it on a bed of plain warm rice or saffron yellow rice for a wholesome lunch/dinner.
    • It also goes very well with cilantro lime quinoa or healthy brown rice.
    shrimp curry served over rice and lime wedges on the side in a serving bowl.

    Helpful Tips!

    • Please read the labels while purchasing shrimp to check if they are sustainably harvested or farmed. We should take this extra step to minimize damage to the ecosystem and our Ocean floors. Read more details in this Huffington Post article on buying the right shrimp.
    • Peel and devein the shrimp before using them. I find the vein part very unappealing.
    • Do not overcook the shrimp. It hardly takes a few minutes for them to be well done with a soft texture. Overcooking makes the shrimp hard and chewy. Again, very unappealing.
    • Buy preservative and chemical-free, good-quality coconut milk. I find the price is pretty much the same, and you only need an extra step to read the label. I love the coconut milk from Trader's Joe.  
    prawn curry with coconut milk served over rice and lime wedges on the side in a serving bowl. Image has text overlay that reads 'easy coconut shrimp curry'.

    Recipe FAQs

    How to store and reheat leftover coconut shrimp curry?

    Let the leftover shrimp/prawn curry cool down completely and store it in an air-tight container in the refrigerator for a couple of days.
    Next time, before using, bring it to a boil in a skillet or microwave it until steamy hot. If the curry is too thick, you can add some water or broth to adjust the consistency.

    What can I use if I don't have coconut milk?

    Use chicken or vegetable broth instead and allow the curry base to cook a little longer to thicken slightly before adding raw shrimp and garam masala.
    Or you can also use cashew cream or non-dairy milk, such as almond milk, to prepare the curry.

    More Curry Recipes

    • Toasted chickpeas dunked in creamy tomato authentic tikka sauce to make this easy restaurant-style healthy chickpea tikka masala.
      Vegetarian Chickpea Tikka Masala
    • Butter chicken meatballs in a serving dish with naan bread, plain rice, lime wedge and green chili on the side.
      Indian Healthy Butter Chicken Meatballs
    • Soft paneer dunked in creamy green spinach curry to prepare authentic Indian palak paneer curry. Healthy, quick and easy recipe for saag paneer curry that you can serve with naan bread or cooked rice. | #watchwhatueat #palakpaneer #spinachrecipe #spinach #vegetarian
      Restaurant-style Healthy Palak Paneer Curry
    • Red Lentil Curry -- Protein filled vegan & vegetarian option perfect for lunch or dinner. Also, a healthy & gluten free dish
      Red Lentil Curry With Indian Flavors

    More Seafood Recipes You Will Love

    • 15-Minute Easy Garlic Shrimp Recipe - shrimps cooked to perfection in finger-licking garlic and fresh tomato sauce. Perfect side to pasta, grits or risotto. #shrimp #healthyrecipes
      15-Minute Easy Garlic Shrimp In Tomato Sauce
    • Shrimps and zucchini noodles cooked in fresh garlic and lemon juice and topped with finely chopped fresh herbs
      Garlic Shrimp And Zucchini Noodles
    • Healthy and Delicious Vietnamese Summer Rolls Salad
      Vietnamese Summer Rolls Salad Bowl
    • One Pan Baked Salmon And Vegetables - Perfect easy, a healthy and quick recipe with tons of flavors for the weeknight dinner. | #watchwhatueat #salmon #onepan #healthydinner #healthyrecipes
      One Pan Baked Salmon And Vegetables

    Love this recipe? Please leave a 5-star ⭐⭐⭐⭐⭐ rating in the recipe card below & a review in the comments if you REALLY like this recipe. Thank You!
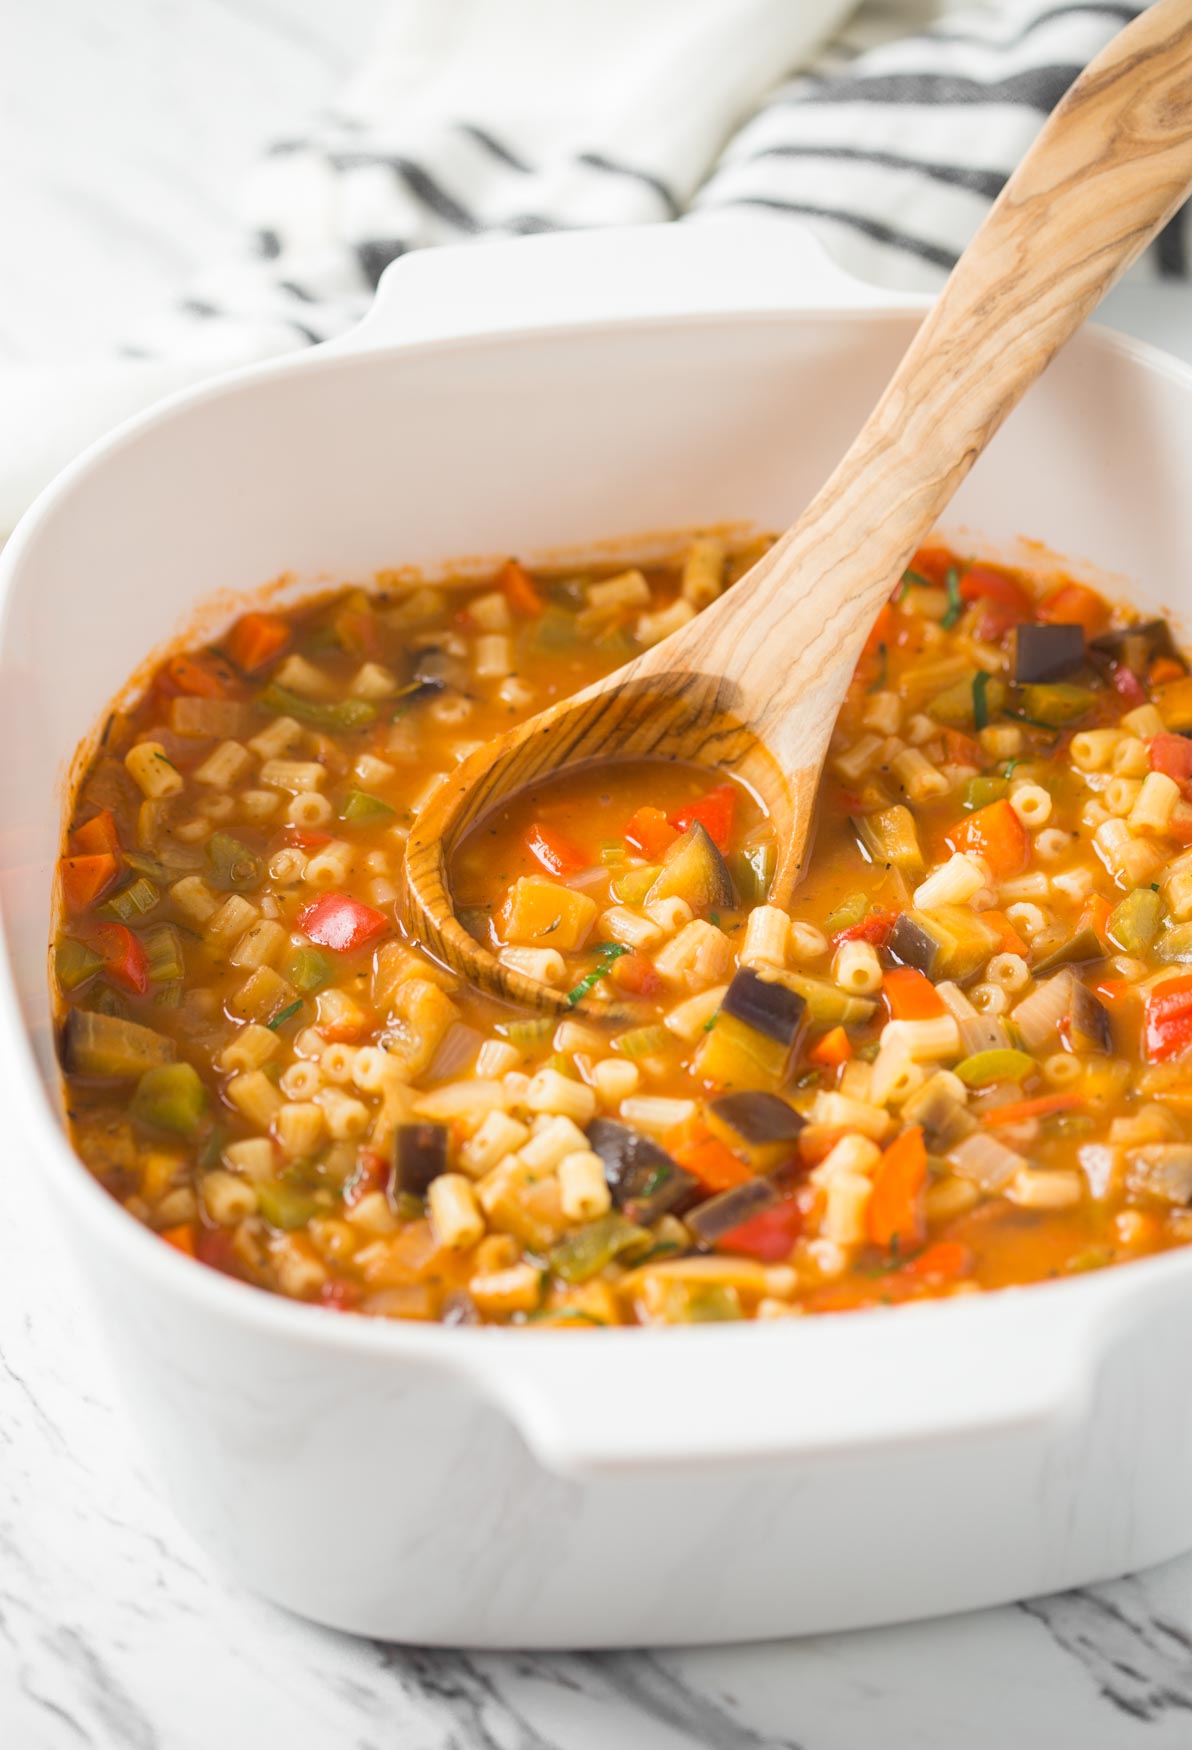
    📖 Recipe

    One pan quick and easy Coconut Shrimp Curry - Delicious shrimp cooked in coconut milk and tomato gravy. Perfect healthy recipe for lunch or busy weeknight dinner. | #shrimp #coconutcurry #curry #onepan
    Print Pin
    4.64 from 11 votes

    30 Min Indian Coconut Shrimp Curry

    Quick and easy Coconut Shrimp Curry is perfect for busy weeknights. You can make it in under 30 minutes using creamy coconut milk, tomato, and onion based gravy.
    Course: Lunch / Dinner
    Cuisine: Indian Inspired,Thai Inspired
    Diet Gluten Free,Low Fat
    Prep Time 10 minutes minutes
    Cook Time 20 minutes minutes
    Total Time 30 minutes minutes
    Servings :4 -5
    Calories :274kcal
    Author:Swati Kadam Gulati

    Would you like to save this recipe?

    Email yourself a link to this post and come back to it later!

    Equipment

    • Sharp Knife (10% Code: WATCHWHATUEAT)
    • Large Skillet

    Ingredients

    • 20 large jumbo shrimps peeled and deveined
    • 1 medium onion finely diced
    • 1 medium medium tomato cut into quarters
    • 2-3 garlic cloves
    • 1 tbsp tomato paste (optional)
    • 1 jalapeno seeded
    • ½" ginger peeled
    • 1 teaspoon garam masala
    • ½ tablespoon cooking oil
    • 1 cup light coconut milk
    • 1 cup water
    • 2 tablespoon finely chopped cilantro
    • salt to taste

    Instructions

    • In a food processor add tomato, garlic, ginger, and jalapeno. Pulse them until pureed.
    • Heat oil in a medium-size skillet over medium heat. Add onion and cook until it turns golden brown.
    • Add the tomato-garlic puree and tomato paste, and cook for about 5-6 minutes or until much of the water evaporates.
    • Add coconut milk, garam masala, salt, and ½ cup water. Bring the mixture to a boil. Add remaining water, if necessary.
    • Add cleaned shrimp or prawns and cook for 2-3 min on each side or until well done.
    • In the end, sprinkle some chopped cilantro and serve warm.

    Notes

    1. You can skip the jalapeno if you don't the prefer hot and spicy taste
    2. Use low-fat coconut milk for cutting down some fat content
    3. If you find the curry thin and runny, let it cook for a few more minutes on medium to high heat until it gets to your desired consistency 
    4. To get the desired red color as shown in the images, use 1 tablespoon (or more) of tomato paste in addition to the fresh tomato-ginger-garlic mixture.
    5. If you have time cook the onion and tomato mixture with spices for a little longer on low heat before adding the coconut milk. It really develops a rich flavor.
    Smart Points -- 8

    Nutrition

    Calories: 274kcal
    Tried this recipe?Tag us on Instagram @watchwhatueat or tag #watchwhatueat! OR leave us a comment & rating below. Your feedback is very important to us.

    8 Comments

    Healthy Oven Roasted Whole Cauliflower with garlic and herb is the easiest and delicious way of preparing cauliflower for a meatless party or holiday dinner. | #cauliflower #vegan #veganthanksgiving #lowcarb

    Oven Roasted Whole Cauliflower with garlic and herb is the easiest and delicious way of preparing cauliflower for a meatless party or holiday dinner. Moreover, it is healthy without any added butter, cream or sugar, etc.

    Whole roasted cauliflower with tomato and herbs in baking dish.

    Have you ever thought of baking whole cauliflower in the oven?

    Somehow, I always felt a bit hesitant in trying this dish out. I had this unusual crazy fear in me that it might taste bland as all the spices would stick on the outside only. But to my surprise, this was definitely not the case. This oven roasted cauliflower did turn out both tasty and flavorful.

    If you have never tried baking whole cauliflower you should definitely try this recipe. This whole cauliflower roast looks so exotic on the dinner table. It will be a perfect meatless alternative to whole roast chicken or whole turkey roast in a Thanksgiving menu. Trust me, your vegan/vegetarian guests will love this so much!
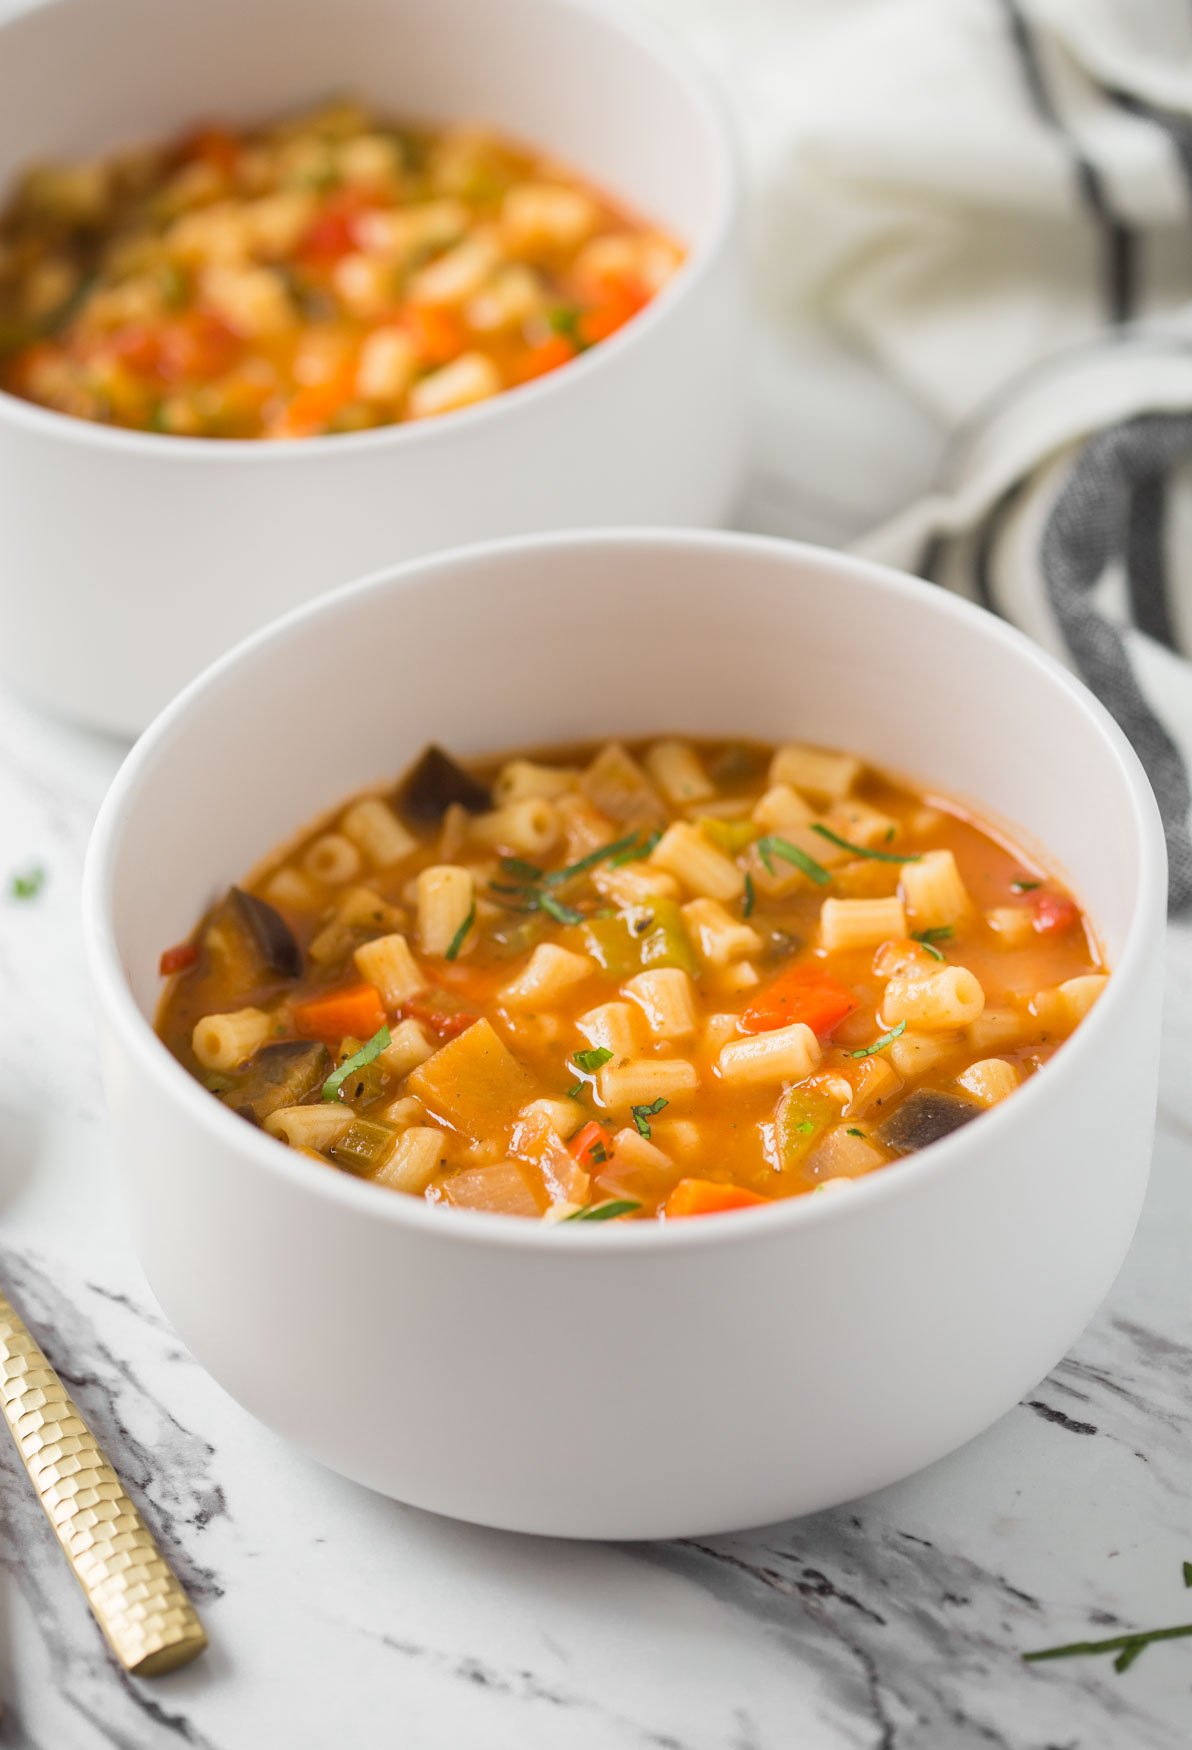
    [feast_advanced_jump_to]
    Whole cauliflower with tomatoes and herbs in baking dish and is ready to bake.
    Garlic, jalapeño, cilantro and spices in a food processor jar.

    How to make oven roasted whole cauliflower?

    Preparing for this recipe is very easy and involves very less time. In a food processor combine fresh garlic cloves, fresh cilantro, paprika, some good quality tomato ketchup, salt, and pepper. Pulse the mixture to a coarse grind consistency. Generously rub this marinade on the entire surface of the cauliflower head. Place the marinated cauliflower on a bed of tomato pieces in a casserole dish and bake in a preheated oven until well done.

    Serving suggestions

    It really goes well with mashed potatoes on the side of pasta or even with this butternut squash risotto. This roasted whole cauliflower will be a perfect addition to meatless party dinner menu.

    Helpful tips!

    • Choose fresh and large cauliflower head for this recipe. Thoroughly rinse and remove dark spot if any.
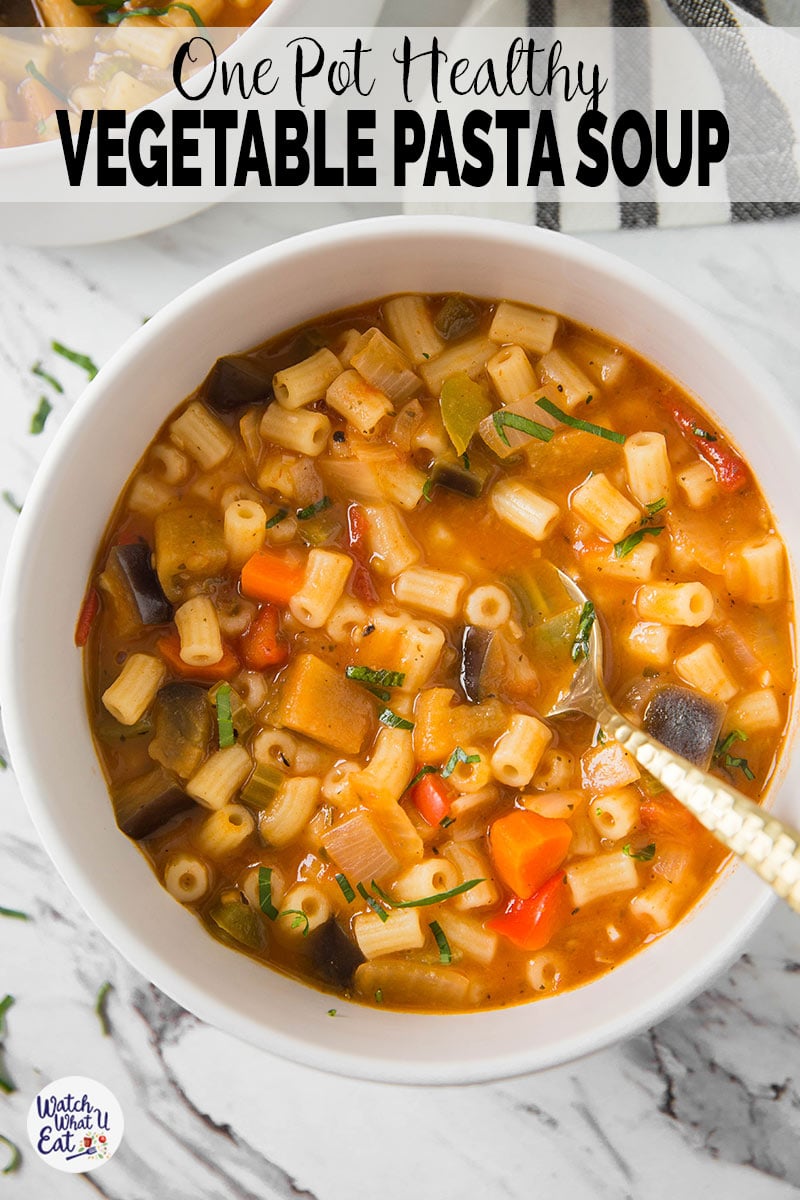
    • I use chemical or preservatives free organic tomato ketchup. It might be a bit pricey but I find it tastes much better than regular ketchup.
    • Use a large and deep casserole dish for baking the cauliflower head.
    Healthy Oven Roasted Whole Cauliflower. | #cauliflower #vegan #veganthanksgiving #lowcarb

    How is this roasted cauliflower healthy?

    Cauliflower is naturally rich in vitamin C, vitamin K, and B vitamins. Also, it is a low-calorie vegetable with low carbs and fat. Additionally, it contains several beneficial phytochemicals.  WHFoods recommends eating cauliflower more frequently to get the fabulous benefits provided by the cruciferous vegetable family.

    Healthy Oven Roasted Whole Cauliflower. | #cauliflower #vegan #veganthanksgiving #lowcarb

    More cauliflower recipes you will love

    • Air fryer cauliflower wings with bbq sauce just after cooking is over
      Air Fryer Cauliflower BBQ Wings
    • Healthy Roasted Turmeric Cauliflower Soup - easy vegetarian or vegan recipe to prepare creamy cauliflower soup. Roasted garlic and potatoes along with cauliflower give amazing flavors to the soup. Perfect for winter nights. | #watchwhatueat #soup #cauliflowersoup #vegan #cauliflowerrecipe
      Healthy Roasted Turmeric Cauliflower Soup
    • Turmeric roasted cauliflower with tahini sauce on a baking tray.
      Turmeric Roasted Cauliflower With Tahini
    • 15 min healthy fried cauliflower rice.| watchwhatueat.com
      The Best Cauliflower Rice Stir Fry | V, GF & Low Carb

    Love this recipe? Please leave a 5-star ⭐⭐⭐⭐⭐ rating in the recipe card below & a review in the comments if you REALLY like this recipe. Thank You!

    📖 Recipe

    Healthy Oven Roasted Whole Cauliflower with garlic and herb is the easiest and delicious way of preparing cauliflower for a meatless party or holiday dinner. | #cauliflower #vegan #veganthanksgiving #lowcarb
    Print Pin
    5 from 5 votes

    Easy Oven Roasted Whole Cauliflower

    Whole cauliflower head rubbed with garlic, cilantro, lime and spice mixture and baked in the oven to perfection. This exotic looking dish on the dinner table is a perfect crowd pleaser.
    Course: Lunch / Dinner,Main Course
    Cuisine: American Inspired
    Prep Time 10 minutes minutes
    Cook Time 1 hour hour
    Total Time 1 hour hour 10 minutes minutes
    Servings :4
    Calories :128kcal
    Author:Swati Kadam Gulati

    Would you like to save this recipe?

    Email yourself a link to this post and come back to it later!

    Ingredients

    • 1 large cauliflower head
    • ½ cup fresh cilantro
    • 2-3 tablespoon tomato ketchup
    • 4-5 garlic cloves
    • 1 tablespoon smoked paprika
    • ½ lime juiced
    • 1 jalapeno optional
    • 1 tablespoon olive oil
    • 3 medium tomatoes cut each into the quarter
    • salt and pepper

    Instructions

    • Preheat oven to 400 F
    • Cut leaves and trim the stem flush from the bottom of the cauliflower head. It will help the cauliflower to sit flat on the casserole pan
    • Add fresh cilantro, garlic, jalapeno, tomato ketchup, paprika, lime juice, salt, and pepper into a food processor. Pulse the ingredients until they combine well to form a coarse mixture.
    • Rub the cilantro-garlic mixture on the cauliflower generously.
    • Place the cauliflower in the casserole dish. Drizzle some oil on top
    • Add tomato pieces in the pan.
    • Cover the casserole pan with Aluminium foil
    • Now bake the cauliflower in the oven covered for 45 min. Uncover and bake further for 10-15 min.
    • Let it cool. Then cut the cauliflower into thick wedges and serve with roasted tomatoes from the pan.

    Notes

    1. You can check the doneness of cauliflower using a long wooden skewer. It should pass through easily

    Nutrition

    Calories: 128kcal
    Tried this recipe?Tag us on Instagram @watchwhatueat or tag #watchwhatueat! OR leave us a comment & rating below. Your feedback is very important to us.

    3 Comments

    Quick and easy Italian flavored leftover Chicken Sandwich Recipe | or Leftover Turkey Sandwich Recipe | #chicken #turkey #leftover

    Transform leftover cooked chicken or turkey into this delicious and healthy leftover chicken sandwich. So quick and easy to prepare with very few ingredients.

    Shredded leftover chicken sandwich on a flat surface.

    Do you ever wonder what to do with leftover roasted chicken or leftover turkey?  

    Don't worry! This shredded chicken sandwich recipe is one of the easier solutions to enjoy leftovers. It is tried and tested.

    Whenever I prepare whole roast chicken at home for our weekend nights or gatherings, I usually end up having quite a bit of leftovers. This doesn't in any way mean that my chicken roast is not tasty (:P). 

    We both don't prefer eating especially chicken the next day in the same form factor. Therefore, I try to make dishes using leftover chicken that look and taste like having fresh meat. And this shredded chicken sandwich recipe is our all-time favorite.

    [feast_advanced_jump_to]
    Shredded leftover chicken in a ceramic bowl for making sandwich.

    Did I mention that it is super duper easy to prepare as well? Not just the chicken you can also use leftover Thanksgiving turkey in place of chicken in this sandwich. I am sure you will love this equally!

    Sandwich bread, cheese, tomato slices and olives on a lat surface.

    How to make Leftover Chicken Sandwich (or Turkey Sandwich)?

    For making this sandwich apart from the chicken you will need ciabatta bread, basil pesto, some olives, tomato slices and fresh mozzarella cheese. 

    Using forks shred chicken or turkey into small pieces. Season the shredded meat with salt and pepper, if necessary. Cut open the bread and then spread basil pesto on both sides. Place shredded chicken on one side of the bread and top it with some tomato slices, olive slices, and fresh mozzarella cheese. Cover and toast the bread in the sandwich maker or a panini maker. If you do not have any of those then just toast the sandwich on a shallow fry pan on medium heat.

    One more thing, it is not absolutely necessary to use leftover meat. You can still make this sandwich using fresh chicken. Just roast or cook it, shred it and use it.

    Shredded leftover chicken sandwich on a flat surface.

    More chicken recipes you will love

    • chicken parmesan in the air fryer
      Air Fryer Chicken Parmesan
    • Butter chicken meatballs in a serving dish with naan bread, plain rice, lime wedge and green chili on the side.
      Indian Healthy Butter Chicken Meatballs
    • Healthy lemon chicken soup with orzo in a serving bowl with some croutons on the side.
      Healthy Lemon Chicken Soup With Orzo
    • Chicken drumsticks in Instant Pot coated with lemon garlic sauce and garnished with fresh parsley.
      Easy Instant Pot Chicken Drumsticks

    Love this recipe? Please leave a 5-star ⭐⭐⭐⭐⭐ rating in the recipe card below & a review in the comments if you REALLY like this recipe. Thank You!
    📖 Recipe

    Quick and easy Italian flavored leftover Chicken Sandwich Recipe | or Leftover Turkey Sandwich Recipe | #chicken #turkey #leftover
    Print Pin
    5 from 2 votes

    Shredded Leftover Chicken Sandwich

    Turn leftover roasted chicken or turkey into a delicious shredded chicken sandwich. This recipe is also perfect for finishing up Thanksgiving leftover turkey.
    Course: Lunch / Dinner
    Cuisine: American Inspired
    Prep Time 10 minutes minutes
    Cook Time 10 minutes minutes
    Total Time 20 minutes minutes
    Servings :4
    Calories :293kcal
    Author:Swati Kadam Gulati

    Would you like to save this recipe?

    Email yourself a link to this post and come back to it later!

    Equipment

    • Panini Maker

    Ingredients

    • 2 cup shredded chicken
    • foot long ciabatta bread cut into 4 equal parts
    • ¼ cup basil pesto
    • 1 roma tomato sliced
    • ¼ cup olives sliced
    • ⅓ cup grated fresh mozzarella cheese

    Instructions

    • Cut open the ciabatta bread and spread basil pesto on both sides.
    • Place shredded chicken on the bread evenly.
    • Then top it with some tomato slices and olives. Finish with spreading some fresh mozzarella cheese and cover with the other bread slice.
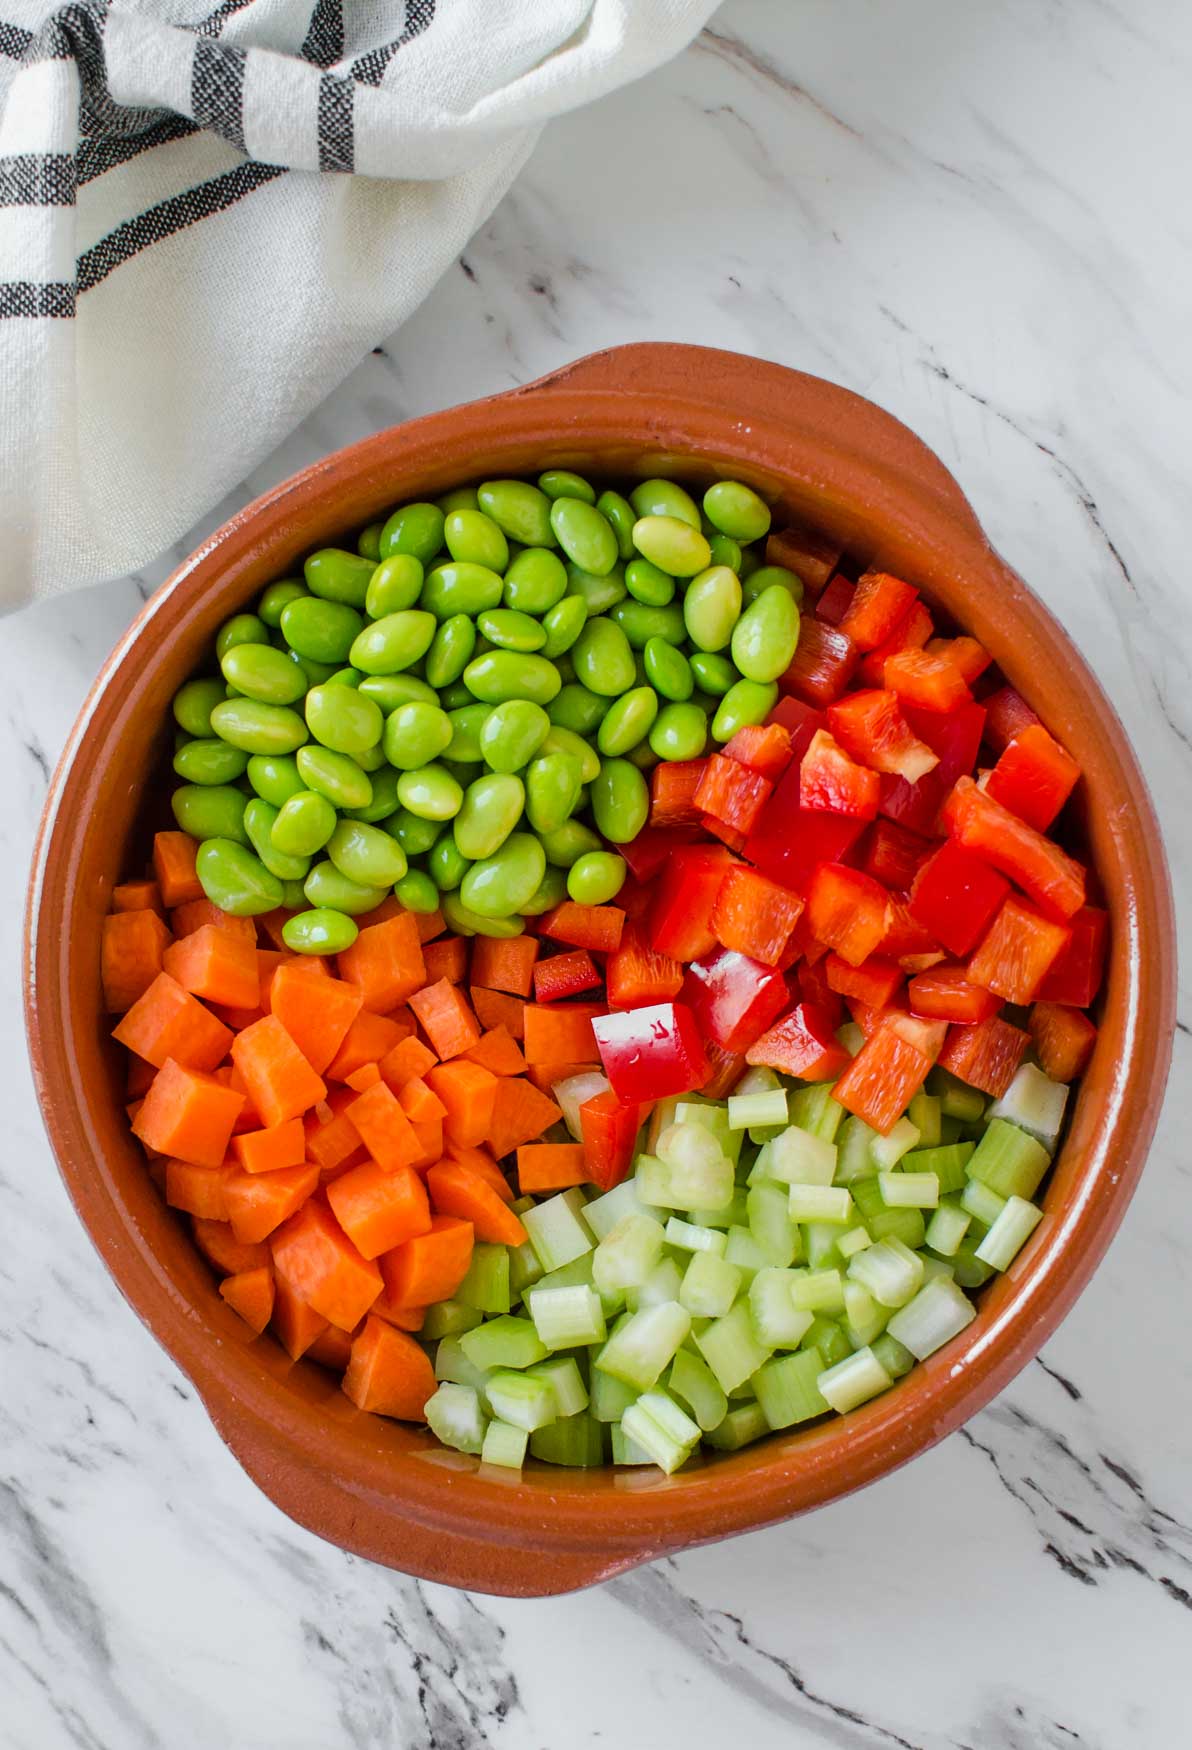
    • Toast the prepared sandwich in a preheated panini maker or sandwich maker until golden brown and the cheese melts.
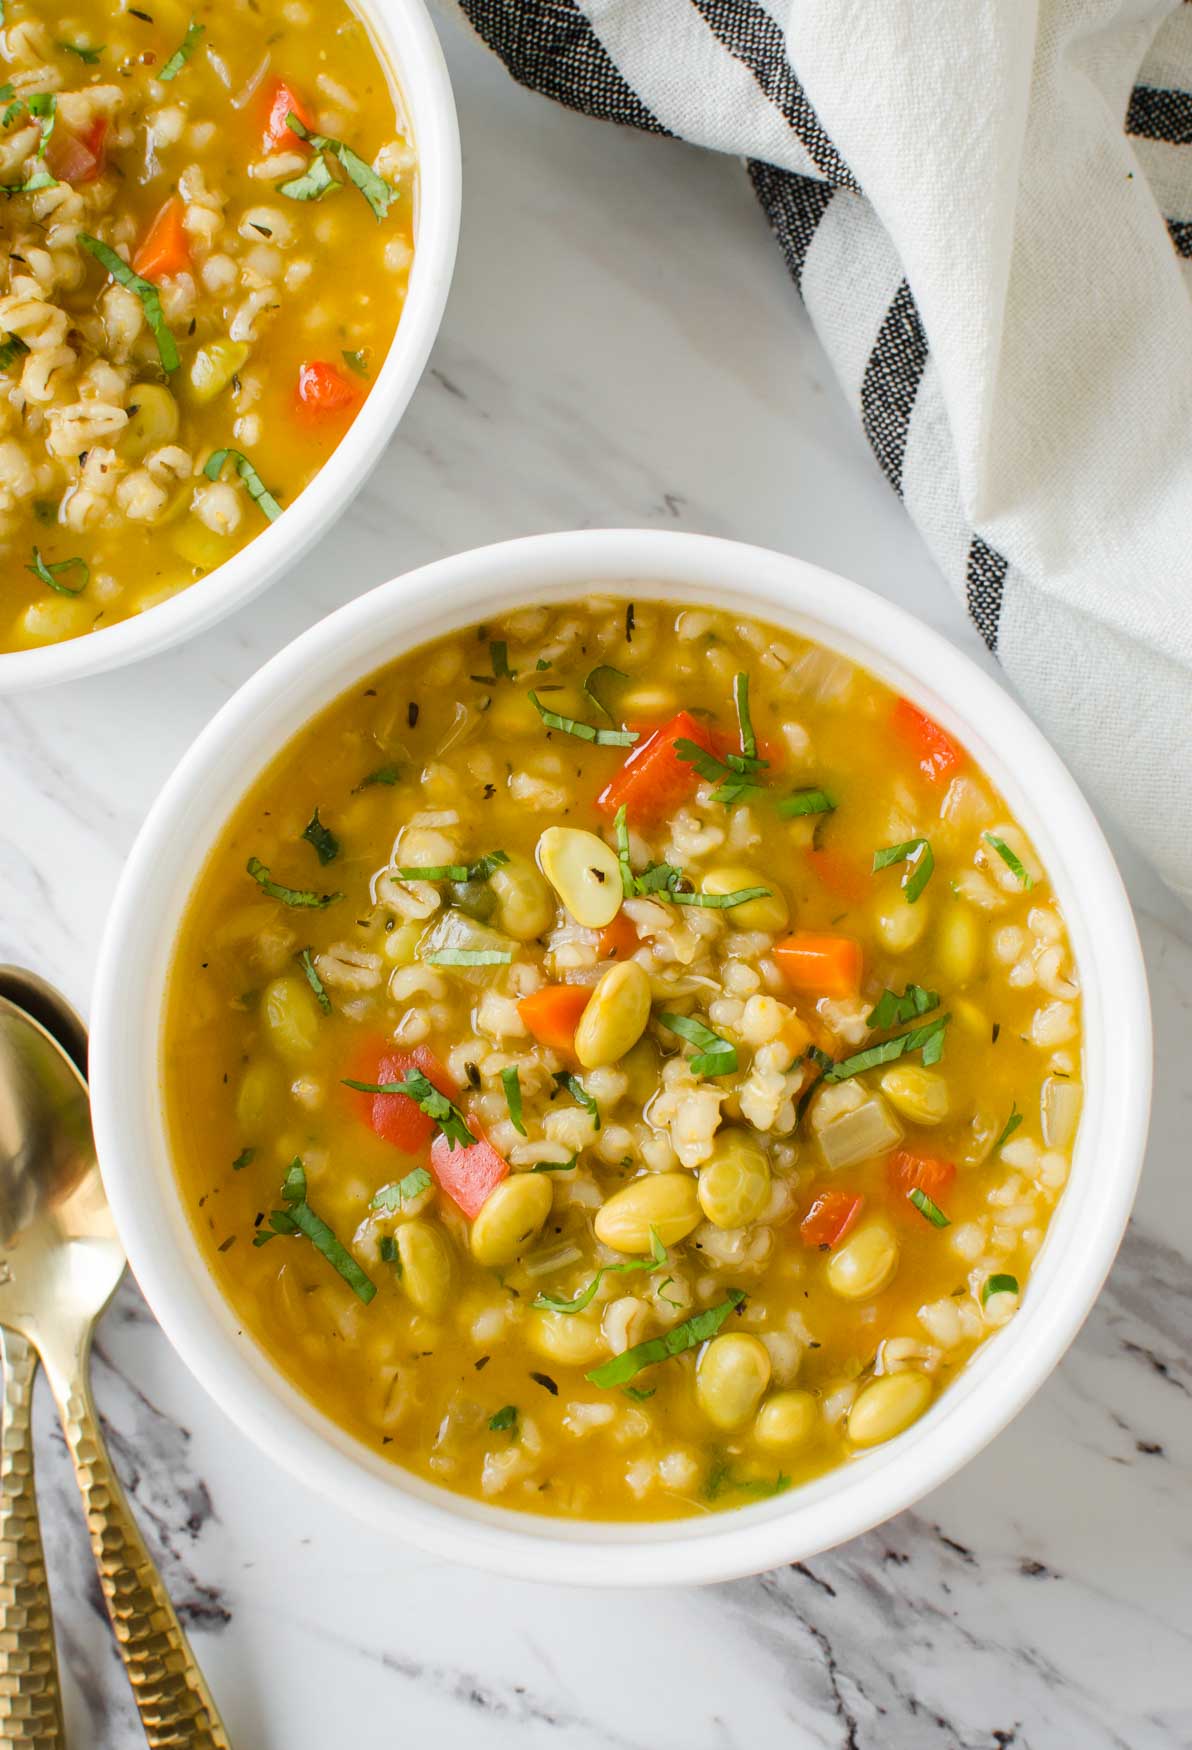
    • Serve warm

    Notes

    • You can brush some oil on the outside of the bread to get nice golden brown color after toasting.
    • Add salt and pepper to the shredded chicken if necessary

    Nutrition

    Calories: 293kcal
    Tried this recipe?Tag us on Instagram @watchwhatueat or tag #watchwhatueat! OR leave us a comment & rating below. Your feedback is very important to us.

    Make this shredded leftover chicken sandwich using leftover roasted chicken for easy and quick meal.

    11 Comments

    Super juicy garlic and herb roasted whole chicken you can make for your weekend family dinner or holiday party night. Super easy with quick preparation and tons of flavors.

    Learn to make perfect super juicy garlic & herb roasted whole chicken in the oven. Quick preparation & tons of flavors with delicious gravy prepared using pan drippings.

    Herb roasted whole chicken on a serving platter.

    This simple herb-roasted chicken will be a perfect addition to a weekend family dinner or holiday party menu.

    Its preparation is super easy and I can confirm that it won't take a lot of your time. Once prepared, the chicken just has to sit in the oven for all the ingredients to do their job.
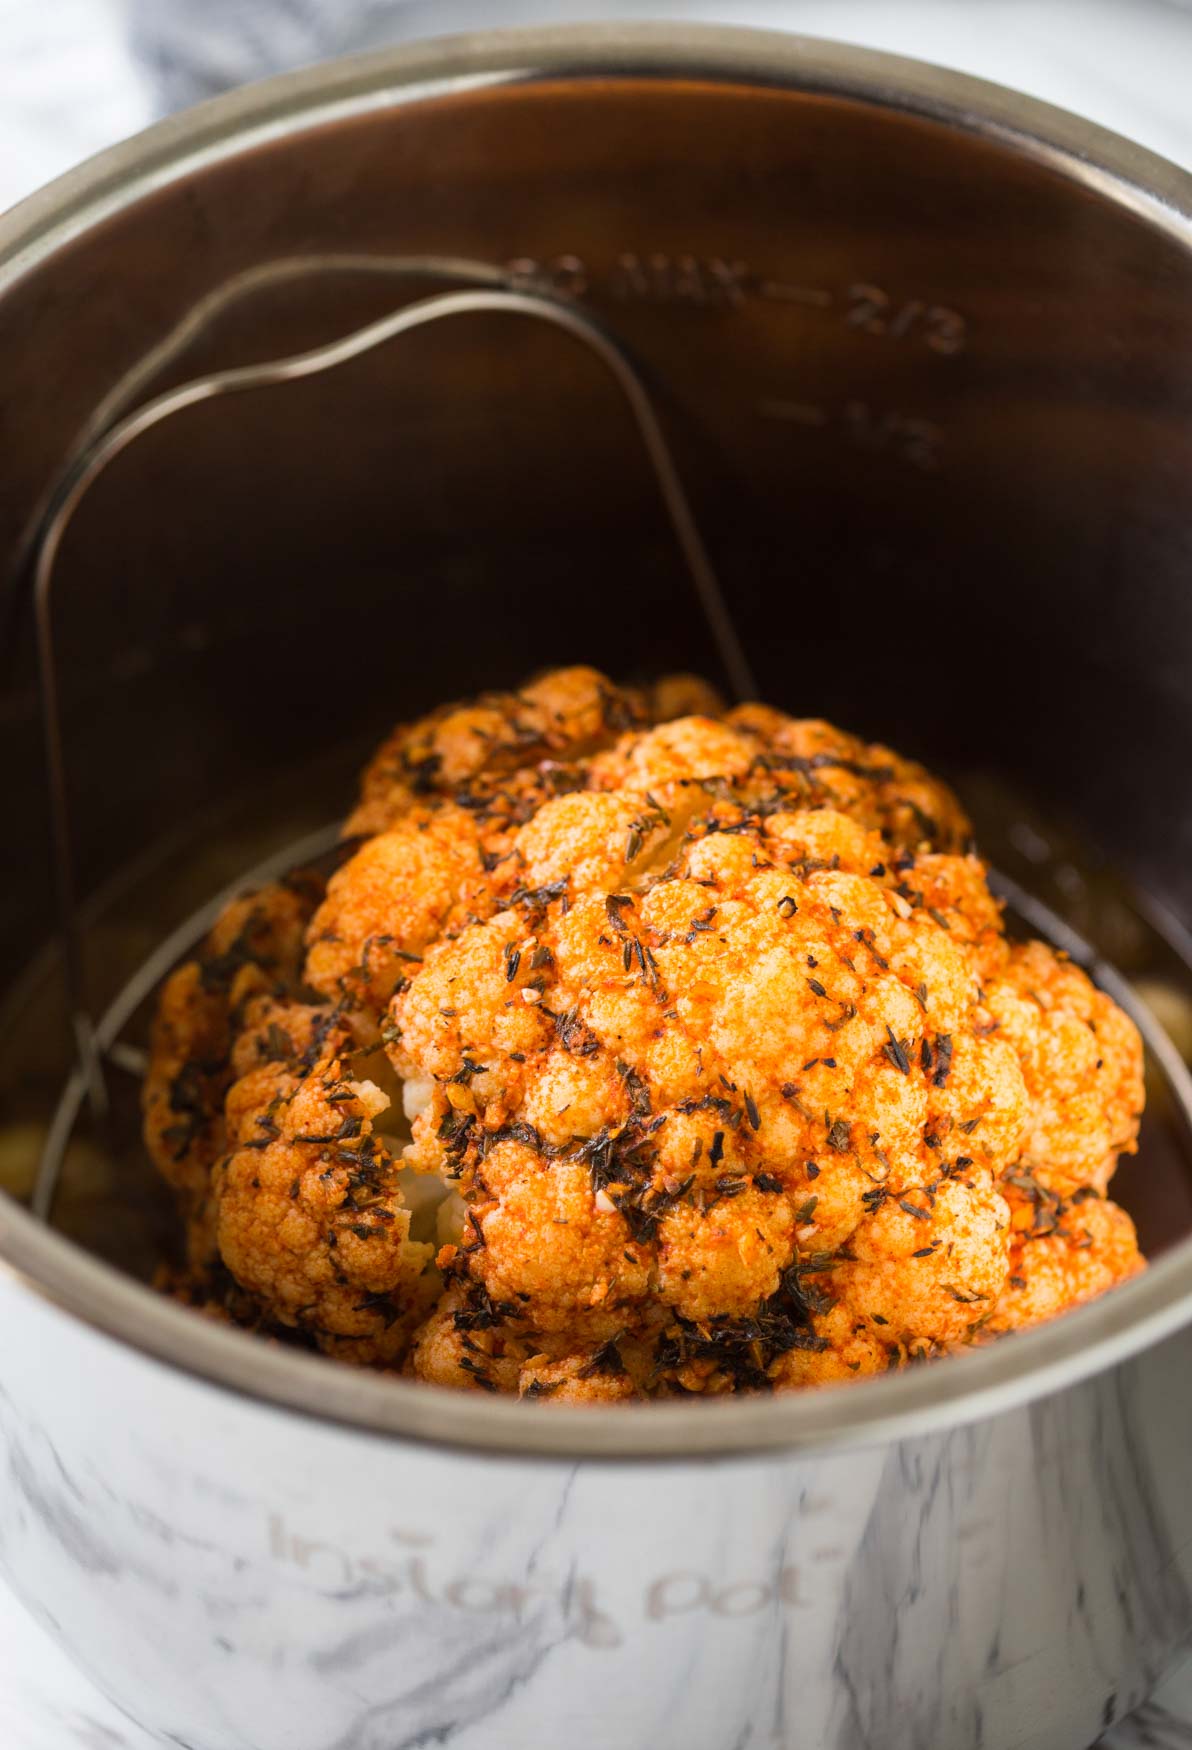
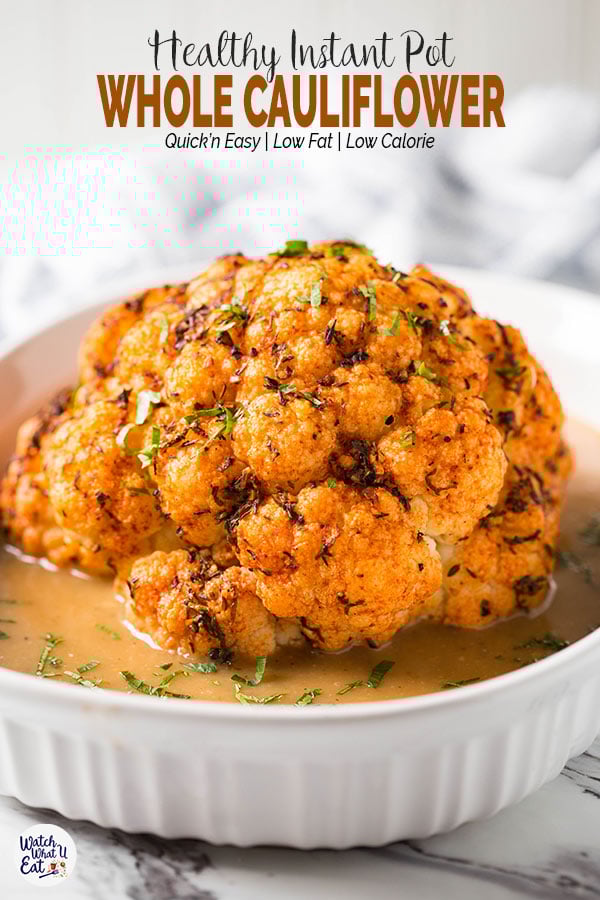
    Moreover, this easy-roasted chicken is a great alternative to Thanksgiving turkey. Especially, for small gatherings, it will be a perfect sized dish compared to a giant size whole turkey that can result in a ton of leftovers (I am not a big fan of leftovers :P). I am sure this melt-in-mouth whole chicken roast will definitely be a crowd-pleaser.

    Whole chicken rubbed with herb marinade and stuffed with fresh onion and lemon.

    How to make Herb Roasted Whole Chicken in the oven?

    For making the rub you will need a generous amount of fresh rosemary, garlic, salt, oil, lemon juice, black pepper, and smoked paprika. For filling the cavity of the chicken you will need fresh celery, onions, and lemon wedges. And of course, whole chicken which is absolutely compulsory (:P).

    Dry herbs, salt, garlic and paprika with oil in small mixing bowl and fresh lemon and onion on the side.
    Garlic and herb chicken marinade in a small mixing bowl.

    Mix all spices with lemon juice and oil and rub it over the chicken and inside of the cavity evenly. You can marinate the chicken and store it in the refrigerator before baking for more flavorful results. Fill in large onion pieces, celery and lemon quarters inside the cavity. Tie both legs together using a cotton twine. Then place the chicken on the metal rack with a roasting tray beneath. Pour some chicken stock in the tray and bake in a preheated oven to perfection.

    Once the chicken is fully cooked make the gravy using pan drippings, celery, onion, and lemons. Step-by-step instructions are given below.

    Whole chicken rubbed with herb marinade and stuffed with fresh onion and lemon.

    Helpful Tips:

    • Buy organic whole chicken whenever possible. It's a bit pricey but I find it tastes so much better than regular chicken.
    • I usually wash and pat dry the chicken before using. Make sure you empty kitchen sink and clean it before washing the chicken (if you decide to). Clean the sink and prep area thoroughly immediately after using meat products to prevent contamination. It may sound obvious but just a reminder in case you forget.
    • If you have plenty of time, marinate the chicken well in advance. Let the chicken sit in the refrigerator after rubbing the spices. The longer you marinate more flavorful the bird will be.
    Herb roasted whole chicken in a baking tray.

    Helpful Tools And Related Products:

    • Roasting Tray - it will collect the drippings from the chicken while baking
    • Roasting Rack - it will help to cook the chicken evenly on all sides. No need to flip the chicken halfway if you use it
    • Almunium Foil - to cover the chicken while baking
    • Cotton Twine - to tie the chicken legs together
    Herb roasted whole chicken in a baking tray.

    More Chicken Recipes You Will Love

    • Air Fryer Whole Chicken
    • Instant Pot Whole Chicken With Gravy
    • Indian Healthy Butter Chicken Meatballs
    • Cilantro Lime Chicken Thighs
    • Browse All Chicken Recipes

    📖 Recipe

    Super juicy garlic and herb roasted whole chicken you can make for your weekend family dinner or holiday party night. Super easy with quick preparation and tons of flavors.
    Print Pin
    4.67 from 3 votes

    Super Juicy Garlic And Herb Roasted Whole Chicken With Delicious Gravy

    Super juicy garlic and herb roasted whole chicken that you can make for your weekend family dinner or holiday party night. Quick preparation and tons of flavors.
    Course: Lunch / Dinner
    Cuisine: American Inspired
    Prep Time 10 minutes minutes
    Cook Time 1 hour hour 15 minutes minutes
    Total Time 1 hour hour 25 minutes minutes
    Servings :4 to 5
    Calories :184kcal
    Author:Swati Kadam Gulati

    Would you like to save this recipe?

    Email yourself a link to this post and come back to it later!

    Equipment

    • Sharp Knife (10% Code: WATCHWHATUEAT)

    Ingredients

    • 3-4 lb whole chicken
    • 2 cup chicken broth or more

    Spice Rub:

    • 5-6 garlic cloves finely chopped
    • 2-3 tablespoon finely chopped fresh rosemary
    • 1 tablespoon smoked paprika
    • 1 tablespoon olive oil
    • 2 tablespoon lemon juice
    • salt and pepper

    Filling:

    • a large celery stalk cut into 1-2" length
    • 1 medium onion cut into quarters
    • 1 lemon cut into quarters

    Instructions

    • Preheat oven to 375 F. 
    • In a small bowl, mix all the ingredients listed under 'spice rub'
    • Rub this spice mixture all over the chicken and inside the cavity
    • Fill in the chicken cavity with large pieces of onion, celery, and lemon. Tie the legs together using a cotton twine
    • In a roasting pan pour chicken stock and place a metal rack on the pan
    • Then lay the spiced chicken on the metal rack facing breast-side up
    • Bake the chicken covered using aluminum foil in the preheated oven for 40 mins. Uncover the chicken and bake further for 35 mins.
    • Let the chicken cool down slightly before carving
    • Then discard the twine. Collect pan drippings along with onion, celery and lemon pulp from the cavity into a blender jar. Blend it into a fine puree that you can use as gravy on the side

    Notes

    • Wash and pat dry chicken before using. Remove giblets etc., if there are any.
    • To get nice golden brown color, broil the chicken for 1-2 minute at the end of baking. 
     
    Have leftover chicken?
    Make this shredded chicken sandwich recipe using leftover roasted chicken. 

    Nutrition

    Calories: 184kcal
    Tried this recipe?Tag us on Instagram @watchwhatueat or tag #watchwhatueat! OR leave us a comment & rating below. Your feedback is very important to us.
    • « Go to Previous Page
    • Page 1
    • Page 2
    • Page 3
    • Page 4
    • Go to Next Page »

    Primary Sidebar

    Hi, we are Swati and Tushar! Our passion for food and cooking has led us to write this blog focusing on healthy recipes to eat well and live well!

    More about me →

    Summer Drinks

    • Cranberry Sangria in a large pitcher is ready to serve
      Non Alcoholic Cranberry Sangria
    • Fresh watermelon slush in a drinking glass
      3 Ingredient Watermelon Slush
    • This pineapple strawberry sangria is a perfect non-alcoholic summer drink to enjoy fresh seasonal fruits and beat the summer heat. It is prepared using fresh strawberries and pineapple. | #watchwhatueat #nonalcoholic #summerdrink #strawberry #nonalcoholicsangria #sangria
      Non-Alcoholic Pineapple Strawberry Sangria
    • Easy Homemade Fresh Strawberry Lemonade -- healthy, refreshing and cooling drink recipe to enjoy the warm days of spring and summer. | #watchwhatuwat #lemonade #summerdrink
      Homemade Fresh Strawberry Lemonade
    • Healthy And Festive Non-alcoholic Cranberry Mimosa! | #thanksgivingdrinks #nonalcoholic #cranberry #mimosa
      Healthy And Festive Cranberry Mimosa Recipe
    • Watermelon Detox Water - refreshing sugar-free drink to stay hydrated during hot days.
      Summer Cooling Watermelon Detox Water

    Popular Recipes

    • Finished roasted asparagus and carrots garnished with fresh herbs and hemp seeds, adding texture and color to the roasted vegetables.
      Roasted Asparagus And Carrots
    • Angled view of beet and feta dip in a serving bowl on a wooden board, garnished with crumbled feta, parsley, and pumpkin seeds, alongside crackers.
      Bold & Beautiful Feta Beetroot Dip Recipe
    • Zucchini meatballs with a dipping sauce on the side, served on a terracotta plate lined with parchment paper.
      Baked Chickpea Zucchini Balls (Vegetarian Meatballs)
    • Baked lemon pepper chicken drumsticks with lemon slices on a serving platter.
      Lemon Pepper Chicken Drumsticks (Legs) – Baked or Grilled!

    Footer

    As Featured On featured on logos

    • Contact us
    • Subscribe
    • Accessibility Statement
    • Homepage
    • Privacy Policy

    Copyright © 2026 | Watch What U Eat

    Rate This Recipe

    Your vote:


    Let us know what you thought of this recipe:

    This worked exactly as written, thanks!
    My family loved this!
    Thank you for sharing this recipe

    Or write in your own words:

    A rating is required
    A name is required
    An email is required